Introduction
Weed eaters are essential tools for keeping your yard looking neat and tidy. However, after extended use, the trimmer line will need to be replaced. Replacing the weed eater string can sound like a daunting task, but it’s actually quite simple when you break it down into easy steps. This article provides an overview of the process and offers helpful tips along the way.
Consult Your Owner’s Manual
The first step in replacing the weed eater string is to consult the owner’s manual. The instructions in the manual are specific to your particular make and model, so it’s important to follow them closely. The manual should provide detailed instructions on how to replace the trimmer line.
Gather the Necessary Tools and Supplies
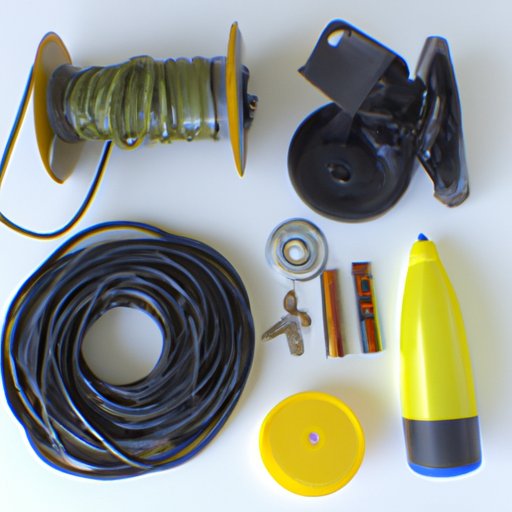
Before beginning the replacement process, make sure you have all the necessary tools and supplies. You’ll need a screwdriver, scissors, and a new spool of trimmer line. If you don’t have these items on hand, you can purchase them at your local hardware store.
Remove the Spool
Once you’ve gathered all the necessary tools and supplies, it’s time to remove the old spool. To do this, locate the spool cap and unscrew it with the screwdriver. Once the cap is removed, carefully take out the old spool of trimmer line.
Cut the Trimmer Line
The next step is to cut the new trimmer line. Measure the length needed (usually 10 to 15 feet) and then cut the line with the scissors. Make sure to cut straight lines and avoid any frayed edges.
Thread the New Line
Once the trimmer line has been cut, it’s time to thread it through the eyelets on the spool. Start by tying a knot at one end of the line and then feed the other end through the eyelets. Make sure that the line is securely fastened to the spool.

Wind the Line Around the Spool
Now that the trimmer line is threaded through the eyelets, you can begin to wind it around the spool. Pay close attention to the arrows on the spool as they will indicate which direction the line should be wound. Keep winding until the entire spool is covered with the line.
Conclusion
Replacing the weed eater string is a relatively simple process that can be done in just a few steps. First, consult your owner’s manual for specific instructions. Then, gather the necessary tools and supplies, remove the old spool, cut the trimmer line, thread the new line, and finally, wind the line around the spool. Remember to always exercise caution when working with power tools and to read the safety instructions in the owner’s manual before beginning any repairs or replacements.
(Note: Is this article not meeting your expectations? Do you have knowledge or insights to share? Unlock new opportunities and expand your reach by joining our authors team. Click Registration to join us and share your expertise with our readers.)