Introduction
Photography is all about capturing the beauty of a moment in time. But some moments are more beautiful than others – and that’s where the “golden hour” comes in. The golden hour is a special time of day when the light is at its most magical, and photographers know how to take advantage of it to create stunning images. In this article, we’ll explore what the golden hour is, the science behind it, and how to make the most of it to capture the perfect shot.

Exploring the Magic of Golden Hour Photography
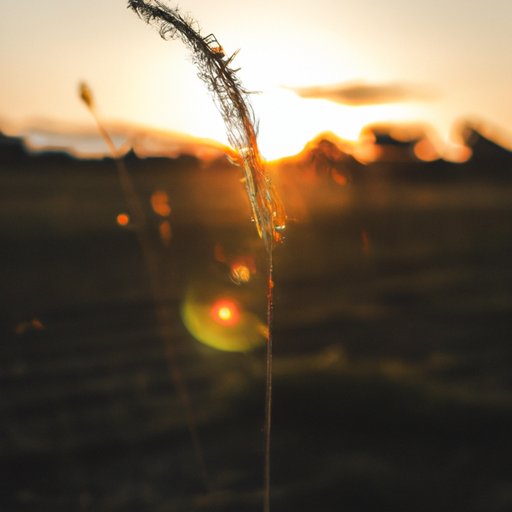
The golden hour is the time just after sunrise or just before sunset. During this time, the sun is low in the sky and its light takes on a warm, golden hue. This soft, diffused light is ideal for photography, as it creates beautiful shadows and highlights that bring out the best in any subject. Photographers have long used the golden hour to their advantage, taking advantage of its unique qualities to create stunning images.

Capturing the Beauty of Sunlight During the Golden Hour
The golden hour is an ideal time to capture the beauty of natural light. The low angle of the sun casts long, dramatic shadows that add texture and depth to an image. The soft light also helps to bring out the vibrant colors of the landscape, making it appear even more vivid and beautiful. The added warmth of the golden hour light also helps to create a sense of intimacy and drama in a photo, making it perfect for portraits and other close-up shots.
Understanding the Science Behind the Golden Hour
The golden hour isn’t just about aesthetics – there’s also a scientific reason why this time of day is so beneficial for photography. During the golden hour, the sun is lower in the sky, which means that its light has to travel through more atmosphere before it reaches the earth. This extra distance gives the light a chance to scatter, creating the softer, warmer tones that make the golden hour so special.

Tips and Tricks for Capturing the Perfect Golden Hour Shot
Now that you understand the science behind the golden hour, let’s look at some tips and tricks for making the most of it. The first step is to find the right location. Look for areas with open skies, as this will allow the light to reach your subject without any obstructions. You should also try to avoid shooting directly into the sun, as this can cause lens flare and other unwanted effects.
Once you’ve found the perfect spot, you’ll want to make sure you’re prepared to make the most of the golden hour. Bring along props and filters to help enhance the light and color of your photos, and make sure you’re familiar with your camera settings and post-processing techniques. Finally, don’t forget to experiment – the golden hour is all about capturing the beauty of the moment, so don’t be afraid to try something new.
A Beginner’s Guide to Photographing the Golden Hour
If you’re new to photography, the idea of shooting during the golden hour can seem daunting. But with a little preparation and practice, you can easily capture stunning shots during this special time of day. Here are some tips to get you started:
Basic Camera Settings
Before heading out to shoot, it’s important to familiarize yourself with your camera settings. Most cameras will have a “golden hour” mode, which will automatically adjust the exposure and white balance to make the most of the soft light. You should also make sure you’re familiar with your camera’s shutter speed, aperture, and ISO settings, as these will all affect the quality of your photos.
Preparing for the Shoot
When shooting during the golden hour, timing is everything. Make sure you arrive at your chosen location at least 15 minutes before the sun sets or rises. This will give you time to set up your equipment and adjust your settings before the light starts to change. It’s also a good idea to bring along a tripod, as this will help to ensure your photos are sharp and clear.
Using Props and Filters
Props and filters can help to enhance the look of your photos and make them stand out from the crowd. For example, you can use a polarizing filter to reduce glare and increase saturation, or a neutral density filter to darken the sky and make the colors pop. You can also use props such as trees or buildings to add interest to the foreground of your photos.
Editing and Post-Processing
Once you’ve taken your shots, it’s time to edit and post-process them. Basic editing tools such as cropping, adjusting exposure, and adding contrast can help to make your photos look even better. You can also use post-processing software such as Adobe Lightroom to add more creative effects to your images.
Conclusion
The golden hour is a special time of day that offers photographers the perfect opportunity to capture stunning shots. By understanding the science behind the golden hour and preparing properly, you can make the most of this magical time of day to create beautiful images. With the right camera settings, props, and post-processing techniques, you can easily capture the perfect golden hour shot.
So next time you’re out with your camera, keep an eye out for the golden hour. With a bit of practice and patience, you’ll soon be capturing breathtaking photos that you’ll treasure for years to come.
(Note: Is this article not meeting your expectations? Do you have knowledge or insights to share? Unlock new opportunities and expand your reach by joining our authors team. Click Registration to join us and share your expertise with our readers.)
