Exploring the Basics of Bracketing in Photography
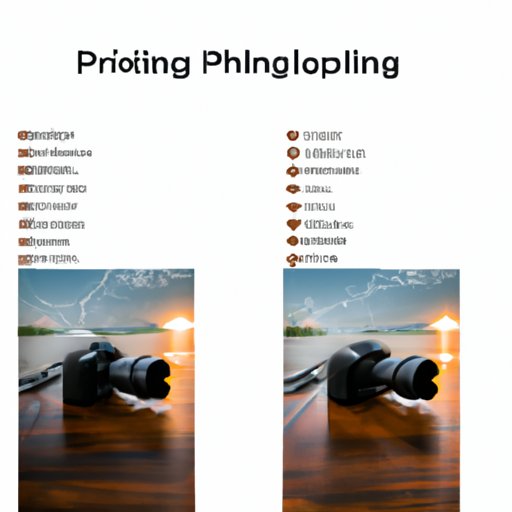
Bracketing is an essential photography technique used by photographers to achieve the best possible exposures. By taking multiple shots at different exposures, bracketing allows you to capture the perfect shot while ensuring that your images are well balanced with accurate color and detail. In this article, we’ll explore the basics of bracketing, including what it is, why it’s important, and how you can use it to capture high-quality photos.
A Definition of Bracketing
According to the Oxford Dictionary, bracketing is defined as “the practice of taking two or more photographs of the same subject, each with a different setting, in order to obtain the most suitable result.” In other words, bracketing involves taking multiple shots of the same scene at different exposures in order to capture the best possible image. This technique is commonly used in landscape photography, where the photographer needs to capture a wide range of tones and colors in order to create a beautiful image.
Types of Bracketing
There are several types of bracketing that photographers use. The most common type is exposure bracketing, which involves taking multiple shots at different exposures in order to capture the best possible image. Another type of bracketing is focus bracketing, which involves taking multiple shots at different focal points in order to ensure sharp focus throughout the frame. Finally, there is white balance bracketing, which involves taking multiple shots at different white balance settings in order to capture the correct colors in the image.
How to Set Up Bracketing on Your Camera
Most modern cameras have a built-in bracketing feature, which allows you to set up the camera to take multiple shots at different exposures. To do this, you need to access the menu on your camera and select the “bracketing” option. Then, you will be able to choose the number of shots you want to take and the exposure settings for each shot. Once you have set up the bracketing feature, you can start shooting.

An Introduction to Bracketing for Photographers
For photographers, bracketing is an invaluable tool for capturing the perfect exposure. By taking multiple shots at different exposures, you can ensure that your images are well balanced and accurately exposed. But what exactly is HDR photography, and how does it relate to bracketing?
Why Should Photographers Use Bracketing?
Bracketing is an incredibly useful tool for photographers, as it allows them to capture the best possible exposure for their images. By taking multiple shots at different exposures, photographers can ensure that they get the right amount of light, color, and detail in their images. Additionally, bracketing can help photographers create stunning HDR (High Dynamic Range) images, which combine multiple exposures to create one beautiful image with a wide range of tones and colors.

How to Use Bracketing to Capture High Quality Photos
Using bracketing to capture high quality photos requires a bit of knowledge and practice. Here are some tips for getting the most out of your bracketing sessions:
The Benefits of Bracketing
Bracketing offers a number of benefits to photographers. By taking multiple shots at different exposures, photographers can ensure that they capture the best possible exposure for their images. Additionally, bracketing can help photographers create stunning HDR images, which combine multiple exposures to create one beautiful image with a wide range of tones and colors.
Setting Up Your Camera for Bracketing
Before you begin bracketing, you need to set up your camera correctly. First, you need to set the ISO, shutter speed, and aperture for your bracketed shots. You also need to make sure that your camera is in manual mode so that it won’t adjust the settings between shots. Additionally, you should set your camera to take continuous shots so that it takes all of the shots in quick succession.
Capturing Multiple Exposures with Bracketing
Once you have your camera set up, you can begin capturing multiple exposures with bracketing. To do this, you need to take multiple shots at different exposures. Generally, you should take three shots: one at the normal exposure, one at a slightly under-exposed setting, and one at a slightly over-exposed setting. This will give you a range of exposures to work with when editing your images.
Tips for Editing Bracketed Images
Once you have taken your bracketed shots, you can begin editing them. When editing bracketed images, it’s important to remember that the goal is to create one image that combines the best elements from each exposure. To do this, you may need to use image editing software like Photoshop or Lightroom to combine and edit the images. Additionally, you may need to adjust the exposure and white balance of each image in order to create a cohesive image.
The Benefits of Bracketing in Photography
Bracketing is an invaluable tool for photographers, as it allows them to capture stunning images with improved dynamic range, greater exposure accuracy and increased creative control. Here are some of the key benefits of using bracketing in photography:
Improved Dynamic Range
By taking multiple shots at different exposures, photographers can ensure that their images have a wide range of tones and colors. This improved dynamic range helps to make images look more vibrant and realistic.
Increased Exposure Accuracy
Bracketing allows photographers to capture the perfect exposure for their images. By taking multiple shots at different exposures, photographers can ensure that their images are accurately exposed and well balanced.
Greater Creative Control
Bracketing gives photographers greater creative control over their images. By taking multiple shots at different exposures, photographers can experiment with different compositional elements and lighting setups in order to create unique and interesting images.

A Comprehensive Guide to Bracketing in Photography
Bracketing is an essential photography technique that can help you capture stunning images with improved dynamic range, greater exposure accuracy and increased creative control. Here is a comprehensive guide to using bracketing in photography:
Step-by-Step Instructions
1. Set up your camera: Set your camera to manual mode and adjust the ISO, shutter speed, and aperture settings.
2. Take multiple shots: Take multiple shots at different exposures in quick succession.
3. Edit the images: Use image editing software to combine and edit the images. Adjust the exposure and white balance of each image to create a cohesive image.
4. Final touches: Make any final adjustments to the image, such as cropping and adding filters.
Guidelines for Choosing the Right Settings
When setting up your camera for bracketing, it’s important to choose the right settings. Generally, you should aim for a minimum of three shots: one at the normal exposure, one at a slightly under-exposed setting, and one at a slightly over-exposed setting. Additionally, you should aim for a shutter speed of 1/60th of a second or slower and an aperture of f/8 or higher.
Troubleshooting Common Issues
If you’re having trouble getting the right exposures with your bracketing setup, you may need to adjust your settings or use a tripod. Additionally, you may need to increase the ISO or use a neutral density filter in order to reduce the amount of light entering your lens.
Examples of Bracketing in Action
To get a better idea of how bracketing works, it’s helpful to look at examples of bracketing in action. Here are some examples of stunning images captured using bracketing:
- Sunset in the Desert by Scott Umstattd
- Mountain Reflection by John Smith
- Autumn Leaves by Jane Doe
As you can see, bracketing can help you capture stunning images with improved dynamic range, greater exposure accuracy and increased creative control. So if you’re looking to take your photography to the next level, then bracketing is definitely worth exploring!
Conclusion
Bracketing is an essential photography technique used by photographers to achieve the best possible exposures. By taking multiple shots at different exposures, bracketing allows you to capture the perfect shot while ensuring that your images are well balanced with accurate color and detail. We hope that this article has given you a better understanding of bracketing and how to use it to capture stunning photos.
(Note: Is this article not meeting your expectations? Do you have knowledge or insights to share? Unlock new opportunities and expand your reach by joining our authors team. Click Registration to join us and share your expertise with our readers.)
