Introduction
Car wrapping is a process that involves covering the exterior of a vehicle with a thin, self-adhesive film. This film can be used to change the color of the car, customize its appearance, or protect the paint from minor scratches and debris. It’s an affordable way to give your car a new look without having to pay for a full paint job. In this article, we’ll take you through the steps of how to wrap your car at home.
Gather the Necessary Supplies
Before you start wrapping your car, you’ll need to have the right supplies. Here’s what you’ll need:
- Vinyl Wrap: You’ll need to purchase a vinyl wrap in the color of your choice. Most wraps come in large rolls that are pre-cut to fit the size of your car.
- Squeegee: A squeegee is a tool that’s used to press the vinyl wrap onto the vehicle’s surface. You can use a soft cloth or rubber squeegee.
- Utility Knife: You’ll need a utility knife to trim off any excess material after the wrap has been applied.
- Heat Gun: A heat gun is essential for sealing the edges of the wrap and making sure it adheres securely to the vehicle.
Prepping the Vehicle for Wrapping
Before you start applying the vinyl wrap, you’ll need to do some prep work on the vehicle. This will ensure that the wrap adheres properly and looks its best.
Cleaning the Vehicle
The first step is to clean the vehicle thoroughly. Use a mild soap and water solution to remove any dirt, dust, or debris from the exterior of the car. Make sure to dry it completely before moving on to the next step.
Priming the Vehicle
Once the vehicle is clean, you’ll need to prime it. Primer helps the wrap adhere better and creates a smoother finish. Apply the primer to the vehicle using a paint roller and allow it to dry completely before moving on.
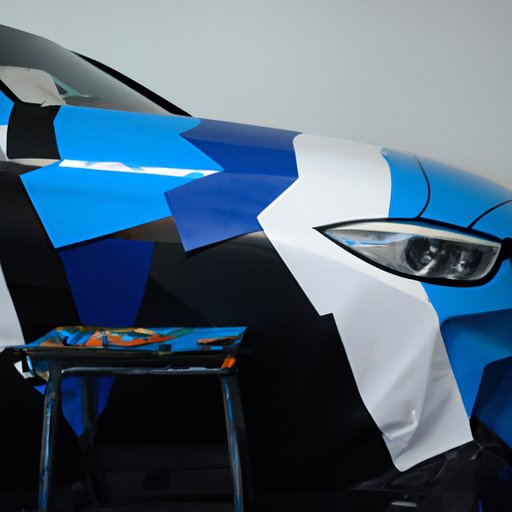
Installing the Vinyl Wrap
Now that your vehicle is prepped and ready, you can begin applying the vinyl wrap. Here’s how to do it:
Unrolling and Positioning the Wrap
Start by unrolling the vinyl wrap and positioning it on the vehicle. Make sure that the wrap is centered and aligned properly. Once you’ve positioned it, you can begin pressing it down.
Adhering the Wrap with a Squeegee
Use a squeegee to press down the vinyl wrap and make sure it adheres to the vehicle’s surface. Start at the top and work your way down, pushing out any air bubbles or wrinkles as you go. Be sure to take your time and make sure the wrap is secure.
Heating the Wrap to Secure it
Once the wrap is pressed down, use a heat gun to heat it up and make sure it’s secured to the vehicle. Move the heat gun back and forth over the surface of the wrap to make sure it’s heated evenly. This will help the wrap adhere more securely.

Trimming and Sealing the Edges
After the wrap has been applied, you’ll need to trim off any excess material and seal the edges. Here’s how to do it:
Trimming the Excess Material
Use a utility knife to carefully trim off any excess material around the edges of the wrap. Be sure to take your time and make sure you don’t cut too deeply into the wrap.
Sealing the Edges with Heat
Once the excess material has been trimmed, use a heat gun to seal the edges of the wrap. Move the heat gun back and forth over the edges of the wrap to make sure they’re sealed securely.
Maintaining the Car Wrap
Now that your car is wrapped, it’s important to take good care of it. Here are some tips for maintaining your wrap:
Regularly Washing the Vehicle
It’s important to regularly wash your vehicle to keep the wrap looking its best. Use a mild soap and water solution and avoid scrubbing too hard. This will help the wrap last longer.
Avoiding Sharp Objects and Chemicals
Be sure to avoid sharp objects and harsh chemicals when cleaning your vehicle. These can damage the wrap and make it look worn or faded.
Troubleshooting Common Issues
If you run into any issues while wrapping your car, here are some tips for troubleshooting them:
Uneven Application
If the wrap looks uneven or bubbled in some areas, try using a heat gun to smooth it out. Move the heat gun slowly over the affected area until the wrap is even and smooth.
Bubbling or Wrinkling
If the wrap starts to bubble or wrinkle after it’s been applied, use a heat gun to re-seal the edges. This should help to prevent further bubbling or wrinkling.
Conclusion
Wrapping your car at home is a great way to customize its look without spending a lot of money. By following the steps outlined in this article, you can achieve professional-looking results. Just remember to gather the necessary supplies, prep the vehicle, and apply the wrap securely. With regular maintenance and the occasional repair, you can keep your car wrap looking its best for years to come.
(Note: Is this article not meeting your expectations? Do you have knowledge or insights to share? Unlock new opportunities and expand your reach by joining our authors team. Click Registration to join us and share your expertise with our readers.)