Introduction
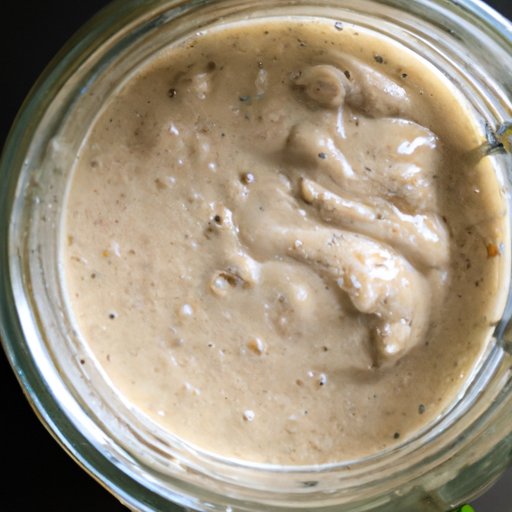
Sourdough starter is a fermented mixture of flour and water that is used as a leavening agent in bread baking. It is derived from wild yeasts and bacteria that occur naturally in the environment, giving it its signature tangy flavor. In addition to providing flavor, starter can be used to create light and airy loaves of bread with a crispy crust. This makes it a great option for those looking to add some variety to their baking repertoire.
The benefits of using a sourdough starter are numerous. It is an all-natural leavener that does not require any added ingredients, such as commercial yeast. It also helps to increase the shelf life of baked goods and adds probiotics, which are beneficial bacteria that support a healthy gut. Additionally, many people find that sourdough starter gives their bread a more complex flavor profile than other leaveners.
Step-by-Step Guide to Making and Using a Sourdough Starter
Making a sourdough starter from scratch is a relatively simple process that takes about seven to ten days. Here’s what you’ll need:
- Flour (rye or whole wheat works best)
- Water (filtered or bottled is best)
- A clean container (glass or ceramic work best)
- A spoon
Once you have gathered your supplies, follow these steps to make your own starter:
- Mix together equal parts flour and water in your container until you have a thick paste.
- Cover the container loosely with a lid or cloth and let it sit at room temperature for 24 hours.
- After 24 hours, discard half the mixture and add equal parts flour and water to the remaining mixture. Stir until it is combined.
- Repeat this process for 7-10 days, stirring the mixture twice a day, until it is bubbly and has a sour aroma.
- Your starter is now ready to use!
Once your starter is ready, you can begin using it in recipes. To do so, first feed the starter by adding equal parts flour and water to the container. Then, use a spoon to scoop out the amount of starter called for in the recipe. The remaining starter can be stored in the refrigerator for up to two weeks before it needs to be fed again.
A Beginner’s Guide to Crafting a Sourdough Starter from Scratch
Beginning bakers who want to craft their own sourdough starter from scratch will need to gather the following ingredients:
- Unbleached all-purpose flour
- Whole wheat flour
- Filtered or bottled water
- Organic raisins (optional)
Once you have gathered the necessary ingredients, you can begin preparing the starter:
- Mix together equal parts of unbleached all-purpose flour and whole wheat flour in a bowl.
- Add enough filtered or bottled water to the flour mixture to make a thick paste.
- Stir in a handful of organic raisins (optional).
- Cover the mixture loosely with a lid or cloth and let it sit at room temperature for 24 hours.
- After 24 hours, discard half the mixture and add equal parts flour and water to the remaining mixture. Stir until it is combined.
- Repeat this process for 7-10 days, stirring the mixture twice a day, until it is bubbly and has a sour aroma.
- Your starter is now ready to use!

Tips and Tricks for Maintaining a Healthy Sourdough Starter
Maintaining a healthy sourdough starter is key to getting the best results in your baking. Here are some tips and tricks to help ensure success:
Feeding Your Starter
It’s important to keep your starter well fed in order to keep it active and healthy. To do this, add equal parts flour and water to the starter every few days and stir until they are completely combined. You can also add a teaspoon of sugar to the mix to give your starter an extra boost.
Keeping Your Starter Alive
If you are not planning on using your starter within two weeks, it should be stored in the refrigerator. Before storing, feed the starter one last time with equal parts flour and water. Once it is stored, it should be fed once a week.
Knowing When Your Starter is Ready
Once your starter has been feeding for 7-10 days, it should be ready to use. Signs that your starter is ready include a bubbly texture and a pleasant, sour aroma. If your starter does not display these characteristics after 10 days, wait a few more days and check again.
How to Adapt Recipes to Use Your Sourdough Starter
Using sourdough starter in place of other leaveners such as commercial yeast or baking powder requires some adaptations to the recipe. Here are some tips for making the transition:
Substituting Sourdough in Place of Other Leaveners
When substituting sourdough starter for commercial yeast, reduce the amount of liquid in the recipe by ¼ cup per cup of starter used. For example, if the recipe calls for 1 cup of commercial yeast, use ¾ cup of starter instead. Additionally, use twice as much starter as you would commercial yeast. For instance, if the recipe calls for 2 teaspoons of commercial yeast, use 4 teaspoons of starter.
Adjusting Recipes to Fit Your Starter
Different starters have different strengths and levels of activity. As a result, recipes may need to be adjusted to fit your specific starter. For example, if your starter is particularly active, you may need to decrease the amount of starter called for in the recipe. On the other hand, if your starter is less active, you may need to increase the amount of starter and/or extend the rising times.

Troubleshooting Common Problems with Sourdough Starters
Even with careful maintenance, there are times when problems arise with sourdough starters. Here are some tips for troubleshooting common issues:
Dealing with Moldy Starter
If you notice mold growing on your starter, discard the affected portion and feed the remaining starter with equal parts flour and water. Once the starter has been fed, it should be discarded if it continues to show signs of mold growth.
Reviving a Neglected Starter
If you have neglected your starter for a long period of time, it may need to be revived before it can be used in recipes. To revive a neglected starter, feed it with equal parts flour and water and let it rest at room temperature for 12-24 hours. If the starter still does not respond, try repeating the process a few more times.
Fixing an Overly Acidic Starter
An overly acidic starter can cause baked goods to have a bitter taste. To fix this issue, feed the starter with equal parts flour and water and let it rest at room temperature for 12-24 hours. After the resting period, discard half the starter and feed it again with equal parts flour and water. Repeat this process until the starter no longer has an overly acidic taste.
Conclusion
Making and using a sourdough starter is an easy and rewarding way to add variety to your baking. With the right ingredients and a little patience, you can create a starter that produces delicious, flavorful loaves of bread. To ensure success, remember to feed your starter regularly and adjust recipes to fit the strength and activity level of your particular starter.
(Note: Is this article not meeting your expectations? Do you have knowledge or insights to share? Unlock new opportunities and expand your reach by joining our authors team. Click Registration to join us and share your expertise with our readers.)