Introduction
The Litter Robot is an automated litter box that uses a rotating sifting system to quickly separate waste from clean litter. It is designed to make litter box maintenance easier, more efficient, and more hygienic. With its self-cleaning mechanism, the Litter Robot requires minimal effort from its users, making it an ideal choice for busy households. But like any piece of machinery, the Litter Robot needs regular maintenance and occasional repairs, which may require taking apart the robot.
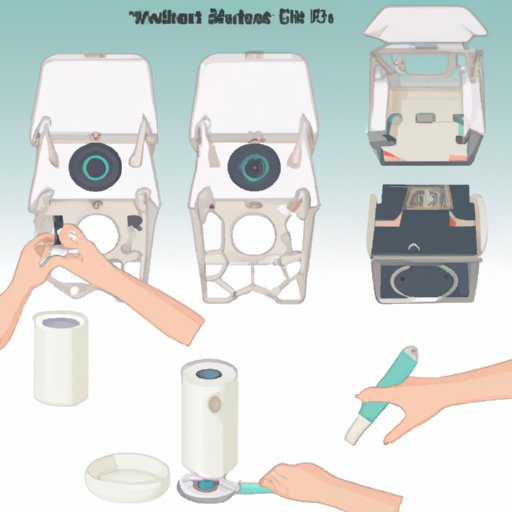
Step-by-Step Guide: A Comprehensive Look at How to Take Apart a Litter Robot
When taking apart the Litter Robot, it is important to follow the steps outlined below. This will help ensure that all parts are taken apart safely and correctly, and that the robot can be reassembled properly after the repair or maintenance is complete.
Unplugging the Litter Robot
The first step in taking apart the Litter Robot is to unplug it from the power source. This is an important safety precaution and should not be skipped. Once the robot is unplugged, it is safe to begin the disassembly process.
Removing the Base Plate and Cover
Next, the base plate and cover must be removed. This can be done by unscrewing the four screws located on the bottom of the robot. Once the screws are removed, the base plate and cover can be lifted off the robot.
Disconnecting the Wires
Once the base plate and cover have been removed, the next step is to disconnect the wires from the motor and other components. This can be done by carefully pulling the wires away from the motor and any other components they are connected to. Be sure to pay attention to the order in which the wires were connected, as this will make reassembling the robot much easier.
Removing the Motor and Drive Train
The motor and drive train are the two main components of the robot’s cleaning system. To remove them, the screws holding them in place must first be removed. Once the screws have been removed, the motor and drive train can be lifted out of the robot.
Taking Out the Waste Collection Bin
The waste collection bin is the part of the robot that collects the waste after it has been separated from the clean litter. To remove the waste collection bin, simply lift it out of the robot’s body. Be sure to take extra care when handling the waste collection bin, as it can be fragile.
Replacing Parts and Reassembling
Once all the parts have been removed, the next step is to replace any broken or worn out parts. This can be done by following the manufacturer’s instructions. Once all the parts have been replaced, the robot can then be reassembled by reversing the steps outlined above.
Disassembling the Litter Robot: A Beginner’s Guide
If you are new to taking apart the Litter Robot, there are some things you should keep in mind. The following guide provides an overview of the tools and safety precautions you need to be aware of before beginning the disassembly process.
Basic Tools Needed
To safely and successfully take apart the Litter Robot, you will need a few basic tools. These include a Phillips head screwdriver, a flathead screwdriver, and a pair of wire cutters or pliers. Having these tools on hand will make the disassembly process much easier.
Safety Precautions
Before taking apart the Litter Robot, it is important to take certain safety precautions. These include wearing protective gloves, using caution when handling sharp edges, and unplugging the robot from the power source before beginning work.
Step-by-Step Instructions
Once you have gathered the necessary tools and taken the necessary safety precautions, you are ready to begin the disassembly process. The following steps outline how to safely and effectively take apart the Litter Robot:
- Unplug the Litter Robot from the power source.
- Remove the base plate and cover by unscrewing the four screws located on the bottom of the robot.
- Carefully disconnect the wires from the motor and other components.
- Remove the motor and drive train by unscrewing the screws holding them in place.
- Gently lift the waste collection bin out of the robot’s body.
- Replace any broken or worn out parts.
- Reassemble the robot by reversing the steps outlined above.

All You Need to Know About Taking Apart a Litter Robot
In addition to the step-by-step instructions outlined above, there are a few other things you should know about taking apart the Litter Robot. This section provides an overview of some common problems and solutions, maintenance tips, and troubleshooting techniques.
Common Problems and Solutions
When taking apart the Litter Robot, there are a few common problems that may arise. These include difficulty removing the screws, difficulty connecting the wires, and difficulty lifting out the waste collection bin. If you encounter any of these problems, the best solution is to seek professional help.
Maintenance Tips
Regular maintenance is key to keeping the Litter Robot running smoothly. To ensure optimal performance, it is important to regularly clean the robot, check for any loose parts, and replace the filter every few months. Additionally, if you notice any strange noises coming from the robot, it is best to seek professional help right away.
Troubleshooting
If you are having trouble getting the Litter Robot to work properly, there are a few troubleshooting techniques you can try. First, make sure all wires are securely connected and that all parts are in good condition. If that doesn’t work, try resetting the robot and replacing the filter. If none of these solutions work, it is best to seek professional help.

How to Take Apart a Litter Robot Without Breaking It
Taking apart the Litter Robot can be a tricky process, and it is important to do it correctly in order to avoid breaking any parts. Here are some tips on avoiding common mistakes, working with delicate parts, and knowing when to seek professional help.
Avoiding Common Mistakes
When taking apart the Litter Robot, it is important to avoid common mistakes such as over-tightening screws, forcing parts into place, and mishandling delicate parts. Taking your time and being careful is key to successfully taking apart the robot without breaking it.
Working with Delicate Parts
When taking apart the Litter Robot, it is important to be mindful of the delicate parts, such as the waste collection bin and the motor. These parts should be handled with extra care and should never be forced or twisted into place.
Knowing When to Seek Professional Help
If you find yourself stuck or unsure of what to do, it is best to seek professional help. There are many qualified technicians who specialize in repairing and maintaining Litter Robots, and they can provide valuable advice and guidance.
The Ultimate Guide to Dismantling Your Litter Robot
Dismantling the Litter Robot can be a daunting task, but it doesn’t have to be. By following the steps outlined above and taking the necessary precautions, you can successfully take apart the robot without breaking it. Additionally, it is important to choose the right replacement parts and reinstall them correctly in order to ensure that the robot works properly after it is reassembled.
Conclusion
Taking apart the Litter Robot is not as difficult as it may seem. By following the steps outlined above and taking the necessary precautions, you can successfully take apart the robot without breaking it. Additionally, regular maintenance and troubleshooting can help keep the robot running smoothly and efficiently. In sum, taking apart the Litter Robot is a relatively straightforward process that can be completed with ease.
(Note: Is this article not meeting your expectations? Do you have knowledge or insights to share? Unlock new opportunities and expand your reach by joining our authors team. Click Registration to join us and share your expertise with our readers.)