Introduction
A weed eater is an essential tool for anyone who wants to keep their lawns and gardens looking neat and tidy. It’s important to know how to properly string a weed eater, as this will ensure the tool runs smoothly and efficiently. In this article, we’ll explain what a weed eater is, provide an overview of the process of stringing one, and then offer step-by-step instructions on how to do it yourself. We’ll also share some troubleshooting tips and strategies for restringing a weed eater.
What Is a Weed Eater?
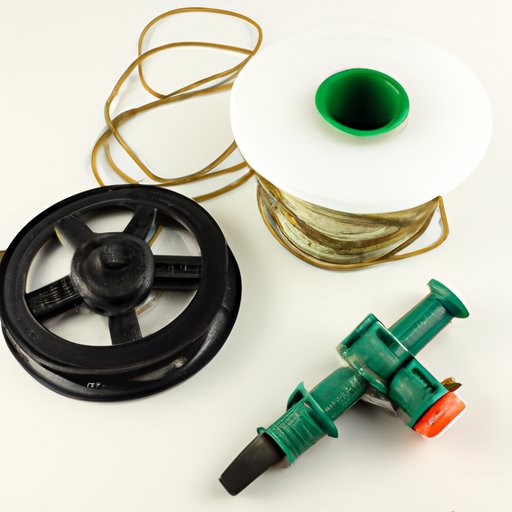
A weed eater is a lightweight, handheld tool used for trimming grass and weeds. It’s powered by either a gas or electric motor and has a flexible line that spins at high speeds to cut through vegetation. The line is usually made of plastic or metal and is replaced regularly to keep the tool running efficiently.

Overview of the Process of Stringing a Weed Eater
Stringing a weed eater involves replacing the old line with new line. To do this, you need to gather the necessary supplies, prepare the weed eater for stringing, install the new line spool, cut the line and thread it through the eyelets, wind the line onto the spool, check for proper tension, reinstall the guard and housing, and finally test the weed eater.
Step-by-Step Guide to Stringing a Weed Eater
Follow these steps to successfully string your weed eater:
Gather the Necessary Supplies
Before you begin, make sure you have all the necessary supplies, including a new line spool, a pair of scissors or a utility knife, and a flat-head screwdriver. You may also need a Phillips head screwdriver and pliers, depending on the type of weed eater you have.
Prepare the Weed Eater for Stringing
To begin, remove the guard and housing from the weed eater. Then, use a screwdriver to loosen the bolts that secure the old line spool in place. Once the bolts are removed, take out the spool and discard the old line.
Install the New Line Spool
Next, install the new line spool into the weed eater. Make sure the spool is securely in place, then tighten the bolts to hold it in place.
Cut the Line and Thread it Through the Eyelets
Using a pair of scissors or a utility knife, cut the line to the correct length. Then, thread the line through the eyelets on the spool. Be sure to thread it in the direction indicated on the spool.
Wind the Line onto the Spool
Once the line is threaded through the eyelets, start winding it onto the spool. Make sure to wind it tightly, but not too tight. If it’s too tight, it won’t spin correctly.
Check for Proper Tension
Once the line is wound onto the spool, turn the weed eater over and check the tension. The line should be taut, but not overly tight. If it’s too loose, the line won’t cut properly. If it’s too tight, it could damage the spool.
Reinstall the Guard and Housing
Once the tension is correct, reinstall the guard and housing. Make sure the guard is securely in place, then tighten the bolts to hold it in place.
Test the Weed Eater
Finally, turn on the weed eater and test it. If it’s working properly, you’re all set. If not, you may need to adjust the tension.
How to Quickly and Easily String a Weed Eater
If you’re looking for a quick and easy way to string your weed eater, there are a few options available. One option is to use pre-cut trimmer line, which is available at most hardware stores. This eliminates the need to measure and cut the line. Another option is to get help from an experienced user, such as a friend or neighbor. Finally, make sure to follow the manufacturer’s instructions when stringing your weed eater.

Troubleshooting Tips for Stringing a Weed Eater
If your weed eater isn’t running properly after stringing it, there are a few troubleshooting tips you can try. First, make sure the line is properly installed. Check for any kinks or tangles in the line. Also, inspect the eyelets for any signs of wear and tear.
A Beginner’s Guide to Stringing a Weed Eater
If you’re new to stringing a weed eater, there are a few things you should do before you start. First, familiarize yourself with the parts of your weed eater. This will make it easier to identify the components you need to work with. Next, familiarize yourself with the process of stringing a weed eater. Finally, practice on an old line before replacing it with a new one.
DIY Tutorial for Stringing a Weed Eater
If you want to tackle the task of stringing a weed eater yourself, there are plenty of resources available to help. Watch online tutorials to learn the basics. Read the manual that came with your weed eater. Ask a knowledgeable friend or family member for help. With the right guidance, you can successfully string your weed eater in no time.

Strategies for Restringing a Weed Eater
When it comes time to restring your weed eater, there are a few strategies to keep in mind. First, choose the right line for the job. Different lines are designed for different types of vegetation. Second, follow the manufacturer’s instructions for stringing the weed eater. Third, use the correct tools for the job. Using the wrong tools can result in poor performance or even damage to the weed eater.
Conclusion
Stringing a weed eater is an important part of maintaining the tool. Knowing how to properly string a weed eater will ensure the tool runs smoothly and efficiently. This article provided an overview of the process of stringing a weed eater, as well as step-by-step instructions, troubleshooting tips, and strategies for restringing. For more information about stringing a weed eater, consult the manual that came with the tool or watch online tutorials.
(Note: Is this article not meeting your expectations? Do you have knowledge or insights to share? Unlock new opportunities and expand your reach by joining our authors team. Click Registration to join us and share your expertise with our readers.)