Introduction
Weber grills are one of the most popular outdoor cooking appliances on the market today. Whether you’re a beginner or an experienced grill master, a Weber grill is an essential part of any backyard barbecue. But before you can fire up the grill and start grilling, you need to know how to get it started.
This article will provide a step-by-step guide to starting a Weber grill, as well as some tips and tricks for getting the perfect flavor out of your grilled food. We’ll also give you a beginner’s guide to grilling with a Weber grill, so that even those who are new to grilling can learn the basics and get their grilling game off to a great start.
Overview of Weber Grills
Weber grills come in a variety of sizes and styles, from small portable grills to large stationary grills. Each type of Weber grill has its own unique features and benefits, so it’s important to choose the right one for your needs. Some of the most popular types of Weber grills include charcoal grills, gas grills, pellet grills, electric grills, and smoker grills.
No matter which type of Weber grill you choose, they all offer several key benefits. For starters, they’re easy to use and maintain, making them ideal for beginners and experienced grill masters alike. They also tend to be very durable, so they can last for many years with proper care and maintenance. Plus, Weber grills are known for producing great tasting grilled food, so you can enjoy delicious meals every time you fire up the grill.
Step-by-Step Guide to Starting a Weber Grill
Starting a Weber grill is a relatively simple process, but there are a few steps you should take to ensure that your grill is fired up safely and efficiently. Follow these steps to get your Weber grill ready for grilling.
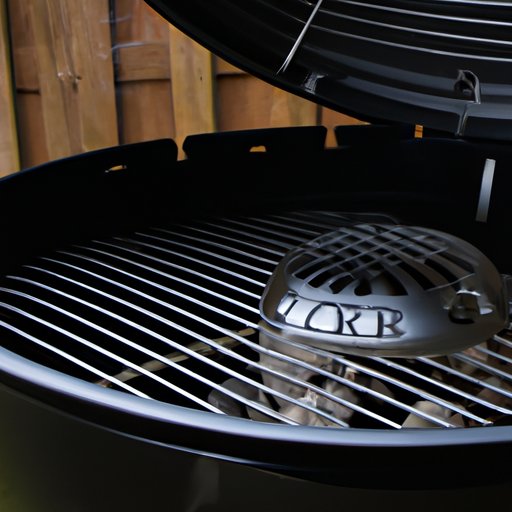
Assembling the Grill
The first step in starting a Weber grill is to assemble it. Make sure to read the instruction manual carefully before you begin, as each type of Weber grill may require different steps for assembly. Once the grill is assembled, make sure all parts are securely fastened and the lid is closed.
Lighting the Grill
Once the grill is assembled, the next step is to light it. Depending on the type of Weber grill you have, this may involve using either charcoal or gas. If you’re using charcoal, make sure to follow the instructions for lighting the charcoal properly. For gas grills, follow the instructions for turning on the gas and igniting the flame.
Adjusting the Airflow
After the grill is lit, you’ll need to adjust the airflow. This is done by adjusting the air vents located on the side of the grill. You want to open the vents enough to allow the heat and smoke to escape, but not too much that the fire goes out. Once the airflow is adjusted, you’re ready to start grilling.
Maintaining the Temperature
Once the grill is lit, you’ll need to maintain the temperature. This is done by adjusting the air vents to control the amount of oxygen that reaches the fire. You want to keep the temperature at a steady level to ensure that your food cooks evenly. If the temperature gets too hot, you can open the vents further to allow more air to reach the fire. If the temperature gets too low, you can close the vents to reduce the amount of air reaching the fire.

Tips for Setting Up and Lighting a Weber Grill
Before you start grilling, there are a few things you can do to ensure that your Weber grill is set up and lit correctly. Here are a few tips to help you get the most out of your Weber grill.
Preheating the Grill
It’s important to preheat your Weber grill before you start cooking. Preheating the grill helps to ensure that the temperature is consistent throughout the cooking process. To preheat the grill, turn the temperature knob to the highest setting and let the grill heat up for 10-15 minutes before turning the temperature down to the desired setting.
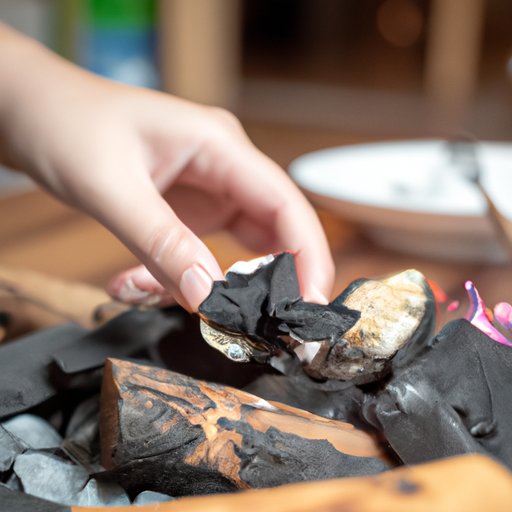
Using Charcoal or Wood Chips
If you’re using charcoal or wood chips to fuel your Weber grill, make sure to follow the instructions for adding them to the fire. For charcoal grills, place the charcoal in a pile in the center of the grill and light it. For wood chips, sprinkle them over the charcoal and light the charcoal. Keep in mind that you may need to add additional charcoal or wood chips during the cooking process to maintain the temperature.
Placement of Charcoal or Wood Chips
When adding charcoal or wood chips to your Weber grill, make sure to place them in the correct position. For charcoal grills, the charcoal should be placed in a pile in the center of the grill. For wood chips, they should be sprinkled over the top of the charcoal. Placing the charcoal or wood chips in the wrong position can lead to uneven cooking and poor flavor.
How to Use Charcoal and Wood Chips to Achieve the Perfect Flavor
Using charcoal and wood chips is a great way to achieve the perfect flavor on your grilled food. But to get the best results, it’s important to know how to use them correctly. Here are a few tips for getting the most out of your charcoal and wood chips.
Choosing the Right Charcoal
When selecting charcoal for your Weber grill, you want to choose a high-quality product that burns evenly and produces minimal ash. Hardwood lump charcoal is generally considered to be the best choice for grilling, as it produces less smoke than briquettes and burns hotter, making it ideal for searing meats. When using charcoal, make sure to wait until it has turned white before adding the food to the grill.
Adding Wood Chips
Wood chips can be used to enhance the flavor of grilled food. When adding wood chips, make sure to soak them in water for at least 30 minutes before placing them on the charcoal. This will help to prevent them from burning too quickly and creating an undesirable flavor. Additionally, it’s important to remember that different types of wood chips will produce different flavors, so make sure to select the type of wood chips that will best complement the food you’re grilling.
Controlling the Heat and Smoke
In addition to adding flavor, wood chips can also be used to control the heat and smoke produced by your Weber grill. By controlling the amount of wood chips you add, you can regulate the temperature and smoke level of your grill. Just remember to add wood chips slowly, as adding too many at once can cause the fire to flare up and create an unpleasant flavor.
10 Simple Steps for Successfully Firing up Your Weber Grill
Now that you know the basics of starting a Weber grill, let’s look at the 10 simple steps you should follow to ensure that your Weber grill is fired up and ready to go.
Preparation
Before you start grilling, make sure to read the instruction manual for your Weber grill and gather the necessary supplies (charcoal, wood chips, lighter fluid, etc.). Additionally, make sure that the area around the grill is clear of debris and that the grill is set up on a flat, stable surface.
Assembling the Grill
Assemble the Weber grill according to the instructions in the manual. Make sure all parts are securely fastened and the lid is closed.
Preheating
Turn the temperature knob to the highest setting and let the grill heat up for 10-15 minutes before turning the temperature down to the desired setting.
Lighting the Grill
Follow the instructions for lighting the charcoal or turning on the gas and igniting the flame.
Adjusting the Airflow
Adjust the air vents located on the side of the grill to allow the heat and smoke to escape without extinguishing the fire.
Placement of Charcoal or Wood Chips
If using charcoal or wood chips, place them in the correct position on the grill.
Maintaining the Temperature
Adjust the air vents to control the amount of oxygen that reaches the fire. This will help to maintain the temperature at a steady level.
Controlling the Heat and Smoke
Add charcoal or wood chips slowly to regulate the temperature and smoke level of your grill.
Cleaning and Storing
Once you’re done grilling, let the grill cool down completely before cleaning and storing it.
Troubleshooting
If you’re having trouble getting your Weber grill started or maintaining the temperature, refer to the troubleshooting section of the instruction manual for guidance.
Mastering the Basics of Starting a Weber Grill
Now that you know the steps for starting a Weber grill, it’s time to start mastering the basics. Here are a few tips to help you become a grill master.
Understanding the Different Types of Grills
It’s important to understand the different types of Weber grills and how they work. Knowing the differences between charcoal, gas, pellet, electric, and smoker grills will help you choose the right one for your needs and get the most out of your grilling experience.
Learning the Proper Techniques for Starting a Grill
Make sure to read the instruction manual for your Weber grill and follow the steps for starting it correctly. Taking the time to learn the proper techniques for assembling, lighting, and maintaining the temperature will help you get the most out of your Weber grill.
Knowing When to Add Charcoal and Wood Chips
Charcoal and wood chips can be used to add flavor and control the temperature and smoke level of your Weber grill. Make sure to add them slowly and in the correct position to get the best results.
Avoiding Common Mistakes
One of the most common mistakes when starting a Weber grill is failing to preheat the grill. Make sure to preheat the grill before adding the food to ensure that the temperature is consistent throughout the cooking process.
A Beginner’s Guide to Grilling with a Weber Grill
Grilling with a Weber grill can be intimidating for beginners, but it doesn’t have to be. Here’s a beginner’s guide to grilling with a Weber grill so that even those who are new to grilling can get the hang of it.
Understanding the Basics of Grilling
The first step in grilling with a Weber grill is understanding the basics. Learn about the different types of grills, the importance of preheating the grill, and the basics of adding charcoal or wood chips. This will help you become a better grill master and get the most out of your Weber grill.
Selecting the Right Type of Grill
Once you’ve learned the basics of grilling, it’s time to select the right type of Weber grill for your needs. Consider the size of the grill, the type of fuel you want to use, and the features you’re looking for to find the perfect grill for your backyard barbecue.
Preparing the Grill
Before you start grilling, make sure to read the instruction manual and assemble the grill according to the instructions. Also, make sure to preheat the grill and adjust the airflow to ensure that the temperature is consistent throughout the cooking process.
Knowing What to Grill
Once the grill is preheated, it’s time to decide what to grill. Choose foods that are easy to prepare and cook quickly, such as burgers, steaks, vegetables, and fish. Avoid complex recipes and large pieces of meat that may take longer to cook.
Learning How to Grill Correctly
To ensure that your food is cooked correctly, make sure to follow the instructions for grilling each type of food. Additionally, pay attention to the temperature of the grill and add charcoal or wood chips as needed to maintain the desired temperature.
Finishing Off the Grill
Once the food is cooked, let the grill cool down completely before cleaning and storing it. This will help to ensure that the grill is in good condition and ready for your next grilling session.
Conclusion
Starting a Weber grill may seem complicated at first, but it’s actually a relatively simple process. With the right knowledge and a few simple steps, you can get your Weber grill fired up and ready to go in no time.
(Note: Is this article not meeting your expectations? Do you have knowledge or insights to share? Unlock new opportunities and expand your reach by joining our authors team. Click Registration to join us and share your expertise with our readers.)