Introduction
Laminate flooring is an affordable and stylish alternative to hardwood floors. It’s available in a variety of colors and styles, making it easy to find something that fits your taste and budget. But before you can enjoy your new laminate flooring, you’ll need to know how to lay it properly. This guide will walk you through the steps of how to lay laminate flooring like a pro.
What is Laminate Flooring?
Laminate flooring is made up of multiple layers of synthetic material, bonded together under high pressure. The top layer is a photographic image that looks like real wood or stone. Underneath are layers of composite wood, called core board, and a backing layer that helps prevent moisture from seeping into the floor.

Benefits of Installing Laminate Flooring
Installing laminate flooring has many benefits. It’s durable, easy to clean, and resistant to scratches and dents. Laminate flooring is also more affordable than hardwood, and easier to install since it doesn’t require nails or glue. Additionally, laminate flooring is less likely to fade or discolor over time.
Step-by-Step Guide on How to Lay Laminate Flooring
Installing laminate flooring isn’t as difficult as it may seem. Follow these steps to learn how to lay laminate flooring like a pro.
1. Preparing the Subfloor
Before you begin installing your laminate flooring, you’ll need to make sure the subfloor is level and free of any debris. Start by sweeping and vacuuming the area to remove dust and dirt. Then use a level and a straight edge to check the subfloor for any dips or humps. If necessary, use a self-leveling compound to even out the surface.
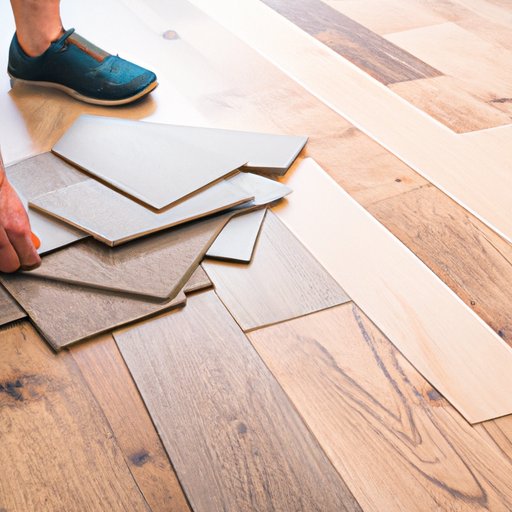
2. Measuring and Cutting the Planks
Once the subfloor is prepped, you’ll need to measure and cut the planks to fit the room. Measure the width of the room and mark the plank accordingly. Use a jigsaw or circular saw to cut the plank to size. Make sure to wear protective gear when cutting the planks.
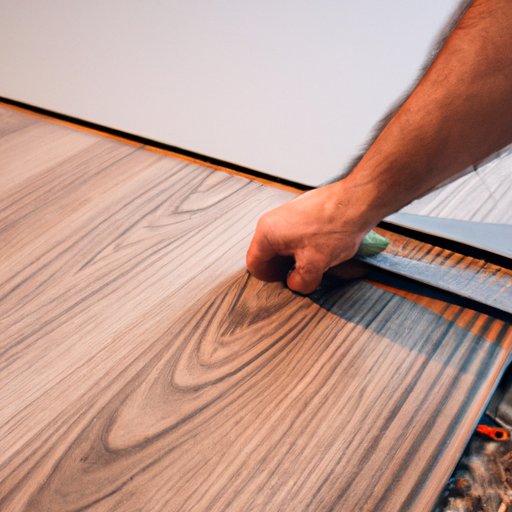
3. Laying the First Row
Start laying the first row of planks along the longest wall of the room. Make sure the end of the plank is flush with the wall. If necessary, use a tapping block and a hammer to tap the planks into place. Continue laying the rest of the planks in the same direction, leaving a gap of at least ¼ inch between each plank.
4. Installing Adhesive Strips
Once all the planks are in place, you’ll need to secure them with adhesive strips. Place the adhesive strips along the edges of the planks, making sure they’re evenly distributed. Then press down firmly to ensure the adhesive sticks.
5. Fitting the Last Row
When fitting the last row of planks, you’ll need to measure and cut each plank to fit. Measure the width of the space and mark the plank accordingly. Then use a jigsaw or circular saw to cut the plank to size. Make sure the planks are tight against the wall and have a consistent gap between them.
6. Finishing Touches
Once all the planks are in place, you’ll need to finish the installation with a few finishing touches. Use a trim piece to cover the expansion gap around the perimeter of the room. Then use a damp cloth to wipe away any excess adhesive or dust. Finally, apply a sealant to protect the floor and help it last longer.
Tips for Installing Laminate Flooring Like a Pro
Follow these tips to ensure your laminate flooring installation goes smoothly.
1. Make Sure You Have the Right Tools
Having the right tools is essential for a successful laminate flooring installation. Make sure you have a measuring tape, a jigsaw or circular saw, a tapping block, and a protective mask or goggles. Having these tools on hand will save you time and energy.
2. Use Quality Underlayment
Underlayment is a foam or felt material that provides cushioning between the subfloor and the laminate flooring. It’s important to use quality underlayment to ensure the flooring is properly supported. Be sure to follow the manufacturer’s instructions for the type and amount of underlayment to use.
3. Follow the Manufacturer’s Instructions
Every laminate flooring product is different, so it’s important to read the manufacturer’s instructions before beginning the installation process. The instructions will tell you how to lay the planks, what types of underlayment to use, and other important information.
A Beginner’s Guide to Laying Laminate Flooring
If you’re a beginner, here are some tips to help you get started.
1. Consider the Room Layout
Before you start laying the planks, consider the layout of the room. Most rooms have an irregular shape, so it’s important to plan ahead and decide where the planks will go. For example, if the room is rectangular, you may want to start in the center and work your way outwards.
2. Start with the Longest Wall
When laying the first row of planks, it’s best to start with the longest wall of the room. This will give you a better idea of how the planks will fit in the space. Make sure the planks are tight against the wall and leave a gap of at least ¼ inch between each plank.
3. Measure Twice, Cut Once
When measuring and cutting the planks, it’s important to double-check your measurements. Measure twice and cut once to avoid wasting planks and having to re-cut them.
4. Don’t Skip Underlayment
Underlayment helps protect the laminate flooring from moisture and provides cushioning, making it more comfortable to walk on. Don’t skip this step—make sure to follow the manufacturer’s instructions for the type and amount of underlayment to use.

How to Choose the Right Laminate Flooring and Install It
Choosing the right laminate flooring and installing it correctly can be tricky. Here’s what you need to know.
1. Evaluate Your Room
The first step is to evaluate your room. Consider the size and layout of the space, as well as the amount of natural light it receives. This will help you determine which type of laminate flooring is best for the room.
2. Choose the Right Laminate Flooring
Next, you’ll need to choose the right laminate flooring for your room. Look for a product that’s durable, easy to clean, and resistant to scratches and dents. Consider the color and style of the planks and make sure they match the decor of the room.
3. Don’t Forget About Accessories
Don’t forget about accessories! You’ll need to purchase transition pieces, trim pieces, and adhesive strips to complete the installation. These items will help ensure your laminate flooring looks professional and lasts for years to come.
4. Know Your Installation Options
Finally, you’ll need to decide whether you’re going to install the laminate flooring yourself or hire a professional. If you choose to do it yourself, make sure you read the instructions carefully and have the right tools for the job.
DIY Laminate Flooring Installation: What You Need to Know
Installing laminate flooring yourself can save you money, but it’s important to understand the process before you get started.
1. Understand the Process
Installing laminate flooring requires several steps, including preparing the subfloor, measuring and cutting the planks, laying the first row, installing adhesive strips, and fitting the last row. Make sure you understand each step before you begin.
2. Gather the Necessary Materials
You’ll need several materials to complete the installation, including underlayment, transition pieces, trim pieces, and adhesive strips. Make sure you have all the materials you need before you start.
3. Clear the Room
Before you begin the installation, you’ll need to clear the room of all furniture and rugs. This will give you plenty of space to work and make it easier to move around.
4. Clean and Prepare the Subfloor
Once the room is cleared, you’ll need to clean and prepare the subfloor. Sweep and vacuum the area to remove dust and debris. Then use a level and a straight edge to check for any dips or humps. If necessary, use a self-leveling compound to even out the surface.
Preparing Your Home for Laminate Flooring Installation
Preparing your home for laminate flooring installation is an important step. Here’s what you need to do.
1. Remove Existing Flooring
If you’re replacing existing flooring, you’ll need to remove it first. Take up the old flooring carefully, being careful not to damage the subfloor. If the subfloor is concrete, you’ll need to rent a floor scraper to remove the adhesive.
2. Check for Moisture
Moisture can cause problems with laminate flooring, so it’s important to check for moisture before you begin the installation. Use a moisture meter to check for moisture in the subfloor. If the reading is higher than 6%, you’ll need to use a dehumidifier to reduce the moisture levels.
3. Level the Subfloor
Once the subfloor is dry, you’ll need to make sure it’s level. Use a level and a straight edge to check for any dips or humps. If necessary, use a self-leveling compound to even out the surface.
4. Trim Door Jambs
Finally, you’ll need to trim the door jambs so the laminate flooring can fit underneath. Use a jamb saw or handsaw to trim the jambs, then use a router to round off the edges.
Conclusion
Installing laminate flooring is a great way to update your home and add value. With the right tools and a little patience, you can easily lay laminate flooring like a pro. Just be sure to follow the steps above and you’ll have beautiful new flooring in no time.
(Note: Is this article not meeting your expectations? Do you have knowledge or insights to share? Unlock new opportunities and expand your reach by joining our authors team. Click Registration to join us and share your expertise with our readers.)