Introduction
Hand stitching is a form of sewing that is done by hand, instead of with a sewing machine. It is used to create clothes, accessories, toys, quilts, and many other items. It is a great way to express creativity and make something unique. With a few basic supplies and some practice, anyone can learn how to hand stitch.
This guide will provide step-by-step instructions on how to start hand stitching. It will also include a primer on the basics of hand stitching and an illustrated tutorial on hand stitching techniques. By the end of this guide, you will have the knowledge and skills necessary to begin making your own creations.
Step-by-Step Guide to Starting a Hand Stitch
Before you can start hand stitching, you need to gather the right supplies and prepare your fabric. Follow these steps to get started:
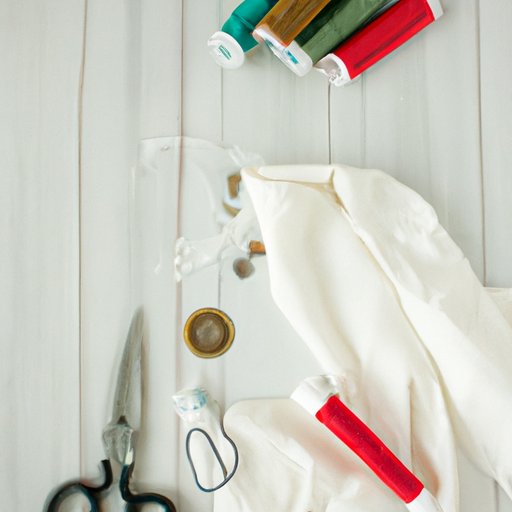
Gather Your Supplies
The first step in starting a hand stitch is gathering the supplies you need. You will need a needle, thread, fabric, scissors, and a thimble (optional). Choose a needle that is sized appropriately for your fabric. For example, if you are working with lightweight fabric, you will need a smaller needle than if you were working with heavy fabric. Select a thread that is the same color as your fabric, or pick a contrasting color for decorative effects. If you are new to hand stitching, it is best to choose a medium weight thread.
Choose Your Fabric
Once you have gathered all of your supplies, the next step is to choose your fabric. There are many different types of fabrics that can be used for hand stitching, including cotton, linen, wool, and velvet. Consider the type of project you are working on and choose the appropriate fabric. Make sure the fabric is pre-washed to avoid shrinkage after stitching.
Prepare the Fabric
Before you can start stitching, you need to prepare the fabric. Place the fabric on a flat surface, such as a table or the floor, and smooth out any wrinkles. Use straight pins to secure the fabric in place. If you are using a pattern, use the pins to mark the lines and shapes you need to follow.
Thread the Needle
Once the fabric is prepared, you can thread the needle. Cut a length of thread that is about 18 inches long. Thread the needle by passing the thread through the eye of the needle from front to back. Hold the thread in one hand and the needle in the other. Gently pull the thread until there is an equal amount of thread on either side of the needle.
Knot the Thread
After the needle is threaded, you need to knot the thread. To do this, take the two ends of the thread and tie them together in a double knot. Make sure the knot is tight so it won’t come undone while you are stitching.
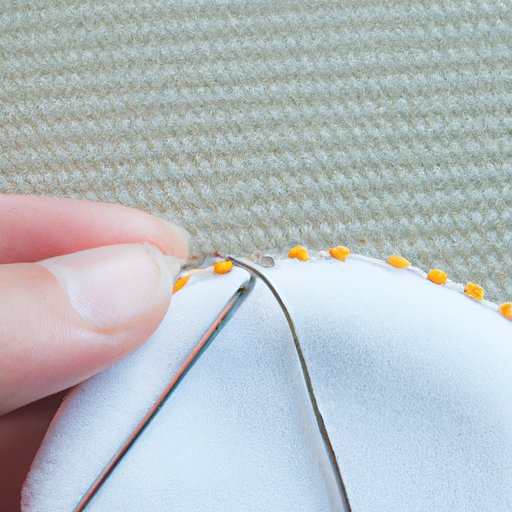
Start Stitching
Now that your supplies are ready, you can start stitching! Begin by pushing the needle through the fabric from the back to the front. Pull the thread through the fabric and then push the needle back into the fabric, creating a small loop. Continue in this manner until you have created the desired pattern or shape.

A Primer on the Basics of Hand Stitching
Now that you know the basics of how to start hand stitching, let’s take a look at some of the different types of hand stitches and their uses. Here is a quick overview of the most common hand stitches and tools.
Types of Hand Stitches
There are many different types of hand stitches, each with its own purpose. Some of the most common types of hand stitches include running stitches, backstitches, slip stitches, and blanket stitches.
Basic Stitches and Their Uses
Running stitches are used to join two pieces of fabric together. Backstitches are used to create a strong and durable seam. Slip stitches are used to close openings and hems. Finally, blanket stitches are used to finish the edges of blankets and other fabric projects.
Commonly Used Tools
In addition to needles and thread, there are several other tools that can be used for hand stitching. Thimbles are used to protect the fingers from the sharp needle. Embroidery hoops are used to keep the fabric taut while stitching. And seam rippers are used to remove stitches quickly and easily.
How to Get Started with Hand Sewing: The Essentials
Now that you know the basics of hand stitching, it’s time to get started. Here are some tips for getting started with hand sewing.
Learn the Basics
The best way to get started with hand sewing is to learn the basics. Read books and watch videos to learn the different types of stitches and how to use them. Practice the different stitches on scrap fabric until you feel comfortable with them.
Practice Your Skills
Once you have learned the basics of hand stitching, it is important to practice your skills. Try making simple projects such as pillows, bags, or scarves. As you become more experienced, you can move on to more complex projects.
Work with Different Fabrics
Experimenting with different types of fabrics is a great way to hone your hand stitching skills. Work with different weights and textures of fabric to see how they respond to the different types of stitches. This will help you become more confident in your hand stitching.
An Illustrated Tutorial on Hand Stitching Techniques
Now that you know the basics of hand stitching, let’s take a look at some of the most common hand stitching techniques. Here is an illustrated tutorial on four basic hand stitches.
Running Stitch
The running stitch is one of the most basic and versatile hand stitches. It is used to join two pieces of fabric together and can be used for both decorative and functional purposes. To make a running stitch, simply insert the needle from the top of the fabric, pull the thread through to the bottom of the fabric, and then repeat.
Backstitch
The backstitch is a strong and durable hand stitch used to create seams. It is made by inserting the needle from the back of the fabric and then pulling it back up through the fabric a few stitches ahead. Repeat this process until you reach the end of the seam.
Slip Stitch
The slip stitch is used to close openings and hems. To make a slip stitch, insert the needle from the underside of the fabric, pull the thread through, and then insert the needle again a few stitches away from the original stitch. Pull the thread through and repeat until the opening is closed.
Blanket Stitch
The blanket stitch is used to finish the edges of blankets and other fabric projects. It is made by inserting the needle from the back of the fabric and then pulling it through to the front. Take the thread around the edge of the fabric and then insert the needle a few stitches away from the original stitch. Pull the thread through and repeat until the entire edge is finished.

Mastering the Art of Hand Stitching: Beginner Tips and Tricks
Learning how to hand stitch can be a rewarding and enjoyable experience. Here are some tips and tricks to help you master the art of hand stitching.
Be Patient
Hand stitching takes time and patience. Don’t expect to be able to make perfect stitches right away. Take your time and focus on mastering the basics before moving on to more advanced techniques.
Take Breaks
Stitching for long periods of time can be tiring, so make sure to take breaks when needed. Get up, stretch, and take a few minutes to rest your eyes and hands.
Experiment with Different Materials
Experimenting with different materials is a great way to expand your skills. Try working with different fabrics, threads, and needles to see what works best for you.
Conclusion
Learning how to hand stitch can be a fun and rewarding experience. With the right supplies and a little practice, anyone can learn how to start hand stitching. This guide has provided step-by-step instructions on how to start hand stitching, as well as a primer on the basics of hand stitching and an illustrated tutorial on hand stitching techniques. With these tips and tricks, you will be ready to start creating your own unique projects.
(Note: Is this article not meeting your expectations? Do you have knowledge or insights to share? Unlock new opportunities and expand your reach by joining our authors team. Click Registration to join us and share your expertise with our readers.)