Introduction
Crocheting is a fun and rewarding hobby that can be enjoyed by people all over the world. Once you’ve mastered the basics of crocheting, you may find yourself wanting to create more complex projects. One of the first steps in doing this is learning how to start a second row in crocheting. This article will provide a comprehensive guide on how to do just that, with step-by-step instructions and helpful tips and tricks to make your second row of crocheting look professional and perfect.
Step-by-Step Guide to Starting a Second Row in Crocheting
Starting a second row in crocheting is a relatively simple process, but it is important to understand the steps involved in order to get the best results. Here is a step-by-step guide to starting a second row in crocheting:
Step 1: Secure the Last Stitch of the First Row
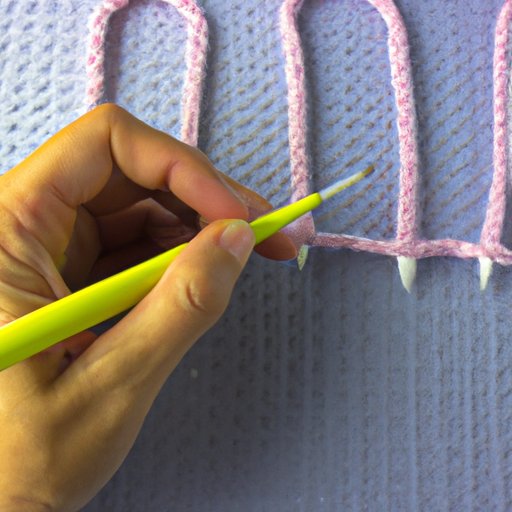
The first step in starting a second row in crocheting is to secure the last stitch of the first row. To do this, simply insert your crochet hook into the last stitch and pull up a loop. Then, yarn over and draw through both loops on the hook to complete the stitch.
Step 2: Create a Turning Chain
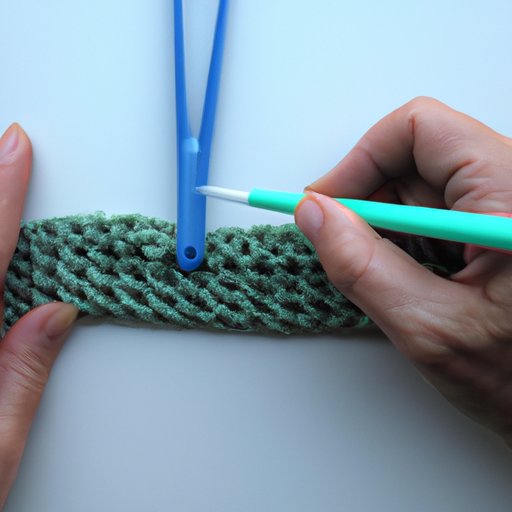
Once you have secured the last stitch of the first row, you will need to create a turning chain. A turning chain is a small number of stitches (usually one or two) that will help you turn the work and begin the new row. To create a turning chain, yarn over and draw the yarn through the loop on the hook.
Step 3: Begin the New Row
Once you have created the turning chain, you are ready to begin the new row. To do this, insert the hook into the first stitch of the new row and draw up a loop. Then, yarn over and draw through both loops on the hook to complete the stitch. You can then continue crocheting the pattern as normal.
How to Master the Art of Starting a Second Row in Crocheting
Learning how to start a second row in crocheting can be a difficult task, especially for beginners. However, with practice and dedication, you can become an expert in no time. Here are some tips for mastering the art of starting a second row in crocheting:
Practice Makes Perfect
The best way to get better at starting a second row in crocheting is to practice, practice, practice! The more you practice, the more comfortable you will become with the process. So don’t be afraid to experiment and try out different techniques until you find one that works for you.
Understanding Different Types of Turning Chains
There are several different types of turning chains that can be used when starting a second row in crocheting. It is important to understand the differences between each type so that you can choose the one that is best suited for your project. For example, a single crochet turning chain is the most common type of turning chain and is used for most basic crochet patterns. On the other hand, a double crochet turning chain is a bit longer and is often used for more complex patterns.
The Basics of Adding a Second Row in Crocheting
Once you have mastered the art of starting a second row in crocheting, it is important to understand the basics of adding a second row. Here are some rules for working the second row:
Rules for Working the Second Row
When adding a second row in crocheting, it is important to remember the following rules:
- Always begin the second row with a turning chain.
- Always work the same number of stitches as the first row.
- Always end the second row with a slip stitch.
Understanding the Mechanics of the Process
It is also important to understand the mechanics of the process. To add a second row in crocheting, you must first create a turning chain, which is a small number of stitches (usually one or two) that will help you turn the work and begin the new row. After creating the turning chain, you must then work the same number of stitches as the first row. Finally, you must end the second row with a slip stitch.
Tips for Making a Clean Start on Your Second Row of Crocheting
Making a clean start on your second row of crocheting is essential for achieving professional-looking results. Here are some tips for making a clean start on your second row of crocheting:
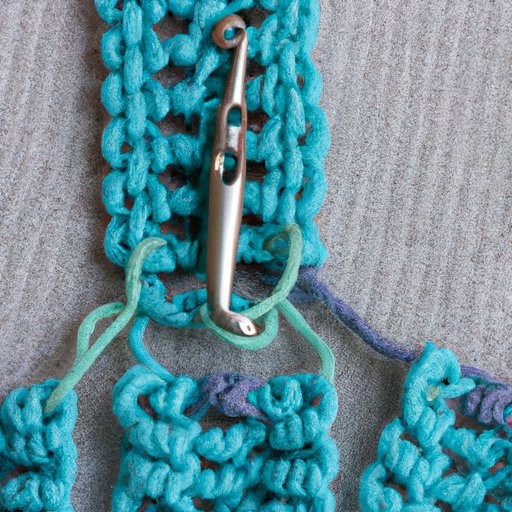
Using a Locking Stitch Marker
Using a locking stitch marker can help ensure that your second row of crocheting starts off on the right foot. A locking stitch marker is a small device that is placed at the beginning of a row to mark where the row should begin. This will help keep your stitches even and consistent.
Double Checking Your Work
It is always a good idea to double check your work before moving on to the next row. This will help ensure that you have not made any mistakes and that your second row of crocheting looks neat and professional.
A Tutorial on Starting a New Row in Crocheting
If you are still having trouble starting a new row in crocheting, there are plenty of tutorials available online. Here is a tutorial on starting a new row in crocheting:
Supplies Needed
To start a new row in crocheting, you will need the following supplies:
- Yarn
- Crochet hook
- Stitch markers
- Scissors
Step-by-Step Instructions
Once you have gathered all the necessary supplies, you are ready to start a new row in crocheting. Here are the steps you should follow:
- Secure the last stitch of the first row by inserting your crochet hook into the last stitch and pulling up a loop. Yarn over and draw through both loops on the hook to complete the stitch.
- Create a turning chain by yarning over and drawing the yarn through the loop on the hook.
- Insert the hook into the first stitch of the new row and draw up a loop. Yarn over and draw through both loops on the hook to complete the stitch.
- Continue crocheting the pattern as normal.

Learn the Simple Trick to Begin a Second Row of Crochet
One of the simplest tricks for starting a second row of crochet is the slip knot method. This method involves creating a slip knot at the end of the first row and using it to begin the second row. Here is how you can use the slip knot method to begin a second row of crochet:
The Slip Knot Method
To begin a second row of crochet using the slip knot method, follow these steps:
- Secure the last stitch of the first row by inserting your crochet hook into the last stitch and pulling up a loop. Yarn over and draw through both loops on the hook to complete the stitch.
- Create a slip knot by wrapping the yarn around your finger twice and inserting your hook through the middle of the loop. Pull the yarn tight to create a knot.
- Insert the hook into the slip knot and draw up a loop. Yarn over and draw through both loops on the hook to complete the stitch.
- Continue crocheting the pattern as normal.
Benefits of the Slip Knot Method
The slip knot method has several benefits, including the fact that it is quick and easy to do. Additionally, it helps to keep your stitches even and consistent, resulting in a professional-looking finish. Finally, it eliminates the need for a turning chain, which can be difficult for beginners to master.
Conclusion
Starting a second row in crocheting can be a daunting task for beginners, but with practice and dedication, it can be done. By following this step-by-step guide, understanding the basics of adding a second row, and using helpful tips and tricks, you can learn the art of starting a second row in crocheting. Don’t be afraid to experiment and try out different techniques until you find one that works for you.
(Note: Is this article not meeting your expectations? Do you have knowledge or insights to share? Unlock new opportunities and expand your reach by joining our authors team. Click Registration to join us and share your expertise with our readers.)