Introduction
Composting is an environmentally friendly way to recycle organic waste such as kitchen scraps, yard trimmings, and even paper products. It’s a great way to reduce your carbon footprint and help the environment. Composting with a tumbler is a popular method for turning your kitchen and garden waste into nutrient-rich soil that can be used in gardens and lawns. In this article, we’ll discuss the basics of composting, the benefits of using a tumbler, and provide a step-by-step guide to building one.
Step-by-Step Guide to Building a Compost Tumbler
Building a compost tumbler is relatively easy and requires basic tools and materials. Here’s what you’ll need to get started:
- A large plastic trash can or barrel
- Drill and drill bits
- Screws and washers
- Hinges and handles
- Soil and composting materials
Once you have the materials, follow these steps to assemble the tumbler:

How to Assemble a Compost Tumbler in 5 Simple Steps
1. Gather materials. Collect all the necessary items listed above and make sure everything is in good working order.
2. Cut pieces & assemble parts. Using the drill and drill bits, cut holes in the trash can or barrel for the hinges, screws, and handles. Then attach the hinges, screws, and handles to the bin.
3. Add soil & composting materials. Fill the bin with soil and composting materials, making sure to mix the materials together. This will ensure that the composting process works properly.
4. Secure the lid. Make sure the lid is securely fastened to the bin by tightening the screws. This will keep animals and pests out of the compost.
5. Place the tumbler in a suitable location. Choose a spot in your yard that gets plenty of sunlight and isn’t prone to flooding or standing water.

Tips for Setting Up Your Compost Tumbler
Here are some additional tips to help ensure success when setting up your compost tumbler:
- Choose an ideal location. Select a spot in your yard that gets plenty of sunlight and is away from trees, shrubs, and other plants.
- Consider ventilation. Make sure the bin has adequate ventilation to allow air to circulate inside the bin.
- Use appropriate bedding materials. Use materials such as shredded newspaper, leaves, grass clippings, and coffee grounds to create a balance between carbon and nitrogen in your compost.
A Beginner’s Guide to Composting with a Tumbler
Now that you know how to build a compost tumbler, it’s time to learn about composting. Here’s a beginner’s guide to getting started with composting:
What Is Compost? Compost is decomposed organic matter that is rich in essential nutrients. It can be used as a soil amendment to improve soil structure and fertility.
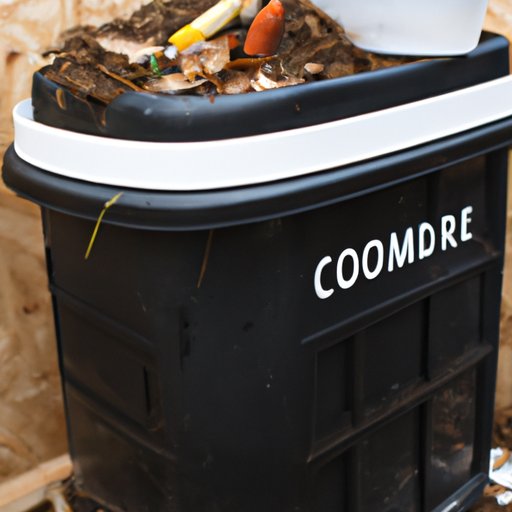
What Can I Compost? You can compost items such as fruit and vegetable scraps, eggshells, coffee grounds, tea bags, and yard trimmings.
What Should I Avoid Composting? Avoid composting meat, dairy products, and oils. These items can attract pests and produce odors that could be unpleasant.
Get Started with Composting: Setting Up a Tumbler
Now that you know the basics of composting, it’s time to get started. Here’s what you need to do to set up your compost tumbler:
Preparing the Compost Bin Start by ensuring that the bin is clean and free of debris. If necessary, use a hose to rinse out the bin.
Adding Compostable Materials Fill the bin with layers of compostable materials such as kitchen scraps, leaves, and grass clippings. Make sure to mix the materials together.
Mixing the Materials Once the bin is full, use a shovel or rake to stir the materials together. This will help break down the materials and speed up the composting process.

DIY Compost Tumbler: What You Need to Know
If you want to build your own compost tumbler, here’s what you need to know:
Basic Supplies You’ll need a large plastic trash can or barrel, drill and drill bits, screws and washers, hinges and handles, and soil and composting materials.
Tools & Equipment You’ll also need some basic tools and equipment such as a drill, screwdriver, hammer, and measuring tape.
Building Instructions Follow the instructions outlined in this article to assemble the compost tumbler. Be sure to follow all safety precautions and wear protective gear when drilling and handling tools.
All You Need to Know about Using a Compost Tumbler
Now that you’ve built your compost tumbler, here’s what you need to know about using it:
Turning the Compost Turn the tumbler every few days to ensure the compost is mixed and aerated. This will help speed up the composting process.
Adding Water Add water to the tumbler if the materials seem dry. This will help maintain the proper moisture level for the compost.
Harvesting the Compost After several weeks, the compost should be ready to harvest. Carefully remove the compost from the tumbler and spread it in your garden or lawn.
Conclusion
Composting with a tumbler is an easy and effective way to recycle organic waste and turn it into nutrient-rich soil. To get started, gather the necessary materials and follow the instructions outlined in this article. With the right setup and proper maintenance, you can successfully turn your kitchen and garden waste into valuable compost.
Composting with a tumbler has many benefits, including reducing waste, improving soil quality, and helping the environment. It’s a great way to reduce your carbon footprint, save money, and produce nutrient-rich soil for your garden or lawn.
(Note: Is this article not meeting your expectations? Do you have knowledge or insights to share? Unlock new opportunities and expand your reach by joining our authors team. Click Registration to join us and share your expertise with our readers.)