Introduction
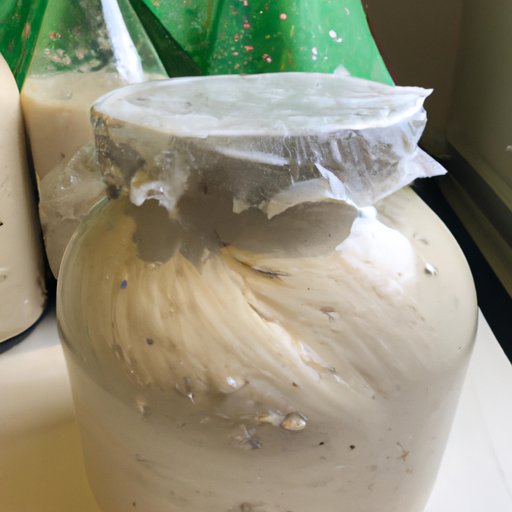
Sourdough starter is a type of dough that is used in baking, most commonly in breads. It is made from a combination of flour, water, and wild yeast, and it serves as a natural leavening agent. The starter is kept alive by regularly “feeding” it with fresh flour and water. Unfortunately, sometimes starters become inactive or dormant due to neglect, and this can be difficult for bakers to revive. In this article, we’ll explore how to revive sourdough starter and keep it active.
Understand the Basics of Sourdough Starter Maintenance
Before attempting to revive a starter, it’s important to understand the basics of maintaining one. This includes knowing what a starter is, the benefits of maintaining a starter, and the requirements for starter maintenance.
What is a Sourdough Starter?
A sourdough starter is a mixture of flour, water, and wild yeast. As explained by Dr. Annegret Wilde, a professor of food microbiology at the Technical University of Berlin, “The starter contains the microorganisms necessary to ferment the dough, which is why it is so important. Without it, you cannot make good-tasting bread.”
Benefits of Maintaining a Starter
There are several benefits to maintaining a sourdough starter. For one, it helps to add flavor and complexity to breads. According to Dr. Wilde, “The starter contains lactic acid bacteria and wild yeasts, which produce acids, alcohols, and other compounds during fermentation. These compounds contribute to the flavor of the finished product.” Additionally, a starter can help to create a more consistent texture in breads since it helps to provide structure and stability. Finally, it helps to reduce waste since it can be reused multiple times.
Requirements for Starter Maintenance
In order to keep a starter healthy and active, it needs to be fed regularly with fresh flour and water. According to Dr. Wilde, “The starter must be fed regularly with fresh flour and water, otherwise it will not remain active. Ideally, it should be fed every 12 hours.” Additionally, it should be stored in a cool, dark place in order to prevent spoilage.

Refresh Your Starter with Flour and Water
One of the easiest ways to revive a sourdough starter is to simply refresh it with flour and water. This can help to bring a dormant starter back to life and make it active again. There are two main methods for doing this: the basic refreshment process and the ratio-based refreshment method.
Basic Refreshment Process
The basic refreshment process involves discarding some of the starter and then adding fresh flour and water to the remaining starter. According to Chef John of Food Wishes, “Discard about half of the existing starter, and then mix in equal amounts of fresh all-purpose flour and warm water.” He suggests using about 1/4 cup of each for a small batch, but you can adjust the amounts depending on your needs. Once the flour and water have been added, cover the bowl and let it sit at room temperature for 8-12 hours before using it.
Ratio-Based Refreshment Method
The ratio-based refreshment method is a bit more complicated than the basic method, but it can be helpful if you need to revive a larger batch of starter. According to Chef John, “Start by discarding all but about 1/4 cup of the starter, then add 2 cups of all-purpose flour and 2 cups of warm water.” He suggests letting the mixture sit at room temperature for 8-12 hours before using it. This method can be adjusted depending on the size of the batch you need to revive.

Use Discarded Starter to Reactivate a Dormant Starter
If your starter has been neglected for too long and become dormant, you may need to take more drastic measures to revive it. One option is to use some of the discarded starter to reactivate the dormant starter.
How to Identify a Dormant Starter
It can be difficult to determine whether a starter is truly dormant or just inactive. According to Chef John, “If the starter has been neglected for a few weeks, it may no longer be active. To test it, add a teaspoon of flour and a teaspoon of warm water, then stir it vigorously. If it does not bubble or increase in volume after a few hours, it is likely dormant.”
Steps for Reviving a Dormant Starter
To revive a dormant starter, Chef John suggests taking the following steps: “Take 1/4 cup of the discarded starter and add it to 2 cups of all-purpose flour and 2 cups of warm water. Mix it well and let it sit at room temperature for 8-12 hours. After that, discard most of the mixture and feed the remaining starter with 1/4 cup of flour and 1/4 cup of warm water. Let it sit for another 8-12 hours before using it.”

Feed Your Starter Regularly to Keep it Active
Once you’ve revived your starter, it’s important to keep it active by feeding it regularly. This will help to ensure that your starter remains healthy and continues to produce delicious breads.
Frequency of Feeding
According to Dr. Wilde, “Ideally, the starter should be fed every 12 hours.” This means that you should feed it once in the morning and once at night. Additionally, it’s important to discard some of the starter each time you feed it in order to prevent it from becoming too acidic.
Types of Flours to Use
When feeding your starter, it’s important to use the right type of flour. According to Dr. Wilde, “The best flours to use are unbleached all-purpose flour or bread flour. Whole wheat flour can also be used, but it should be used sparingly as it can make the starter too dense.”
Experiment with Different Flours and Temperatures
Experimenting with different flours and temperatures can help you to get the most out of your starter. This can allow you to create unique flavors and textures in your breads.
Benefits of Experimentation
Experimenting with different flours and temperatures can help to add complexity and flavor to your breads. According to Dr. Wilde, “Different types of flour contain different levels of enzymes, which can affect the flavor of the finished product. Similarly, different temperatures can result in different fermentation rates, which can also affect the flavor.”
Tips for Successful Experiments
When experimenting with your starter, it’s important to start small and make gradual changes. According to Dr. Wilde, “Start by making small adjustments to the recipe and see how it affects the finished product. Then gradually increase the amount of flour or change the temperature until you find a combination that works for you.”
Store Your Starter in a Cool, Dark Place
In order to keep your starter healthy and active, it’s important to store it in a cool, dark place. This will help to prevent spoilage and extend the shelf life of your starter.
Recommended Storage Conditions
According to Dr. Wilde, “The ideal storage conditions for a sourdough starter are cool (around 50°F) and dark. It’s also important to store it in an airtight container to prevent contamination.” She also suggests keeping the starter in the refrigerator when not in use. This will help to extend its shelf life.
Potential Risks of Improper Storage
If the starter is not stored properly, it can become contaminated with bacteria or mold. According to Dr. Wilde, “If the starter is exposed to too much light or heat, it can become contaminated with bacteria or mold. This can lead to off-flavors in the finished product and can even be dangerous if consumed.”
Conclusion
Reviving a sourdough starter can be a daunting task, but with the right knowledge and techniques, it can be done. By understanding the basics of starter maintenance, refreshing with flour and water, using discarded starter to reactivate a dormant starter, feeding the starter regularly, experimenting with different flours and temperatures, and storing properly, you can keep your starter healthy and active. With a little patience and practice, you can create delicious, flavorful breads with your own homemade sourdough starter.
(Note: Is this article not meeting your expectations? Do you have knowledge or insights to share? Unlock new opportunities and expand your reach by joining our authors team. Click Registration to join us and share your expertise with our readers.)