I. Introduction
If you are a vehicle owner, chances are that you have come across those stubborn stickers that can be a real challenge to remove. These may include bumper stickers, parking permits, dealership logos, and window decals, among others. Not only do they spoil the aesthetics of your car, but also pose a challenge when it’s time to sell or repurpose your vehicle.
But fret not! In this guide, we will explore various methods of removing car stickers at home. This is an important process that requires patience, attention to detail, and the right tools to avoid damage to the paint or glass surface of your car.
II. Using a Hairdryer and a Plastic Card
This is a popular method that involves using heat to soften the adhesive of the sticker and a plastic card or scraper to peel it off without causing scratches or marks. Here is how to go about it:
- Start by warming the sticker by directing hot air from the hairdryer over it, moving the dryer back and forth to avoid overheating any specific area.
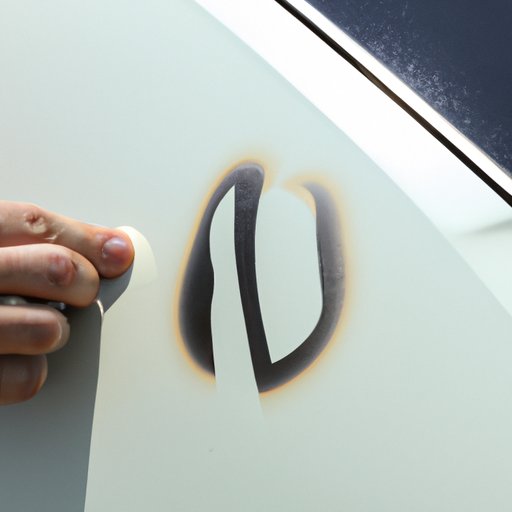
- Once the sticker becomes pliable, use a plastic card to scrape it gently starting from the edges and working your way towards the center in a circular motion. Be patient, and repeat the heating process if the sticker resists peeling off.
- Clean the surface with a soapy solution and a soft, non-abrasive cloth to remove any remaining adhesive residue.
For the best results, avoid using metal scrapers or razor blades as they can cause damage to the surface of your car. Additionally, it is recommended to use mild heat, not to overheat the surface, and to keep the hairdryer at a safe distance to avoid burns.
III. Using Rubbing Alcohol or Vinegar
If you don’t have a hairdryer, don’t worry. Rubbing alcohol or vinegar is an effective alternative. Here’s how to go about it:
- Soak a cloth or sponge in high-percentage isopropyl alcohol or vinegar and apply it directly to the sticker. Let it sit for a few minutes to give the solution time to penetrate the adhesive.
- Use a plastic card to peel off the sticker by starting at the edges and working your way toward the center. If the sticker resists, pour some more alcohol/vinegar on it and repeat the process.
- Clean the surface using soapy water and a soft cloth to remove residual adhesive.
It is essential to note that vinegar and rubbing alcohol should not be used on tinted windows or plastic surfaces as they may cause damage. Additionally, it is recommended to wear gloves, work in a well-ventilated area, and avoid inhaling the fumes.
IV. Using a Heat Gun
A heat gun is another tool you can use to soften the adhesive of a stubborn sticker and facilitate easy removal. Here is a step-by-step guide:
- Plug in the heat gun and adjust it to low heat settings. Be careful not to overheat the surface of your car.
- Hold the heat gun at a distance of about six inches from the sticker and move it back and forth to soften the adhesive.
- Use a plastic scraper or your fingers to remove the sticker from the edges to the center. Apply more heat if needed.
- Clean the surface with a mild detergent and soft cloth to remove any adhesive remains.
When using a heat gun, take safety measures such as wearing gloves and protective eyewear. Avoid using it on plastic or rubber surfaces, and keep it out of reach of children and pets.
V. Using Baking Soda and Hot Water
Baking soda is a natural cleaner that you can use to remove car stickers without damaging your car’s surface. Here’s how:
- Make a solution by mixing warm water and baking soda to form a paste. Apply this paste to the sticker and let it soak for half an hour.
- Use a sponge or brush to scrub the sticker off. For stubborn marks, add some more paste and repeat the process.
- Use warm water to rinse and a soft cloth to dry the surface.
Since baking soda is abrasive, avoid using it on painted surfaces or sensitive areas such as plastic or rubber moldings. Also, it is advisable to test the solution on a small, hidden area before proceeding.
VI. Using Commercial Adhesive Remover
If you have tried all the above methods without success, it’s time to use a commercial adhesive remover. Here’s how:
- Purchase a commercial adhesive remover that is safe for your car’s surface. Ensure that it does not contain harsh chemicals that can damage the paint or glass surfaces.
- Apply the adhesive remover directly to the sticker and surrounding area. Follow the manufacturer’s instructions.
- Peel off the sticker gently, using a plastic scraper, and use a soft cloth to remove any residual adhesive and cleaner solution.
Always wear safety gloves, and work in a well-ventilated area when using commercial adhesive remover. Avoid using it on plastic, rubber, or tinted surfaces as it may cause damage.
VII. Using Tape
Surprisingly, tape can be a quick fix for small and easy-to-peel stickers. Here’s how to use it:
- Cut a piece of tape and fold it lengthwise, making sure the sticky side is exposed.
- Place the tape over the sticker, press it firmly, and then peel it off, ensuring that the sticker comes off with the tape.
- Repeat the process until the sticker is completely removed.
- Clean the surface with soapy water and a soft cloth
While tape is a less messy alternative, it may not work for larger or more stubborn stickers. Additionally, avoid using duct tape, as it may leave residue behind.
VIII. Using a Homemade Solution of Olive Oil and Dish Soap
You can also prepare a natural solution of olive oil and dish soap to remove car stickers. Follow these steps:
- Mix equal parts of olive oil and dish soap in a bowl, stir, and apply the solution to the sticker.
- Allow it to soak for an hour or so to soften the adhesive.
- Peel off the sticker with a plastic scraper or your fingers, using warm water to rinse off any remaining adhesive.
This method is gentle, natural and affordable. However, it may not work for larger or more stubborn stickers, and excess solution may damage the paint or glass surface.
IX. Conclusion
In conclusion, removing car stickers at home is a simple task as long as you use the right tools, follow the correct procedures, and observe safety precautions. A range of methods such as using a hairdryer and a plastic card or rubbing alcohol and vinegar can do the job. So whether you want to rebrand your car or give it a new look, you can try these methods and find what works best for you.
However, it is important to note that different methods are suitable for different surfaces, and it’s essential to conduct a patch test before proceeding with the whole area. If unsure about the best method to use, seek advice from a professional who can guide you on the most suitable approach for your car.
(Note: Is this article not meeting your expectations? Do you have knowledge or insights to share? Unlock new opportunities and expand your reach by joining our authors team. Click Registration to join us and share your expertise with our readers.)