Introduction
A weed eater is a power tool used to trim grass and weeds around the lawn or garden. It is composed of two main parts: a motor and a cutting head. The cutting head contains a spool of string that rotates at a high speed, cutting grass and weeds as it spins. Installing the proper type and length of string is essential for the optimal performance of the weed eater.
Step-by-Step Guide to Installing Weed Eater String
Installing weed eater string can seem daunting, but with the right steps and materials it can be done quickly and easily. Here is a step-by-step guide to installing weed eater string.
Materials Needed
Before beginning, make sure you have all the necessary materials on hand. You’ll need a spool of weed eater string in the correct size and shape for your weed eater, a pair of scissors, and a Phillips head screwdriver.
Step One: Prepare the Weed Eater
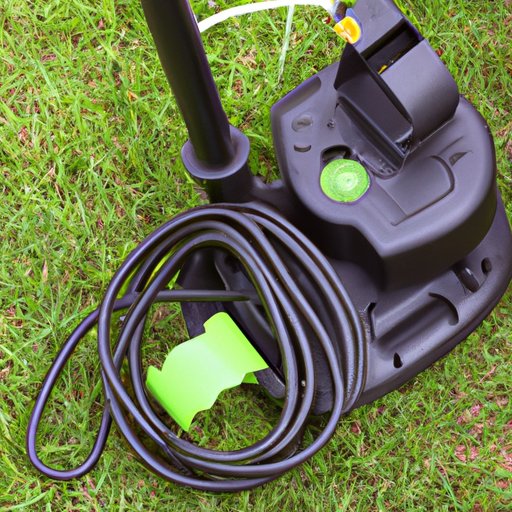
The first step is to prepare the weed eater for installation of the string. Make sure the weed eater is turned off and unplugged. Remove the cutting head from the weed eater by unscrewing the screws with the Phillips head screwdriver. Once the cutting head is removed, you should see a spool inside.
Step Two: Measure and Cut the String
Measure the length of the string needed for your weed eater and cut it accordingly. Most weed eaters require about 15 feet of string. Cut the string at an angle to create a sharp tip for easier threading.
Step Three: Thread the String Through the Weed Eater
Thread the string through the eyelet in the center of the spool. Make sure the string is tight and secure before continuing.
Step Four: Secure the String
Once the string is threaded, wrap it around the spool several times. Make sure the string is tight and secure before reattaching the cutting head to the weed eater.

How to Replace the String on Your Weed Eater
If the string on your weed eater has become worn or frayed, it’s time to replace it. Here are the steps for replacing the string on your weed eater.
Step One: Remove the Old String
The first step is to remove the old string from the spool. Pull the string out of the eyelet and unwrap it from the spool. Discard the old string.
Step Two: Install the New String
Measure and cut the new string according to the instructions in the Step-by-Step Guide to Installing Weed Eater String section. Thread the new string through the eyelet and wrap it around the spool several times. Make sure the string is tight and secure.
Step Three: Secure the New String
Once the new string is installed, reattach the cutting head to the weed eater. Make sure the string is secure before turning the weed eater on.
A Beginner’s Guide to Installing Weed Eater String
Installing weed eater string can seem intimidating, especially for those who are new to the task. Here are some tips for installing weed eater string.
What You Need to Know Before Getting Started
Before beginning the process, make sure you know what type and size of string is required for your weed eater. Different types of weed eaters require different types of string, so it’s important to get the right one. Additionally, most weed eaters require about 15 feet of string.
Tips for Installing Weed Eater String
When installing the string, make sure it is tight and secure. If the string is too loose, it won’t cut properly. Additionally, make sure to cut the string at an angle to create a sharp tip for easier threading. Finally, make sure the cutting head is securely attached to the weed eater before turning it on.

Visual Guide to Installing Weed Eater String
For those who prefer visual guides, here is a step-by-step diagram for installing weed eater string. This diagram outlines the steps for preparing the weed eater, measuring and cutting the string, threading the string, and securing the string.
Step-by-Step Diagrams
The diagrams below provide a visual guide to installing weed eater string. Following these steps will ensure that the string is installed correctly and securely.
Tips for Troubleshooting
If you encounter any issues while installing the string, double check that the string is tight and secure. Additionally, make sure the cutting head is securely attached to the weed eater before turning it on.

Quick and Easy Steps to Installing Weed Eater String
Installing weed eater string doesn’t have to be complicated. Here are the quick and easy steps for installing weed eater string.
Preparing the Weed Eater
Make sure the weed eater is turned off and unplugged. Remove the cutting head from the weed eater by unscrewing the screws with the Phillips head screwdriver. Once the cutting head is removed, you should see a spool inside.
Cutting the String
Measure the length of the string needed for your weed eater and cut it accordingly. Most weed eaters require about 15 feet of string. Cut the string at an angle to create a sharp tip for easier threading.
Threading the String
Thread the string through the eyelet in the center of the spool. Make sure the string is tight and secure before continuing.
Securing the String
Once the string is threaded, wrap it around the spool several times. Make sure the string is tight and secure before reattaching the cutting head to the weed eater.
Troubleshooting Tips for Installing Weed Eater String
Sometimes, installing weed eater string can be tricky. Here are some common problems and solutions for troubleshooting.
Common Problems and Solutions
If the string is too loose, it won’t cut properly. Make sure the string is tight and secure. Additionally, make sure the cutting head is securely attached to the weed eater before turning it on. If you encounter any other issues, refer to the Visual Guide to Installing Weed Eater String section for step-by-step diagrams.
Tips for Avoiding Issues
To avoid any issues, make sure you use the proper type and size of string for your weed eater. Additionally, make sure to cut the string at an angle to create a sharp tip for easier threading. Finally, make sure the string is tight and secure before reattaching the cutting head to the weed eater.
Conclusion
Installing weed eater string can seem daunting, but with the right steps and materials it can be done quickly and easily. This article provided a comprehensive step-by-step guide to installing weed eater string, including tips for beginners and troubleshooting.
(Note: Is this article not meeting your expectations? Do you have knowledge or insights to share? Unlock new opportunities and expand your reach by joining our authors team. Click Registration to join us and share your expertise with our readers.)