Introduction
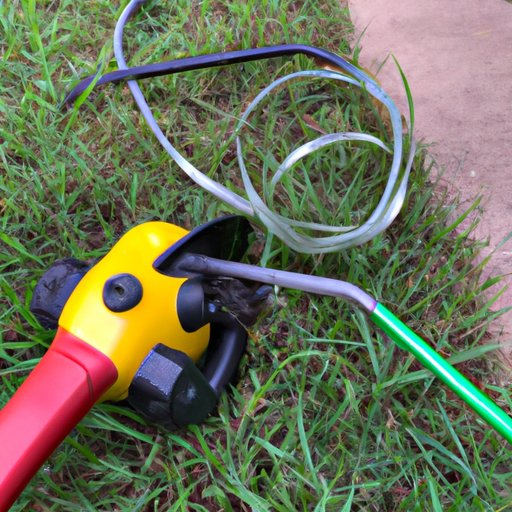
A weed eater, also known as a string trimmer or a grass trimmer, is a tool used to trim grass in hard-to-reach areas. It has a long shaft that houses a motor and a cutting head at the end. The cutting head spins a piece of plastic line that cuts through the grass and weeds. It’s important to know how to put line in a weed eater so you can keep your yard looking neat and tidy.
Step-by-Step Guide: How to Put Line in a Weed Eater
Putting line in a weed eater isn’t difficult, but it does require patience and attention to detail. Here are the steps you need to take to properly install line in a weed eater:
Preparing the Weed Eater
The first step is to prepare the weed eater for the new line. Unplug the weed eater from its power source and turn it over. Remove the cutting head by unscrewing the knob on the bottom. Then, remove the old line from the cutting head and discard it.
Installing the Line
Once the old line has been removed, it’s time to install the new line. Start by threading one end of the line through the hole in the cutting head. Make sure the line is securely attached and won’t come loose. Then, wind the line around the spool until there’s an equal amount of line on each side.
Cutting the Line
Once the line has been installed, use a pair of scissors or a utility knife to cut the line to the correct length. The line should be slightly longer than the cutting head so it doesn’t get tangled up when it’s spinning. You may want to mark the line with a marker to make it easier to cut it evenly.
Securing the Line
The final step is to secure the line to the cutting head. This is done by wrapping the line around the spool several times and then tying it off. Once the line is secure, reattach the cutting head to the weed eater and plug it in. Now you’re ready to start trimming your lawn!
A Beginner’s Guide to Replacing the Line in a Weed Eater
If you’re new to using a weed eater, it’s important to understand the basics of how they work. Knowing the different parts of the weed eater and what they do will help you put line in the weed eater correctly. Here are some things to keep in mind when replacing the line in a weed eater:
Understanding the Parts of the Weed Eater
The most important part of the weed eater is the cutting head, which is located at the end of the shaft. This is where the plastic line is attached. There is also a knob on the bottom that is used to secure the cutting head in place. On the side of the cutting head, there is a small hole where the line is threaded through.
Selecting the Right Line
When selecting the line for your weed eater, it’s important to choose the right type. There are two main types of line: round and square. Round line is more durable and better for heavy-duty jobs, while square line is better for lighter, more precise trimming. Choose the type that best suits your needs.
Choosing the Correct Size Line
The size of the line is also important. Most weed eaters require 0.080″ or 0.095″ line. Make sure you check the manual of your weed eater to determine the correct size line for your model.

Quick Tips for Installing Line in a Weed Eater
When installing line in a weed eater, it’s important to take proper safety precautions. Here are a few quick tips to keep in mind:
Wear Safety Gear
When working with a weed eater, it’s important to wear safety gear such as gloves, goggles, and long pants. This will protect you from any flying debris and ensure that you don’t get injured while working.
Use the Right Tools
Using the wrong tools can damage the weed eater or cause injury. Make sure you have the right tools on hand before you start working on the weed eater. A pair of scissors or a utility knife is all you need to cut the line.
Check Your Work Regularly
Finally, it’s important to check your work regularly. Make sure the line is securely attached and the cutting head is tightened properly. If the line is loose or the cutting head is not secured, it could cause injury or damage to the weed eater.
How to Change the Line on a Weed Eater in Minutes
Changing the line on a weed eater is easy if you know what you’re doing. Here’s a quick guide to help you get the job done in minutes:
Finding the Right Line
First, you need to find the right line for your weed eater. Check the manual to see what type of line is recommended for your model. Once you’ve found the right line, you can move on to the next step.
Prepping the Weed Eater
Next, unplug the weed eater and turn it over. Remove the cutting head and discard the old line. Make sure the hole in the cutting head is clear before installing the new line.
Installing the Line
Thread one end of the line through the hole in the cutting head. Wind the line around the spool evenly and then tie it off. Reattach the cutting head to the weed eater and plug it in.

Get Your Yard Ready: How to Easily Put Line in a Weed Eater
Now that you know how to put line in a weed eater, you can get your yard ready for the summer. Here’s a quick guide to help you get the job done quickly and easily:
Gather the Necessary Supplies
Before you start, make sure you have all the necessary supplies on hand, such as the right type of line, scissors or a utility knife, and safety gear. This will make the process much smoother.
Cut the Line
Once you have the supplies, it’s time to cut the line. Cut the line to the correct length and make sure the ends are even. Mark the line with a marker to make it easier to see.
Secure the Line
Now it’s time to secure the line to the cutting head. Wrap the line around the spool several times and tie it off. Reattach the cutting head to the weed eater and plug it in. Now you’re ready to start trimming your lawn!
Conclusion
Putting line in a weed eater is a simple task if you know what you’re doing. With the right supplies and a little bit of patience, you can quickly get your weed eater ready for the summer. Just remember to wear safety gear, use the right tools, and check your work regularly to ensure that your weed eater is in top condition.
(Note: Is this article not meeting your expectations? Do you have knowledge or insights to share? Unlock new opportunities and expand your reach by joining our authors team. Click Registration to join us and share your expertise with our readers.)