Introduction
You’ve worked hard to restore your classic car, but now it’s time to give it a fresh coat of paint. While it may seem daunting, painting your classic car at home can be a rewarding and cost-effective way to achieve a great look. In this article, we’ll guide you through the steps to achieve a professional-quality job. We’ll cover preparation, equipment, common mistakes to avoid, choosing the right paint, and more.
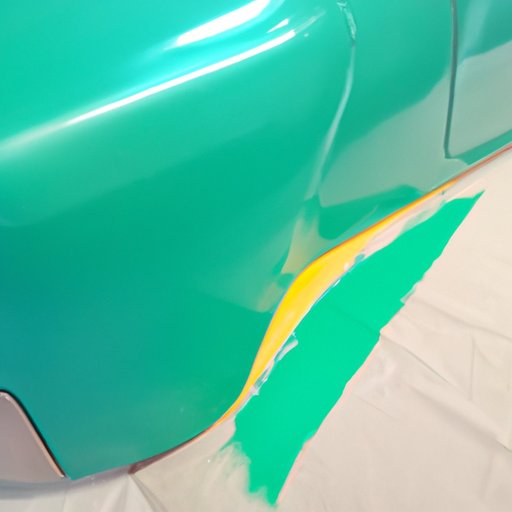
DIY Guide: How to Paint Your Classic Car at Home
Preparation: How to Get the Car Ready for Painting
Before starting your painting project, it’s essential to prepare the car. Start by removing all parts you don’t want painted, such as windows, mirrors, lights. Ensure that the surface is clean and dry before painting. A common mistake is to forget to mask off areas before painting. Use tape and paper to mask off areas that don’t need to be painted.
Equipment: What Equipment You’ll Need and How to Use It
You’ll need to gather a range of equipment for your painting project. This includes sandpaper, masking tape, paint, primer, paint gun, and compressor. Make sure you choose the right type of paint for your car, and that you test it before applying it to the entire car.
Painting: Tips and Tricks for Applying the Paint Correctly
When painting your car, spray in a back and forth motion and overlap each stroke to prevent streaking. Always start with the underside of the hood and the trunk, and then move to the roof and side panels. Make sure to pay attention to the details, such as door handles and side mirrors. Apply the paint in thin, even coats.
Achieving a Professional Finish: How to Make Your Paint Job Look Like It Was Done by a Pro
You’ve completed the first few steps in this guide, but achieving success with a paint job takes practice and patience. Learning how to paint requires you to invest time. Once the painting is complete and you are happy with the outcome, let the car dry for a day or two and apply two coats of clear coat. This will give your new paint job added protection.
Avoid These Common Mistakes When Painting Your Classic Car at Home
Improper Equipment: What Equipment to Avoid and What to Use Instead
One common mistake is using subpar equipment. Instead of using low-grade paint, invest in quality paint, as well as a compressor and paint gun. This will save you time and money in the long run. Additionally, you should avoid using an airbrush, as it can cause an uneven finish.
Not taking Time to Properly Prepare the Car: How to Avoid Damaging Your Car
A common painting mistake is not taking the time to properly prepare the car for painting. This can result in a poor quality finish and even damage your car’s body. Take time to properly prep your car by cleaning it thoroughly and sanding it down.
Solutions for Common Problems: How to Fix Drips, Streaks, and Other Issues
If you encounter drips or streaks, here are a few tips to help you resolve the issue. First, avoid making sudden stops while spraying. Spray in a continuous motion. If you spray gloss on top of a patch of uneven primer or paint, then it can cause ripples and create an uneven surface. It is best to sand the surface again to create a level surface.
The Pros and Cons of Painting Your Classic Car at Home
Benefits of DIY Painting
One of the biggest benefits of DIY painting is the cost savings compared to a professional paint job. You’ll also be able to make choices about the finish and texture of your paint job and have full control over the process.
Drawbacks of DIY Painting
With a DIY painting job, there is always a higher chance of making a mistake. It takes time, patience, and practice to get it right. If you make a mistake on your car’s finish, it can be costly to fix. Additionally, quality equipment can be expensive
Advice for Those Who Opt to Do It Themselves
If you are ready to take on the challenge of painting your classic car, here is our advice. Start with a smaller project first to get some practice. Invest in quality equipment, and don’t rush the process. Follow industry guidelines, and you’ll have a car that looks like it was done by a pro.
Choosing the Right Paint for Your Classic Car: A Comprehensive Guide
Matching the Original Color: How to Find the Right Color Paint
When selecting the right paint for your car, you need to consider the original color. Consult with a paint professional to find the right color or consider doing online research. You can also get help from customer service representatives who will help match the paint to your car manufacturer.
Selecting the Right Type of Paint: Enamel vs. Acrylic vs. Urethane
After determining the color, you can move on to selecting the type of paint. The common types of paint include enamel, acrylic, and urethane. Enamel is durable but it will fade faster than acrylic and urethane. Acrylic bonds better to metal and is more resistant to rust. Urethane is a newer formula that provides a durable finish and is great for an overall coat. Make sure you consult with a professional to determine the best option for your car.
Storing and Handling Paint: Tips for Keeping Your Paint Fresh and Safe
Finally, once you have purchased the paint, you need to consider how you will store and handle it. Be aware that excessive heat or cold can damage the paint, so keep it in a cool, dark area. Be sure to mix the paint before use, storing it properly, and being careful that it doesn’t cause any accidents.
Before You Paint: Steps for Properly Preparing Your Classic Car
Cleaning the Car: How to Clean Your Car Properly Before Painting
Cleaning the car thoroughly is one of the most important steps when preparing your classic car for painting. Before cleaning the car, be mindful and always use gloves, wear protective clothing, and eyewear. Clean the surface of your car’s exterior with a pressure washer. Washing the surface will help remove any debris, grime, grease or other loose materials from your car exterior.
Sanding the Car: How to Sand the Car Without Damaging It
Sanding your car’s surface will help to smooth out rough patches, and it also makes it easier for the paint to adhere to the car’s metal surface. Use a fine-grit sandpaper and be careful not to sand too much, which could damage your car’s paint finish.
Filling in Dents and Scratches: Tips for Using Filler and Avoiding Mistakes
If you notice any dents or scratches, fill them in using a filler. Make sure to allow the filler to dry completely before sanding it down. This will help to ensure a smoother surface. Use a fine grit sandpaper to sand the entire surface. Avoid using aggressive sandpaper, which can harm the surface. Finish by washing and drying the surface before painting.
Conclusion
Recap of the Topics Covered
In this article, we’ve covered everything you need to know to paint your classic car at home. We’ve discussed preparation, equipment, tips for achieving a professional finish, common mistakes to avoid, the pros and cons of DIY painting, choosing the right paint and how to prepare your car to be painted.
Final Thoughts and Advice for Readers Who Want to Paint Their Classic Car at Home
Painting your classic car at home can be a fun and rewarding project if you do it right. Practice makes perfect, invest in quality equipment, and be patient. Following the tips and instructions in this article will help ensure your project is a success.
(Note: Is this article not meeting your expectations? Do you have knowledge or insights to share? Unlock new opportunities and expand your reach by joining our authors team. Click Registration to join us and share your expertise with our readers.)