Introduction
Wella toner is one of the most popular choices among hair colorists and DIY enthusiasts alike. It offers a variety of shades and tones, allowing you to achieve a unique look that’s all your own. Whether you’re looking to make subtle changes or bold transformations, Wella toner can help you get the results you desire. But before you start mixing and applying, it’s important to understand the basics of Wella toner and how to use it properly.
Overview of Wella Toner and its Benefits
Wella toner is a type of semi-permanent dye used to add a hint of color to the hair while also neutralizing unwanted tones. It works by depositing pigments onto the hair shaft, allowing you to change the overall shade without having to bleach or lighten the hair first. Wella toners come in a wide range of shades, ranging from cool ash to warm golden. This makes them ideal for creating custom blends and adjusting existing colors.
In addition to being easy to use, Wella toners are also incredibly versatile. They can be used to enhance natural tones, reduce brassiness, or completely transform your look. Plus, because they don’t require any pre-lightening, they’re ideal for those who want to avoid damaging their hair with harsh chemicals.
Description of the Problem
Despite its many benefits, Wella toner can be tricky to use. The key to achieving the best possible results lies in getting the mix just right. Too little toner can leave your hair looking dull and lifeless, while too much can lead to an overly dark or brassy finish. That’s why it’s important to know exactly how to mix Wella toner correctly. Fortunately, with a few simple steps, you can easily master the art of mixing Wella toner.
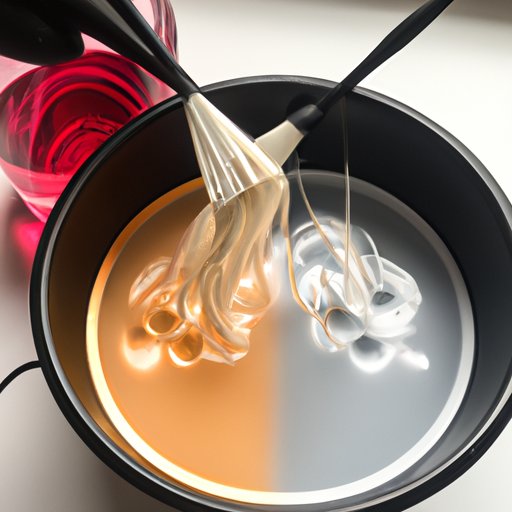
Step-by-Step Guide to Mixing Wella Toner
Mixing Wella toner is easier than you might think. Follow these steps for perfectly blended results every time:
Gather Supplies
Before you begin, make sure you have everything you need. You’ll need a bowl, a brush, gloves, a pair of scissors, and of course, your Wella toner. Most Wella toners come with instructions on how much developer to use, but if not, use a 10-volume developer.
Measure Out Toners
Once you’ve gathered your supplies, measure out the toner into the bowl. Start with a small amount – usually about a quarter of the bottle – and gradually add more until you reach your desired shade. Be sure to mix the toner thoroughly after each addition.
Mix Properly
Mixing the toner is an important part of the process. Use the brush to blend the toner and developer together until you reach a smooth, creamy consistency. Be sure to scrape down the sides of the bowl to ensure everything is well blended.
Apply to Hair
Once you’ve achieved the desired consistency, it’s time to apply the toner to your hair. Start at the roots and work your way down, sectioning off your hair as you go. Make sure to cover each strand evenly and avoid leaving any patches. Once you’re done, let the toner sit for the recommended time before rinsing it out.
How to Create Custom Blends with Wella Toner
If you’re feeling adventurous, why not try creating your own custom blends with Wella toner? By combining different shades, you can create a unique look that’s tailored to your individual style. Here are a few tips for creating the perfect blend:
Combining Colors
Start by selecting two or three shades that you like. Be sure to choose colors that complement each other, such as a light ash blonde and a medium golden blonde. Then, measure out equal amounts of each shade into the bowl and mix them together until you reach your desired tone.
Adjusting Strength
Depending on the results you’re looking for, you may need to adjust the strength of the toner. To do this, simply add more or less developer to the mix. For a stronger color, add more developer; for a lighter color, add less. Be sure to mix everything thoroughly before applying.
Tips for Perfectly Mixed Wella Toner Every Time
Mixing Wella toner doesn’t have to be difficult. With a few simple tips, you can easily master the art of creating the perfect blend. Here are a few things to keep in mind:
Use A Bowl and Brush
When mixing Wella toner, it’s important to use the right tools. A bowl and brush will help you achieve a smoother, more even blend. If you don’t have a brush, you can use a spoon or spatula instead.
Wear Gloves
It’s also important to wear gloves when mixing Wella toner. This will protect your hands from the dye and help prevent staining.
Check Color Before Applying
Before applying the toner to your hair, take a moment to check the color. If it’s too light or too dark, adjust the mix accordingly. Once you’re happy with the result, you can go ahead and apply the toner.
The Do’s and Don’ts of Wella Toner Mixing
Mixing Wella toner isn’t complicated, but there are a few things you should keep in mind. Here are some of the do’s and don’ts of mixing Wella toner:
Do Follow the Directions
Be sure to read the instructions on the Wella toner package carefully. This will help you get the best possible results.
Don’t Overmix
Overmixing can cause the toner to become too thick, making it difficult to apply. Be sure to mix just until the toner and developer are fully combined.
Do Test a Strand First
Before applying the toner to your entire head, it’s a good idea to test it on a single strand of hair first. This will allow you to see what the results will look like before committing.

Mastering the Art of Mixing Wella Toner
With practice and patience, anyone can learn to mix Wella toner like a pro. Here are a few tips to help you get started:
Practice Makes Perfect
Like any skill, mixing Wella toner takes practice. Don’t be afraid to experiment and try out different combinations until you find the perfect blend.
Pre-Mix Your Favorite Blends
Once you’ve perfected your favorite mixes, consider pre-mixing them for future use. This will save you time and effort when it comes time to color your hair again.

Achieving Professional Results with Wella Toner
Getting professional-looking results with Wella toner is easier than you might think. All you need are the right products and tools. Here are a few tips to help you get started:
Invest in Quality Products
When it comes to hair coloring, it pays to invest in quality products. Look for high-end brands that use only the best ingredients.
Get the Right Tools
Having the right tools is essential for achieving professional results. Invest in a good bowl and brush, as well as a pair of gloves to protect your hands.

DIY Hair Coloring: Mixing Wella Toner at Home
Mixing Wella toner at home can be a great way to save money and still get salon-quality results. Just remember to follow these safety precautions:
Properly Prepare Hair
Before applying the toner, make sure your hair is properly prepared. Wash and condition your hair, then towel dry it. This will help ensure the toner is evenly applied.
Have a Plan
It’s also important to have a plan before you start mixing. Decide what shade you’re aiming for and measure out the toners accordingly.
Follow Safety Precautions
Finally, always follow safety precautions when using Wella toner. Wear gloves, use a bowl and brush, and never leave the toner on your hair longer than recommended.
Conclusion
Mixing Wella toner is a great way to get salon-quality hair coloring at home. With the right supplies and a bit of practice, you can easily master the art of mixing Wella toner. Remember to measure out the toners carefully, mix properly, and always follow safety precautions. With these tips, you’ll be able to create beautiful, customized looks in no time!
(Note: Is this article not meeting your expectations? Do you have knowledge or insights to share? Unlock new opportunities and expand your reach by joining our authors team. Click Registration to join us and share your expertise with our readers.)