Introduction
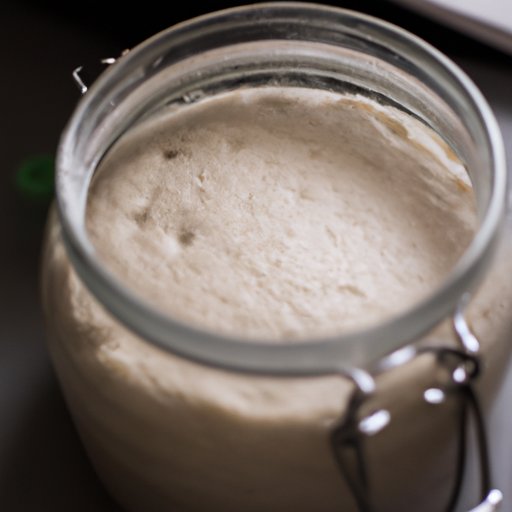
Sourdough starter is a fermented mixture of flour, water, and wild yeast that gives bread its unique flavor and texture. It’s an essential ingredient in baking traditional sourdough bread and can be used as a leavening agent in other types of bread too. Making your own sourdough starter is a great way to get creative in the kitchen and save money on store-bought starters. Plus, it’s a fun and rewarding process that anyone can do.
Step-by-Step Guide to Making Sourdough Starter
Making your own sourdough starter is a simple process that takes time and patience. Here’s a step-by-step guide to help you get started.
Ingredients
You will need:
- Flour (rye or whole wheat)
- Water
Equipment
You will also need:
- A large bowl
- A wooden spoon or spatula
- Cheesecloth or a kitchen towel
- A rubber band
Instructions
Follow these steps to make your own sourdough starter:
- Mix one cup of flour with one cup of warm water in a large bowl. Stir until there are no lumps.
- Cover the bowl with cheesecloth or a kitchen towel and secure it with a rubber band.
- Let the mixture sit at room temperature for 24 hours.
- After 24 hours, add another cup of flour and one cup of warm water to the mixture. Stir until combined.
- Re-cover the bowl with the cheesecloth or kitchen towel and let the mixture sit for another 24 hours.
- Continue adding one cup of flour and one cup of warm water every 24 hours until the mixture starts to bubble and have a sour smell. This usually takes 3-5 days.
- Once the starter is bubbly and smells sour, it is ready to use! Store the starter in an airtight container in the refrigerator.

The Basics of Creating a Sourdough Starter
Creating a sourdough starter is a science. In order to successfully make a starter, you need to understand the basics of fermentation. Fermentation is the process in which bacteria and yeast break down sugars into acids and alcohols, producing carbon dioxide which causes the dough to rise. The bacteria and yeast found in a sourdough starter are known as “wild” because they are naturally occurring in the environment, rather than being added.
There are two main types of starters: liquid and solid. Liquid starters are made with just flour and water and are the most common type. Solid starters are made with flour, water, and additional ingredients such as fruit, vegetables, or honey. Each type of starter has its own unique flavor and texture, so it’s important to experiment and find the one that works best for you.
Tips for Making a Successful Sourdough Starter
Here are some tips to help ensure success when creating a sourdough starter:
- Use filtered or bottled water instead of tap water. Chlorine and other chemicals in tap water can inhibit the growth of the wild yeast.
- Use stone-ground or freshly milled flour. This will provide more nutrients for the yeast and bacteria to feed on.
- Stir the starter twice daily. This helps aerate the mixture and encourages the growth of beneficial bacteria and yeast.
- Discard half of the starter before feeding. This ensures that the starter won’t become too acidic and will stay active.
- Keep the starter at room temperature. Cold temperatures can slow down the fermentation process.
An Easy-to-Follow Recipe for Sourdough Starter
If you’re looking for an easy-to-follow recipe for making sourdough starter, try this one:
Ingredients
- 1 cup all-purpose flour
- 1 cup warm water (105-115°F)
Step-by-Step Instructions
- In a large bowl, combine 1 cup of flour and 1 cup of warm water. Stir until there are no lumps.
- Cover the bowl with cheesecloth or a kitchen towel and secure it with a rubber band.
- Let the mixture sit at room temperature for 24 hours.
- After 24 hours, add another cup of flour and one cup of warm water to the mixture. Stir until combined.
- Re-cover the bowl with the cheesecloth or kitchen towel and let the mixture sit for another 24 hours.
- Continue adding one cup of flour and one cup of warm water every 24 hours until the mixture starts to bubble and have a sour smell. This usually takes 3-5 days.
- Once the starter is bubbly and smells sour, it is ready to use! Store the starter in an airtight container in the refrigerator.

How to Make Sourdough Starter in 8 Simple Steps
Making your own sourdough starter doesn’t have to be complicated. Here’s a simple 8-step guide to help you get started:
Step 1: Gather Your Ingredients
Gather the ingredients you need to make your sourdough starter: flour, water, and a large bowl.
Step 2: Combine the Ingredients
Combine 1 cup of flour and 1 cup of warm water in the large bowl. Stir until there are no lumps.
Step 3: Let the Mixture Sit
Cover the bowl with cheesecloth or a kitchen towel and secure it with a rubber band. Let the mixture sit at room temperature for 24 hours.
Step 4: Stir the Mixture Twice Daily
Twice a day, stir the mixture to aerate it and encourage the growth of beneficial bacteria and yeast.
Step 5: Check for Signs of Fermentation
Check the mixture every day for signs of fermentation. You may notice bubbles forming, a sour smell, or a thicker consistency.
Step 6: Begin Feeding the Starter
Once the starter shows signs of fermentation, begin “feeding” it by adding 1 cup of flour and 1 cup of warm water every 24 hours. Keep stirring the mixture twice a day.
Step 7: Store the Starter
Once the starter is bubbly and smells sour, it is ready to use! Store the starter in an airtight container in the refrigerator.
Step 8: Bake with the Starter
Now you’re ready to start baking with your sourdough starter. Try out different recipes to see what flavors and textures you can create!
Learn the Art of Making Sourdough Starter
Making sourdough starter can be tricky, so don’t be discouraged if you don’t get it right the first time. Here are some tips to help troubleshoot common problems:
- If your starter isn’t bubbling after a few days, check the temperature of the room where it’s sitting. Yeast prefers warmer temperatures, so try moving the starter to a slightly warmer spot.
- If the starter smells overly sour, it means it has gone bad and needs to be discarded. Start over with fresh ingredients.
- If the starter is too watery, it means it hasn’t been fed enough. Add an extra ½ cup of flour and stir.
For more information about making sourdough starter, check out these helpful resources:
- King Arthur Flour’s Guide to Making Sourdough Starter
- The Kitchn’s Guide to Making Sourdough Starter from Scratch
- The Clever Carrot’s All About Sourdough Starter
All You Need to Know About Making Sourdough Starter
Once you’ve mastered the basics of making sourdough starter, there are a few more things to keep in mind. Here are some tips for storing and using sourdough starter:
- Store the starter in an airtight container in the refrigerator. It should last up to two weeks.
- Feed the starter once a week to keep it active. Discard half of the starter before feeding.
- If you plan to bake with the starter, use it within 24 hours of feeding. Otherwise, the starter will become too acidic and won’t produce the desired results.
- If you don’t plan to use the starter for a while, freeze it in an airtight container.

The Best Way to Create a Sourdough Starter from Scratch
If you’re looking for the best way to create a sourdough starter from scratch, try this foolproof method:
Ingredients
- 1 cup all-purpose flour
- 1 cup warm water (105-115°F)
Step-by-Step Instructions
- In a large bowl, combine 1 cup of flour and 1 cup of warm water. Stir until there are no lumps.
- Cover the bowl with cheesecloth or a kitchen towel and secure it with a rubber band.
- Let the mixture sit at room temperature for 24 hours.
- After 24 hours, add another cup of flour and one cup of warm water to the mixture. Stir until combined.
- Re-cover the bowl with the cheesecloth or kitchen towel and let the mixture sit for another 24 hours.
- Continue adding one cup of flour and one cup of warm water every 24 hours until the mixture starts to bubble and have a sour smell. This usually takes 3-5 days.
- Once the starter is bubbly and smells sour, it is ready to use! Store the starter in an airtight container in the refrigerator.
Conclusion
Making your own sourdough starter is a fun and rewarding process. With the right ingredients, equipment, and instructions, you can easily create a delicious and flavorful starter that will take your baking to the next level. Remember to always feed the starter regularly and discard half before feeding to ensure that it stays active.
(Note: Is this article not meeting your expectations? Do you have knowledge or insights to share? Unlock new opportunities and expand your reach by joining our authors team. Click Registration to join us and share your expertise with our readers.)