Introduction
Sourdough bread has become increasingly popular in recent years, due to its unique flavor and health benefits. Unlike other breads, which use commercial yeast, sourdough bread relies on a special type of starter made with flour, water, and wild yeasts. The starter is used to ferment the dough, allowing it to rise without the need for additional yeast.
Not only does using a starter give the bread its signature tangy flavor, but it also increases its nutritional value. According to a study published in the Journal of Agriculture and Food Chemistry, the lactic acid produced during the fermentation process helps break down carbohydrates, making them easier to digest and reducing their glycemic index. As a result, sourdough bread can help regulate blood sugar levels, reduce inflammation, and improve digestion.
Step-by-Step Guide to Making Sourdough Bread from Starter
Making sourdough bread from starter requires patience and attention to detail, but the end result is worth the effort. Here is a step-by-step guide to help you get started.
Ingredients Needed
To make a basic sourdough loaf, you will need the following ingredients:
- ¾ cup of active sourdough starter
- 2 cups of all-purpose flour
- 1 teaspoon of salt
- ¾ cup of warm water
Instructions for Preparing the Starter
Before you can begin making the dough, you need to prepare the starter. To do this, combine ½ cup of flour and ¼ cup of warm water in a bowl and mix until you have a thick, sticky paste. Cover the bowl with a damp towel or plastic wrap and let it sit at room temperature for 12–24 hours. Once the mixture has doubled in size and has a slightly sour smell, it is ready to use.
Instructions for Making the Dough
Once you have prepared the starter, you can begin making the dough. In a large bowl, combine the starter, flour, salt, and warm water. Use your hands to mix everything together until it forms a shaggy dough. Turn the dough out onto a lightly floured surface and knead for 8–10 minutes, adding more flour if necessary. Once the dough is smooth and elastic, shape it into a ball and place it in a lightly greased bowl. Cover the bowl with a damp towel and let it rise for 6–8 hours.
Tips for Shaping and Baking the Loaf
Once the dough has doubled in size, turn it out onto a lightly floured surface and shape it into a round or oval loaf. Place the loaf on a baking sheet lined with parchment paper and cover it with a damp towel. Let it rise for 2–3 hours. Preheat the oven to 450°F and bake the loaf for 30–35 minutes, until it is golden brown and sounds hollow when tapped.
Baking the Perfect Sourdough Loaf with a Starter
Getting the perfect rise and crisp crust is key to making a delicious sourdough loaf. Here are some techniques for achieving these results.
Techniques for Getting the Perfect Rise
The key to getting a light and airy loaf is to ensure that the dough has enough time to rise. To do this, keep the dough in a warm, draft-free area and make sure that it is covered with a damp cloth. You can also try adding a bit of extra flour to the dough for a higher rise.
Tips for Achieving a Crispy Crust
For a perfectly crispy crust, try sprinkling the loaf with a bit of water before baking. You can also create steam in the oven by placing a metal pan filled with hot water on the bottom rack while the loaf is baking. This will help keep the crust crisp and prevent it from becoming soggy.
A Beginner’s Guide to Crafting Sourdough Bread from a Starter
Making sourdough bread from a starter requires knowledge of the fermentation and proofing processes. Here is a beginner’s guide to help you understand the basics.
Understanding the Process of Fermenting and Proofing
Fermenting is the process of allowing the dough to rise with the help of wild yeasts in the starter. This is what gives the bread its signature tangy flavor. Proofing is the process of allowing the shaped loaf to rise before baking. This helps the loaf to develop its structure and texture.
Common Mistakes to Avoid
When making sourdough bread from starter, there are a few common mistakes to avoid. One mistake is over-kneading the dough, which can lead to a dense and heavy loaf. Another is not giving the dough enough time to rise, which can result in a flat and dense loaf. Finally, not preheating the oven can cause the loaf to be undercooked and gummy.

How to Cultivate and Use a Sourdough Starter to Make Bread
Creating and maintaining your own sourdough starter is an important part of making sourdough bread. Here is a guide to help you get started.
Creating Your Own Starter
Creating your own starter is simple and requires just a few ingredients: flour, water, and wild yeasts. To make the starter, combine equal parts flour and warm water in a bowl and mix until you have a thick, sticky paste. Cover the bowl with a damp towel or plastic wrap and let it sit at room temperature for 12–24 hours. Once the mixture has doubled in size and has a slightly sour smell, it is ready to use.
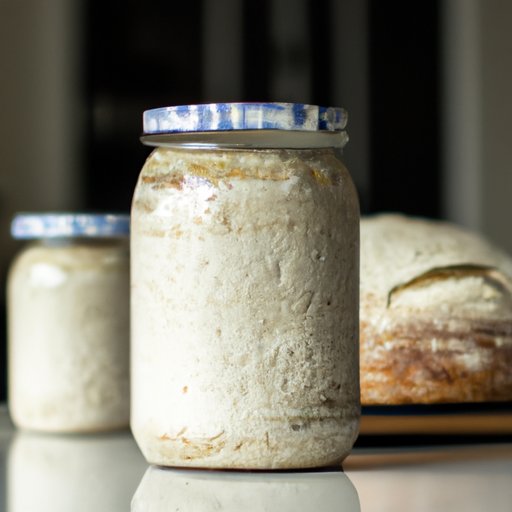
Feeding and Storing Your Starter
Once your starter is ready, you will need to feed it regularly to keep it alive. To do this, add equal parts flour and water to the starter every 12–24 hours and mix until combined. After feeding, store the starter in a jar with a lid and keep it in the refrigerator. It should last for up to six months.

Tips and Tricks for Making Delicious Sourdough Bread with Starter
Once you have mastered the basics of making sourdough bread from starter, there are several tips and tricks you can use to take your loaves to the next level.
Different Methods of Kneading and Shaping Dough
Kneading and shaping the dough is an essential part of the sourdough-making process. For a traditional round or oval loaf, shape the dough into a ball and place it on a baking sheet. For a rustic boule, shape the dough into a tight round and place it in a Dutch oven. Other methods include braiding and weaving the dough into intricate shapes.
Adding Flavors to Your Bread
Adding flavors to your bread is a great way to make it even more delicious. To do this, add herbs, spices, fruits, nuts, and seeds to the dough before shaping it. You can also brush the top of the loaf with olive oil and sprinkle it with salt and herbs for added flavor.

Troubleshooting Common Problems When Making Sourdough Bread from Starter
Despite your best efforts, there may be times when your sourdough loaves don’t come out quite right. Here are some tips for identifying and solving common problems.
Identifying and Solving Common Problems
If your loaves are too dense, the most likely culprit is not enough rising time. If your loaves are too dry, you may have added too much flour. If they are too wet, you may have added too much water. If your loaves are misshapen, you may not have given them enough time to rise before baking.
Strategies for Dealing With Failed Loaves
If you find yourself dealing with failed loaves, don’t despair. Start by identifying the root cause of the problem, then adjust your process accordingly. You can also try adding more liquid or fat to the dough, or increasing the rising time. Finally, don’t be afraid to experiment—you never know what delicious creations you might come up with!
Conclusion
Making sourdough bread from starter is an involved process that requires patience and attention to detail. To get started, prepare the starter, then follow the instructions for making the dough, shaping it, and baking it. With the right techniques, you can achieve a perfect rise and crispy crust. Finally, don’t forget to experiment and have fun—that’s half the fun of making sourdough!
In summary, making sourdough bread from starter requires understanding of the fermentation and proofing process. This article provided a step-by-step guide on how to make the perfect sourdough loaf with tips and tricks for getting the perfect rise and crispy crust, as well as strategies for dealing with failed loaves.
(Note: Is this article not meeting your expectations? Do you have knowledge or insights to share? Unlock new opportunities and expand your reach by joining our authors team. Click Registration to join us and share your expertise with our readers.)