I. Introduction
DIY face masks are becoming increasingly popular as people seek to take control of their skincare routine and limit their exposure to potentially harmful ingredients. Making your own face mask at home is simple, cost-effective, and can be tailored to suit your skin’s specific needs. In this article, we’ll explore the benefits of making your own face masks, provide step-by-step instructions for five easy recipes, offer tips for creating custom masks, and discuss the environmental and cost benefits of DIY skincare.
II. DIY Face Masks for Glowing Skin: 5 Easy Recipes You Can Make at Home
If you’re new to making your own face masks, these five easy recipes are a great place to start:
1. Honey and Oatmeal Mask
This mask is perfect for soothing dry, sensitive skin. Simply mix one tablespoon of honey with one tablespoon of ground oatmeal and one teaspoon of warm water. Apply to your face and leave for 10-15 minutes before rinsing off with warm water.
2. Avocado and Yogurt Mask
This mask is packed with nourishing ingredients that will leave your skin feeling soft and hydrated. Mash half an avocado and mix with one tablespoon of plain yogurt and one teaspoon of honey. Apply to your face and leave for 10-15 minutes before rinsing off with warm water.
3. Turmeric and Yogurt Mask
This mask is great for brightening dull, tired skin. Mix one teaspoon of turmeric powder with two tablespoons of plain yogurt and one teaspoon of honey. Apply to your face and leave for 10-15 minutes before rinsing off with warm water (note: turmeric can stain clothing, so be careful not to get it on your clothes).
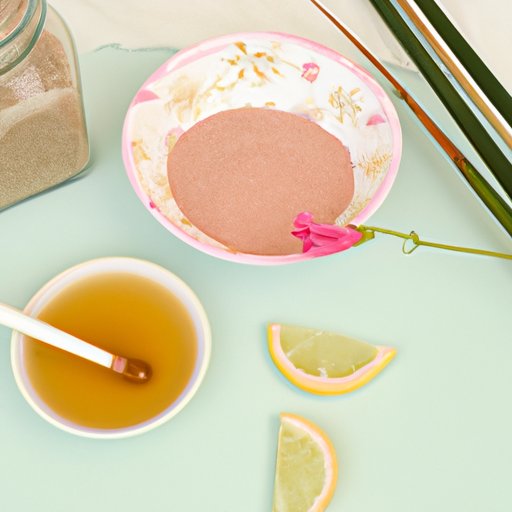
4. Green Tea and Lemon Mask
This mask is perfect for oily or acne-prone skin. Steep one green tea bag in hot water for 3-5 minutes, then remove the tea bag and let the tea cool. Mix the cooled tea with one tablespoon of lemon juice and one tablespoon of honey. Apply to your face and leave for 10-15 minutes before rinsing off with warm water.
5. Banana and Honey Mask
This mask is great for soothing and moisturizing dry, sensitive skin. Mash half a ripe banana and mix with one tablespoon of honey. Apply to your face and leave for 10-15 minutes before rinsing off with warm water.
Remember to always patch test new ingredients before applying them to your entire face, and avoid using any ingredients that you are allergic to.
III. Unlock the Secret to Healthy Skin: Create Your Own Face Mask from Natural Ingredients
Using natural ingredients in your DIY face masks is a great way to nourish your skin without exposing it to potentially harmful synthetic chemicals. Here are some common natural ingredients and their benefits:
- Honey: soothes, moisturizes, and has antibacterial properties
- Oatmeal: calms irritation and exfoliates gently
- Avocado: hydrates and nourishes with healthy fats and antioxidants
- Yogurt: exfoliates and brightens with lactic acid
- Turmeric: brightens and calms inflammation
- Green Tea: soothes and has powerful antioxidants
- Lemon: brightens and helps control oil production
- Banana: moisturizes and contains vitamins and antioxidants
Experiment with combining these ingredients to create your own custom face masks. Here are a few sample recipes to try:
1. Brightening Mask
Mix one tablespoon of plain yogurt, one teaspoon of turmeric, and one teaspoon of honey. Apply to your face and leave for 10-15 minutes before rinsing off with warm water.
2. Soothing Mask
Mix one tablespoon of mashed avocado, one tablespoon of plain yogurt, and one teaspoon of honey. Apply to your face and leave for 10-15 minutes before rinsing off with warm water.
3. Exfoliating Mask
Mix one tablespoon of ground oatmeal, one tablespoon of honey, and one teaspoon of water. Apply to your face and gently massage in a circular motion for 2-3 minutes. Leave on for an additional 5-10 minutes before rinsing off with warm water.
IV. The Ultimate Guide to DIY Face Masks: Tips and Tricks for Perfect Skin
Here are some general tips and tricks for making your own face masks:
- Cleanse your face before applying a mask for best results
- Apply masks to dry skin for better absorption
- Use a brush or your fingers to apply masks, making sure to avoid the eyes and mouth
- Leave masks on for the recommended amount of time (usually 10-15 minutes)
- Rinse off masks with warm water and pat dry
- For best results, use masks 1-2 times per week
There are many different types of face masks available, including clay, sheet, and gel masks. Choosing the right type of mask for your skin type can help you achieve the best results. Clay masks are great for oily or acne-prone skin, sheet masks are hydrating and good for all skin types, and gel masks are soothing and perfect for sensitive skin.
V. Sustainable Skincare: Make Your Own Face Masks with Common Household Ingredients
Making your own face masks can be not only good for your skin, but good for the environment as well. By using common household ingredients, you can reduce waste and avoid buying products in single-use packaging. Here are some common household ingredients that can be used in DIY face masks:
- Coffee grounds: exfoliates and has antioxidant properties
- Baking soda: gently exfoliates and balances pH levels
- Sugar: exfoliates and has humectant properties
- Milk: exfoliates and brightens with lactic acid
- Apple cider vinegar: balances pH levels and has antibacterial properties
- Cocoa powder: brightens and contains antioxidants
- Coconut oil: hydrates and contains healthy fats and antioxidants
Here are a few sample recipes using household ingredients:
1. Exfoliating Mask
Mix one tablespoon of coffee grounds, one teaspoon of milk, and one teaspoon of honey. Apply to your face and gently massage in a circular motion for 2-3 minutes. Leave on for an additional 5-10 minutes before rinsing off with warm water.
2. Hydrating Mask
Mix one tablespoon of coconut oil and one tablespoon of cocoa powder. Apply to your face and leave for 10-15 minutes before rinsing off with warm water.
VI. Why Buy Expensive Face Masks? Learn How to Make Your Own with These 4 Simple Recipes
Making your own face masks is not only good for your skin, it can also save you money. Here are four simple recipes using common ingredients:
1. Soothing Mask
Mix one tablespoon of aloe vera gel and one teaspoon of honey. Apply to your face and leave for 10-15 minutes before rinsing off with warm water.
2. Brightening Mask
Mix one tablespoon of mashed papaya and one teaspoon of lemon juice. Apply to your face and leave for 10-15 minutes before rinsing off with warm water.
3. Clarifying Mask
Mix one tablespoon of bentonite clay and one tablespoon of apple cider vinegar. Apply to your face and leave for 10-15 minutes before rinsing off with warm water.
4. Moisturizing Mask
Mix one tablespoon of mashed banana and one tablespoon of plain yogurt. Apply to your face and leave for 10-15 minutes before rinsing off with warm water.
Compare the cost of making your own face masks to buying commercial products and see the savings for yourself. Making your own face masks can also be a fun and creative way to experiment with different ingredients and take control of your skincare routine.
VII. Transform Your Skincare Routine: Create Customized Face Masks at Home
Creating your own custom face masks can be a great way to target specific skin concerns and tailor your skincare routine to your individual needs. Here are some tips for creating custom masks:
- Identify your skin concerns (e.g. dryness, acne, aging)
- Choose ingredients that target those concerns (see the list of natural ingredients above)
- Mix and match ingredients to create a custom mask
- Adjust ingredient amounts for different skin types (e.g. oily skin may require less oil-based ingredients)
Experimenting with different ingredients and combinations can be a fun way to get creative with your skincare routine. Don’t be afraid to try new things and see what works best for you!
VIII. Conclusion
Making DIY face masks can be a great way to take control of your skincare routine, limit your exposure to harmful ingredients, and save money. By using natural and household ingredients, you can nourish your skin and reduce waste at the same time. Whether you’re a seasoned DIYer or just getting started, there’s a recipe out there for everyone.
(Note: Is this article not meeting your expectations? Do you have knowledge or insights to share? Unlock new opportunities and expand your reach by joining our authors team. Click Registration to join us and share your expertise with our readers.)