Introduction
Starting seeds indoors is a great way to get a jump start on the growing season. But in order to ensure that your seeds have the best chance of germinating and thriving, you need to provide them with the right environment. That means using a quality seed starting mix.
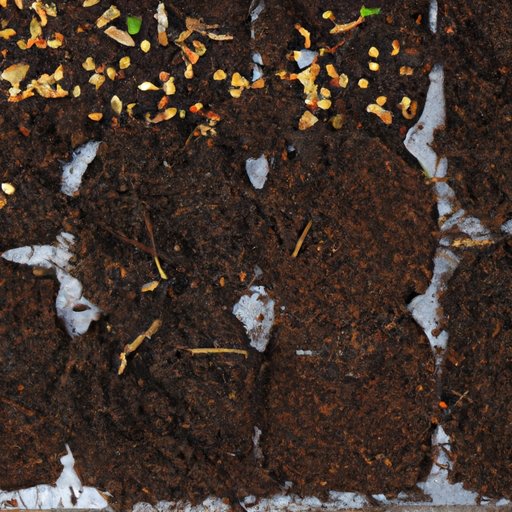
Seed starting mix is a special type of soil designed specifically for growing seeds. It is light and airy, allowing for good drainage and air circulation, and it is usually supplemented with nutrients to help promote seed growth.
But why make your own seed starting mix? Let’s take a look at the pros and cons of doing so.

Pros and Cons of Different Types of Seed Starting Mixes
When it comes to creating your own seed starting mix, there are several options available. Each has its own advantages and disadvantages.
Peat Moss
Peat moss is a popular choice for seed starting mixes due to its light texture and ability to retain water. It also contains trace amounts of nutrients, although these will need to be supplemented. On the downside, peat moss is not sustainable and can be expensive.
Coconut Coir
Coconut coir is a more sustainable alternative to peat moss. It is made from the husks of coconuts and is an excellent source of organic matter. Its light, fluffy texture makes it ideal for seed starting mixes, and it is also a good source of nutrients. The main downside is that it can be difficult to find in some areas.
Vermiculite
Vermiculite is a lightweight, absorbent material made from mica. It helps to retain moisture and keep the mix from becoming waterlogged. It is also relatively inexpensive and easy to find. However, it does not contain any nutrients and can be difficult to work with.
Compost
Compost is another popular option for seed starting mixes. It is rich in organic matter and provides a good source of nutrients. The downside is that it can be difficult to find in some areas, and it can also introduce pests and diseases into the mix.
What Makes a Good Seed Starting Mix
No matter which ingredients you choose to use in your seed starting mix, there are a few key characteristics that all mixes should have in order to give your seeds the best chance of success.
The Right Texture
The texture of the mix is important for good aeration and drainage. The mix should be light and fluffy, allowing for good air circulation and water flow. Avoid mixes that are too dense or too sandy, as these can impede root growth.
Good Drainage
Good drainage is essential for preventing waterlogging and promoting healthy root growth. A good seed starting mix should be able to hold onto some water, but should also allow excess water to drain away easily.
Proper pH Balance
The pH balance of the mix is also important. Most seeds prefer a slightly acidic environment, so aim for a pH between 5.5 and 6.5. Too much acidity or alkalinity can stunt or even kill your seedlings.

Tips for Making Your Own Seed Starting Mix
Making your own seed starting mix can be a fun and rewarding experience. Here are a few tips to help you get started.
Choose the right ingredients
Choosing the right ingredients is key to creating a successful seed starting mix. Aim for a mix that is light and fluffy, with good drainage and the proper pH balance. Also, make sure to choose ingredients that are free from pests and disease.
Measure accurately
Accurate measuring is essential for getting the right proportions of each ingredient. Too much or too little of any one ingredient can throw off the balance of the mix, resulting in poor drainage or incorrect pH levels.
Sanitize the container
Before adding your ingredients to the container, make sure to sanitize it first. This will help to prevent any pests, diseases, or fungus from contaminating the mix.
Benefits of Using Homemade Seed Starting Mix
Using homemade seed starting mix has several benefits over store-bought mixes.
Cost Savings
One of the biggest benefits of making your own mix is cost savings. Store-bought mixes can be expensive, but making your own mix is much cheaper and more cost-effective.
Control Over Ingredients
When you make your own mix, you have complete control over what goes into it. You can choose the exact ingredients and proportions to create a mix tailored to your specific needs.
Eco-Friendly
Homemade mixes are also better for the environment than store-bought mixes. By using locally sourced or recycled materials, you can reduce your environmental footprint and help to preserve natural resources.
Steps Involved in Creating Your Own Seed Starting Mix
Now that you know the basics of creating your own seed starting mix, let’s take a look at the steps involved.
Gather Materials
The first step is to gather the materials you will need. This includes ingredients, containers, and other supplies such as scissors and measuring cups.
Prepare Ingredients
Once you have gathered the materials, it’s time to prepare the ingredients. This may involve chopping, shredding, or sifting, depending on the type of ingredients you are using.
Combine Ingredients
Once the ingredients are prepared, it’s time to combine them. Start by combining the dry ingredients, then add the wet ingredients. Stir or mix until everything is evenly distributed.
Place in Container
Once the mix is ready, it’s time to place it in a container. Use a container that is large enough to accommodate the amount of mix you are making. Make sure that the container has drainage holes for excess water to escape.

Demonstration: How to Make a DIY Seed Starting Mix
Now that you know the steps involved in making your own seed starting mix, let’s take a look at a demonstration. Here’s how to make a simple DIY seed starting mix.
Step-by-Step Instructions
1. Gather your materials. You will need 1 part peat moss, 1 part coconut coir, 1 part vermiculite, and 1 part compost. You will also need a large container with drainage holes.
2. Prepare the ingredients. Chop or shred the peat moss and coconut coir, and sift the vermiculite to remove any lumps.
3. Combine the ingredients. Place the ingredients in a large bowl or container and mix until everything is evenly distributed.
4. Place the mix in the container. Transfer the mix to the container and tap down lightly to remove any air pockets. Water lightly and cover with a lid or plastic wrap.
Tips for Success
Here are a few tips to help ensure that your seed starting mix is successful:
- Make sure to measure accurately, as too much or too little of any one ingredient can throw off the balance of the mix.
- Sanitize the container before adding the mix to prevent contamination.
- Water lightly and cover with a lid or plastic wrap to keep the mix moist during germination.
Conclusion
Making your own seed starting mix is a great way to save money and ensure that your seeds have the best chance of success. With the right ingredients and a bit of patience, you can create a custom mix tailored to your specific needs.
Creating your own seed starting mix involves gathering the materials, preparing the ingredients, combining the ingredients, and placing the mix in a container. To ensure success, make sure to measure accurately, sanitize the container, and water lightly.
By following these steps, you can create a quality seed starting mix that will give your seedlings the best chance of success.
(Note: Is this article not meeting your expectations? Do you have knowledge or insights to share? Unlock new opportunities and expand your reach by joining our authors team. Click Registration to join us and share your expertise with our readers.)