Introduction
High pressure car washers are an essential tool for keeping your vehicle in top condition. They help remove dirt and grime from hard-to-reach places, making it much easier to clean your car. Unfortunately, these powerful machines can be expensive, so many people want to know if it is possible to make their own high pressure car washer at home.
In this article, we will explore how to make a high pressure car washer at home. We will look at the necessary materials and tools, provide step-by-step instructions on how to assemble the parts, discuss how to test the pressure, choose a suitable location for the washer, and offer tips on how to use it safely.

Research the Necessary Materials and Tools
Before you begin building your high pressure car washer, you need to research the necessary materials and tools. This will help you determine what parts you need and where to find them. You may even be able to source some of the materials from your local hardware store.
What You Need to Make a Pressure Washer
The most important thing you will need to make a high pressure car washer is a pump. This is a device that increases the pressure of water coming out of your hose. You will also need a motor to power the pump, a pressure gauge to measure the water pressure, and a hose to connect the pump to the motor.
Sources for Parts and Tools
You can find all of the necessary parts and tools online or at your local hardware store. Be sure to do your research and compare prices before making any purchases. You may also be able to find used parts at a discount. Additionally, you may want to consider buying a kit, which usually includes all of the necessary parts and tools.
Assemble the Parts
Once you have all of the necessary parts and tools, it’s time to start assembling the pressure washer. This process requires patience and precision, as even the smallest mistake can cause the washer to malfunction.
Step-by-Step Instructions
Start by connecting the pump to the motor. Then, attach the pressure gauge to the pump. Next, connect the hose to the pump and the motor. Finally, secure all connections with clamps or bolts. Be sure to double check that everything is firmly connected before proceeding.
Tips for Making Sure Everything Fits Together
When connecting the parts, be sure to read the instructions carefully. If you are unsure about something, don’t hesitate to ask for help. Additionally, take your time when connecting the parts and double check that all connections are tight.
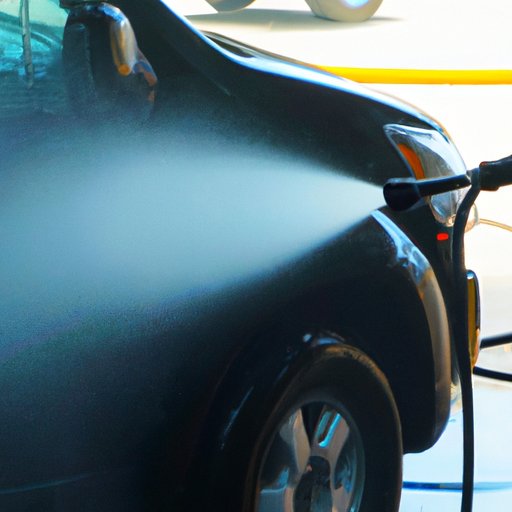
Test the Pressure Washer
Once you have assembled the parts, it’s time to test the pressure washer. This is an important step, as it will reveal any issues with the washer before you begin using it.
Safety Precautions
Before testing the pressure washer, make sure you take all necessary safety precautions. Wear protective clothing, such as goggles, gloves, and long sleeves. Additionally, make sure the area around the washer is clear of debris and other objects.
Testing the Pressure
To ensure the washer is working properly, turn on the water supply and start the motor. Adjust the pressure gauge until it reaches the desired level. Then, turn off the water supply and allow the motor to cool down. Finally, turn off the motor and check the pressure gauge to make sure it is still reading correctly.
Choose a Location for the Washer
Now that the washer is assembled and tested, it’s time to choose a location for it. There are several factors to consider when selecting a spot, such as access to a water source, proximity to electricity, and safety concerns.
Considerations for Placement
When deciding where to place the washer, think about the size of the space and the type of surface it will be placed on. It’s best to choose a flat, even surface that is large enough for the washer and its accessories. Additionally, make sure the washer is placed in a well-ventilated area.
Connecting the Washer to a Water Source
Once you have chosen a suitable spot for the washer, you will need to connect it to a water source. This can be done using a garden hose or a dedicated plumbing line. Make sure the connection is secure and check for leaks before using the washer.

Use the Pressure Washer Safely
Using a high pressure car washer requires caution and care. To ensure your safety, it’s important to follow these tips:
Protective Clothing and Equipment
Always wear protective clothing, such as goggles, gloves, and long sleeves, when using the washer. Additionally, keep a fire extinguisher nearby in case of emergencies.
Tips for Avoiding Damage
Be sure to keep the nozzle at least 12 inches away from the surface you are cleaning. Additionally, start with a low pressure setting and gradually increase the pressure if needed. Finally, avoid aiming the washer directly at windows, mirrors, and electrical components.
Conclusion
Making a high pressure car washer at home is a great way to save money and get a quality cleaning tool. The process involves researching and sourcing the necessary materials and tools, assembling the parts, testing the pressure, choosing a location, and using the washer safely. With patience and attention to detail, you can easily create your own high pressure car washer.
(Note: Is this article not meeting your expectations? Do you have knowledge or insights to share? Unlock new opportunities and expand your reach by joining our authors team. Click Registration to join us and share your expertise with our readers.)