Introduction
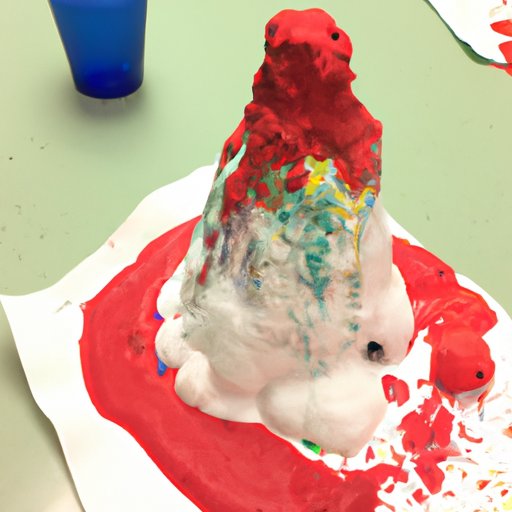
Making a volcano for a science project can be an exciting and educational experience for both children and adults alike. Not only does it provide an opportunity to learn about volcanoes, but it also encourages creativity and imagination when building the model. In order to make a successful volcano, there are a few essential materials and instructions that should be followed.
Overview of the Project
The goal of the project is to create a volcano that will erupt when a chemical reaction occurs. The materials needed to complete the project include: baking soda, vinegar, red food coloring, a container to build the volcano in (such as a large bowl or cupcake tin), a plastic bottle, modeling clay, and sand.
Outline of Materials Needed
- Baking Soda
- Vinegar
- Red Food Coloring
- Container to Build the Volcano In
- Plastic Bottle
- Modeling Clay
- Sand
Step-by-Step Instructions
Once all of the materials have been gathered, it’s time to start building the volcano. Here are the steps to follow:
- Fill the container with sand and shape it into a mountain.
- Cut the bottom off of the plastic bottle and place it upside down in the center of the sand mound.
- Cover the bottle with modeling clay to create the look of a volcano.
- Mix together one cup of baking soda and one tablespoon of red food coloring in a separate bowl.
- Pour the baking soda mixture into the plastic bottle.
- Slowly pour vinegar over the top of the volcano.
- Watch the eruption!
Science Behind Volcanic Eruptions
Before attempting to make a volcano, it is important to understand the science behind a volcanic eruption. A volcanic eruption occurs when molten rock, known as magma, rises up from deep within the Earth’s crust and is expelled through an opening at the surface. This process is often accompanied by lava, ash, and gases.
The eruption of the volcano in the science project is created by a chemical reaction between the baking soda and vinegar. When these two substances combine, they produce carbon dioxide gas which causes pressure to build up inside the bottle. This pressure eventually leads to an eruption, much like what would happen during a real volcanic eruption.
Tips for Making a Realistic Looking Volcano
Once the basic structure of the volcano has been built, it’s time to start thinking about how to make it look more realistic. Here are some tips for making a realistic looking volcano:
- Types of Clay to Use: Air-dry clay or oven-bake clay work best for creating the look of a volcano. Both types of clay can be easily molded into different shapes and colors that will make the volcano look more realistic.
- Color Options for the Volcano: Adding paint or other colorants to the clay can help give the volcano a more realistic look. Try painting the sides of the volcano with shades of brown, orange, and yellow to simulate the look of a real volcano.
- Other Decorations to Make It Look More Realistic: Adding small stones, shells, and other decorations around the base of the volcano can also help give it a more realistic look. To add even more realism, try adding a few drops of vegetable oil to the mix before pouring in the vinegar.

Ideas for Accompanying Experiments and Activities
Once the volcano has been built, there are many experiments and activities that can be done to further explore the science behind it. Here are a few ideas to get started:
- Measuring the Height of the Eruption: Measure the height of the eruption using a ruler or tape measure. Record your results and compare them to previous eruptions.
- Adding Food Coloring to the Lava: Add a few drops of food coloring to the baking soda mixture before pouring it into the bottle. This will create a colorful eruption similar to what you would see during a real volcanic eruption.
- Creating a Mini Landscape Around the Volcano: Create a mini landscape around the volcano using small rocks, shells, and other decorations. This can help give the volcano a more realistic look and feel.
Conclusion
Making a volcano for a science project is a great way to learn about volcanoes and the science behind them. With the right materials and instructions, anyone can create a successful volcano that will erupt when a chemical reaction occurs. By adding paint, decorations, and experiments to the project, it can become even more exciting and educational.
Building a volcano is a fun and rewarding project that encourages creativity and imagination. It also provides an opportunity to learn more about the science behind volcanic eruptions and how they can be simulated with a simple project.
(Note: Is this article not meeting your expectations? Do you have knowledge or insights to share? Unlock new opportunities and expand your reach by joining our authors team. Click Registration to join us and share your expertise with our readers.)
