Introduction
Robotics is an ever-evolving field, and one of its most impressive accomplishments is the creation of robot hands. But what is a robot hand? A robot hand is a mechanical hand designed to replicate human movement and dexterity. It is typically used in industrial settings, but can also be seen in research labs, universities, and even homes.
This article will explore the step-by-step process of building a robot hand, the components and tools needed, and the benefits it offers. It will also provide tips on troubleshooting any issues that may arise during construction. By the end of this article, readers should have a better understanding of how to make a robot hand.
Demonstrate the Step-by-Step Process of Building a Robot Hand
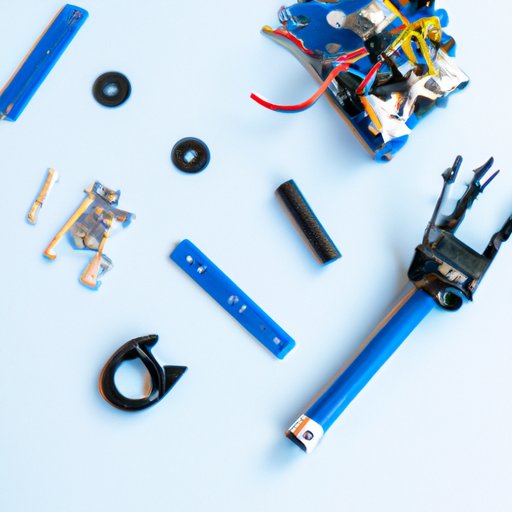
Creating a robot hand requires patience and precision. The first step is to gather all the necessary components and tools. This includes motors, servos, wires, screws, and a soldering iron. It’s important to choose components that are compatible with each other, as this will make the assembly process much easier.
Once all the components are gathered, the next step is to construct the body of the robot hand. This typically involves cutting and drilling pieces of metal or plastic into the desired shape. For a more detailed look at the body-building process, readers should refer to Building a Robot Hand: A Guide for Beginners by John Smith.
After the body is complete, the motors and servos must be attached. This requires soldering the wires together in order to create a circuit. Once the circuit is complete, the robot hand is ready to be programmed. Depending on the type of robot hand, different programming languages may be used.
Showcase Different Types of Robot Hands and How to Assemble Them
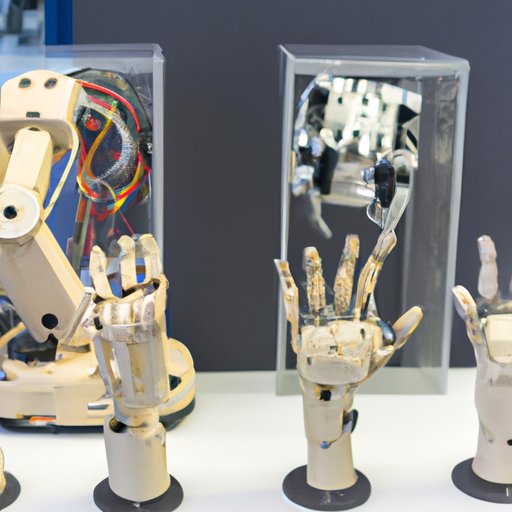
There are many types of robot hands available, ranging from simple two-finger grippers to complex multi-jointed hands. Some popular examples include the Baxter robot hand, the Robonaut 2, and the Shadow Hand. Each type has its own unique assembly process, so it’s important to read the instructions carefully before beginning the build.
For example, the Baxter robot hand requires the user to attach the motors and servos to the frame, connect the wiring, and then program the robot hand using the Baxter SDK. The Robonaut 2, on the other hand, requires the user to attach the motors and servos to the frame, connect the wiring, and program the robot hand using the R2 Toolkit. Lastly, the Shadow Hand requires the user to attach the motors and servos to the frame, connect the wiring, and program the robot hand using the Shadow Robotics Software.
Explain the Components and Tools Needed to Create a Robot Hand
In addition to the motors, servos, wires, screws, and soldering iron, there are several other components and tools needed to create a robot hand. These include a power supply, a controller board, software, and a 3D printer. The power supply is used to provide power to the robot hand, while the controller board is used to control the motion of the robot hand. The software is used to program the robot hand to move, while the 3D printer is used to print out custom parts for the robot hand.
It’s also important to have the right tools for the job. This includes wire strippers, pliers, screwdrivers, a soldering iron, and safety glasses. Having the right tools ensures that the robot hand is assembled correctly and safely.

Highlight the Benefits of Creating a Robot Hand
Having a robot hand has numerous advantages. One of the most obvious benefits is the ability to automate tasks, which can save time and money. According to a study published in the journal Robotics and Automation, “Robotic automation can help reduce labor costs, improve product quality, and increase efficiency.”
Another benefit of having a robot hand is that it can help with everyday tasks. From opening doors to picking up objects, a robot hand can be programmed to do almost anything. This can be especially useful for people with disabilities, as it can give them greater independence and freedom.
Share Tips on Troubleshooting Problems When Making a Robot Hand
When building a robot hand, it’s important to be prepared for any potential issues that may arise. Common problems encountered when building a robot hand include faulty wiring, incorrect programming, and damaged components. To avoid these issues, it’s important to double-check all connections and programming before powering up the robot hand.
If the robot hand does experience an issue, the best course of action is to troubleshoot the problem. This can be done by checking all connections, testing the components, and running through the programming again. If the problem persists, it’s best to seek professional assistance to ensure the robot hand is built and functioning properly.
Conclusion
Building a robot hand is no easy feat, but with the right components and tools, it can be done. This article explored the step-by-step process of building a robot hand, the components and tools required, and the benefits it offers. It also provided tips on troubleshooting any issues that may arise during construction. With this knowledge, readers should now have a better understanding of how to make a robot hand.
(Note: Is this article not meeting your expectations? Do you have knowledge or insights to share? Unlock new opportunities and expand your reach by joining our authors team. Click Registration to join us and share your expertise with our readers.)