Introduction
Knowing how to make a fire starter can be an invaluable skill. Whether you’re camping, hiking, or in an emergency situation, having the ability to start a fire with ease is essential for staying warm and safe. This article will provide step-by-step instructions on how to create five different types of fire starters, as well as showcase the benefits of each.
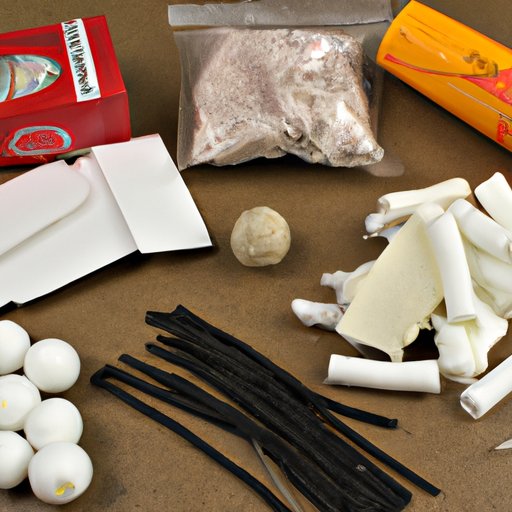
Demonstrate How to Make a Fire Starter Using Cotton Balls and Petroleum Jelly
The first type of fire starter we’ll discuss is one that uses cotton balls and petroleum jelly. This method is straightforward and requires only two materials. Here’s what you need to do:
- Gather materials: You’ll need a handful of cotton balls and some petroleum jelly.
- Prepare the cotton balls: Separate the cotton fibers so that they are fluffy. This will help the fire starter catch fire more easily.
- Apply the petroleum jelly: Smear the petroleum jelly onto the cotton ball until it is completely covered.
- Light the fire starter: Place the petroleum-coated cotton ball near your kindling and ignite it with a match or lighter. The petroleum jelly should cause the cotton ball to burn for several minutes, giving you enough time to get your fire going.
Create an Easy DIY Fire Starter with Dryer Lint, Egg Cartons and Wax
This next method is perfect for those who want to make their own fire starters at home. It utilizes items you likely already have, such as dryer lint and egg cartons. Here’s how to do it:
- Gather materials: You’ll need dryer lint, egg cartons and wax (either candle wax or paraffin wax).
- Place lint into egg carton cups: Fill each cup of the egg carton with dryer lint. Make sure to pack it in tightly.
- Melt wax: Melt the wax in a double boiler or in the microwave. If you’re using the microwave, stir the wax every 30 seconds.
- Pour wax over lint: Once the wax is melted, pour it over the lint in the egg carton cups. Make sure to cover the lint completely.
- Light the fire starter: Allow the wax to cool and harden before attempting to light the fire starter. To ignite it, simply strike a match or use a lighter. The lint should burn for several minutes, giving you enough time to get your fire going.
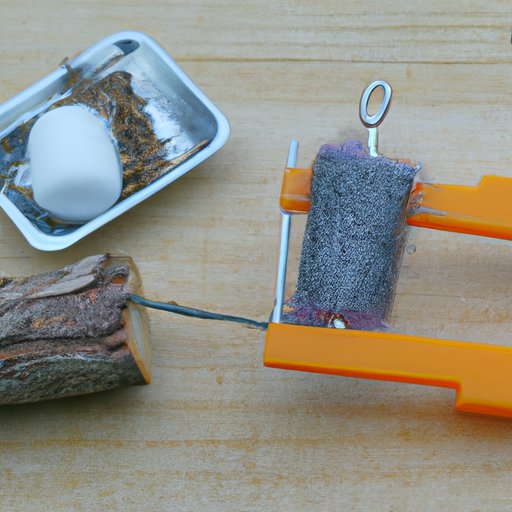
Learn How to Make an Emergency Fire Starter with Magnesium and Steel Wool
This method is great for emergency situations where you may not have access to traditional fire starting materials. All you need is a bit of magnesium and some steel wool. Here’s what you need to do:
- Gather materials: You’ll need a small container, some magnesium shavings, and some steel wool.
- Create magnesium shavings: Using a knife, shave off small pieces of magnesium and place them in a pile. You don’t need much – just enough to fill up your container.
- Stuff steel wool into container: Take the steel wool and stuff it into the container. Make sure to push it down so that there are no gaps.
- Add magnesium shavings to container: Sprinkle the magnesium shavings on top of the steel wool. This will help the fire starter to ignite more easily.
- Light the fire starter: To light the fire starter, use a match or lighter to ignite the magnesium shavings. The steel wool should then catch fire and burn for several minutes, giving you enough time to get your fire going.
Step-by-Step Guide to Making a Fire Starter with Wood Shavings and Charcoal
Another great option for making a fire starter is to use wood shavings and charcoal. This method requires a bit more work than the others, but it’s worth it. Here’s what you need to do:
- Gather materials: You’ll need a small container, some wood shavings, and some charcoal.
- Prepare the wood shavings: Using a knife, shave off thin strips of wood and place them in a pile. You don’t need much – just enough to fill up your container.
- Place charcoal in container: Take the charcoal and place it in the bottom of the container. Make sure to pack it down so that there are no gaps.
- Pack wood shavings around charcoal: Pack the wood shavings around the charcoal. Make sure to leave some space between the wood shavings and the charcoal so that air can flow through.
- Light the fire starter: To light the fire starter, use a match or lighter to ignite the charcoal. The wood shavings should then catch fire and burn for several minutes, giving you enough time to get your fire going.
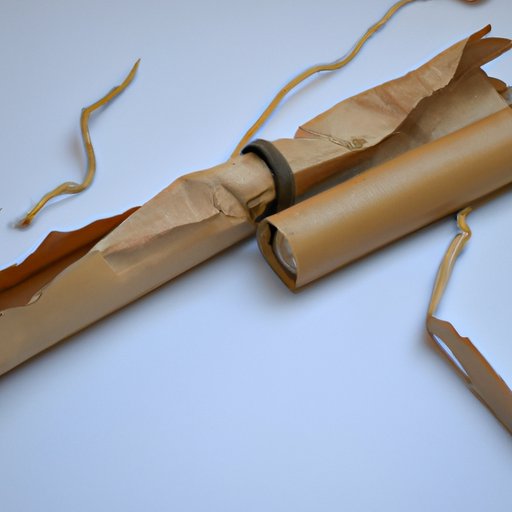
Showcase the Benefits of Using a Fire Starter Made from Cardboard Tubes and Waxed Paper
The last type of fire starter we’ll discuss is one that uses cardboard tubes and waxed paper. This method is easy to make and can be stored for a long time. Here’s how to do it:
- Gather materials: You’ll need a cardboard tube, some waxed paper, and a match or lighter.
- Cut waxed paper into strips: Cut the waxed paper into thin strips and place them inside the cardboard tube.
- Fill cardboard tube with waxed paper strips: Stuff the waxed paper strips into the cardboard tube. Make sure to pack it in tightly so that there are no gaps.
- Ignite the waxed paper: To ignite the waxed paper, use a match or lighter to set it alight. The waxed paper should burn for several minutes, giving you enough time to get your fire going.
- Light the fire starter: Once the waxed paper has burned down, light the fire starter with a match or lighter. The cardboard tube should burn for several minutes, giving you enough time to get your fire going.
Conclusion
In this article, we discussed five different ways to make a fire starter. We demonstrated how to make a fire starter using cotton balls and petroleum jelly, dryer lint and wax, magnesium and steel wool, wood shavings and charcoal, and cardboard tubes and waxed paper. Each of these methods has its own advantages, and knowing how to make a fire starter can be an invaluable skill in many situations.
(Note: Is this article not meeting your expectations? Do you have knowledge or insights to share? Unlock new opportunities and expand your reach by joining our authors team. Click Registration to join us and share your expertise with our readers.)