Introduction
Jump starting a motorcycle is a skill that every rider should know how to do. It can be a lifesaver when your battery dies or if you run out of fuel in the middle of nowhere. Knowing how to jump start a motorcycle can save you time, money, and hassle when your bike won’t start.
To jump start a motorcycle, you need a donor vehicle with a working battery and a set of jumper cables. The process involves connecting the donor vehicle’s battery to the dead motorcycle battery via the jumper cables. After the connection is made, the donor vehicle’s battery will provide enough power to start the motorcycle.
Check the Motorcycle’s Fuel Level
Before you attempt to jump start the motorcycle, make sure that there is enough fuel in the tank. If the fuel level is too low, the engine won’t have enough power to start. Check the fuel gauge or dipstick to determine the fuel level.
If the fuel level is too low, fill up the tank before proceeding with the jump start. Also, make sure that you know where the fuel cutoff switch is located. This switch is usually located near the fuel tank and it needs to be turned on for the motorcycle to start.
Inspect the Battery
The next step is to inspect the battery. Make sure that the battery is charged by using a multimeter to check the voltage. If the battery is not charged, you will need to charge it before attempting to jump start the motorcycle.
Also, look for any signs of corrosion on the battery terminals. If there is corrosion present, clean it off using baking soda and water. Once the terminals are clean, you can proceed with charging the battery.
Charge the Battery
To charge the battery, use an automotive battery charger. Connect the charger to the battery and turn it on. Monitor the charging process as it can take several hours to fully charge the battery.
Once the battery is charged, disconnect the charger and move on to the next step.
Connect the Jumper Cables
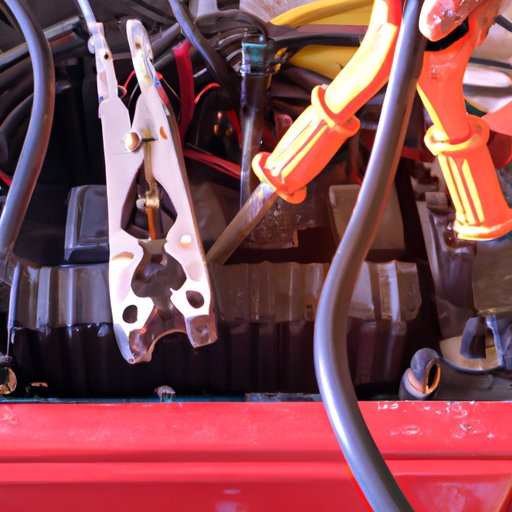
Now it’s time to connect the jumper cables. Attach one end of the cable to the donor vehicle’s battery and the other end to the dead motorcycle battery. Make sure that the clamps are connected securely.
Start the Donor Vehicle
Once the connection is made, start the donor vehicle and let it run for several minutes. This will allow the donor vehicle’s battery to charge the dead motorcycle battery.
Make sure that the donor vehicle is running smoothly before proceeding to the next step.
Start the Motorcycle
Now it’s time to start the motorcycle. Turn on the ignition switch and give the motorcycle gas. If the engine starts, you’re good to go.
Disconnect the Jumper Cables
Once the motorcycle is running, it’s important to disconnect the jumper cables in the right order. Remove the cable from the donor vehicle first, then remove the cable from the motorcycle second.
Conclusion
Knowing how to jump start a motorcycle can save you time, money, and hassle when your bike won’t start. The process involves connecting the donor vehicle’s battery to the dead motorcycle battery via the jumper cables. After the connection is made, the donor vehicle’s battery will provide enough power to start the motorcycle.
By following these simple steps, you can jump start your motorcycle in no time. With this knowledge, you’ll never have to worry about being stranded with a dead battery again.
(Note: Is this article not meeting your expectations? Do you have knowledge or insights to share? Unlock new opportunities and expand your reach by joining our authors team. Click Registration to join us and share your expertise with our readers.)