Introduction
Installing plumbing fittings can be a tricky endeavor. With so many options available on the market, it can be difficult to know which type of fitting is best for your needs. One popular option is SharkBite fittings, which are designed for quick and easy installation. In this article, we’ll explore what SharkBite fittings are, the benefits of using them, and how to install them safely and effectively.
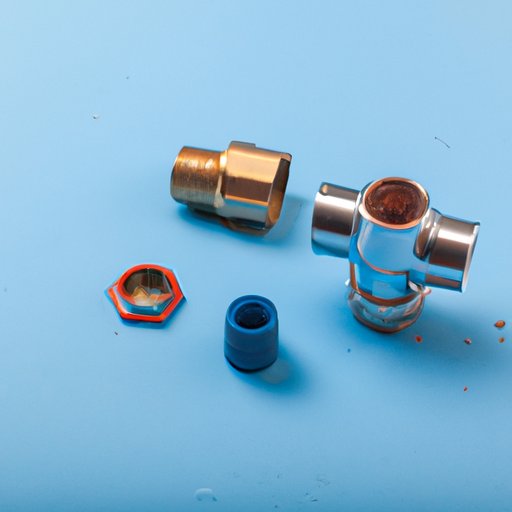
What are SharkBite Fittings?
SharkBite fittings are quick-connect fittings designed for use with copper, CPVC, and PEX pipes. They feature a push-fit design, which allows you to simply push the fitting onto the pipe without any special tools or solder. This makes them ideal for DIY projects, as they can be installed quickly and easily without the need for a professional plumber.
Benefits of Installing SharkBite Fittings
There are several benefits to using SharkBite fittings. First and foremost, they are incredibly easy to install, making them perfect for DIYers who don’t want to waste time trying to figure out how to solder or crimp fittings. Additionally, SharkBite fittings create a secure and leak-proof connection, meaning there’s no need to worry about water damage or other issues caused by leaking pipes.
In addition, SharkBite fittings are designed to be compatible with most plumbing materials, including copper, CPVC, and PEX. This means that you can create a reliable connection between different types of pipes without having to use multiple fittings.
Finally, research has shown that SharkBite fittings have a significantly lower failure rate than other types of fittings. According to one study, SharkBite fittings had a failure rate of just 0.14%, while other types of fittings had a failure rate of up to 5%.1 This makes them an ideal choice for reliable and long-lasting plumbing installations.
Step-by-Step Guide to Installing SharkBite Fittings
Installing SharkBite fittings is relatively straightforward. Here’s a step-by-step guide to help you get started:
Preparing the Pipes
Before you begin, you’ll need to ensure that both the fitting and the pipe are properly prepared. This means cutting the pipe to the correct size and deburring the edges to remove any sharp burrs. This will help ensure a secure and leak-proof connection.
Attaching the Fitting
Once the pipe is prepped, you’re ready to attach the fitting. Simply insert the fitting onto the end of the pipe, then press down firmly until it clicks into place. This should create a secure and watertight connection.
Testing the Seal
It’s important to test the seal before using the fitting. To do this, turn on the water and check for any leaks or drips. If there are any, make sure to tighten the fitting and test again. Once you’ve confirmed that the seal is tight and secure, you’re ready to go.
A Beginner’s Guide to Installing SharkBite Fittings
If you’re new to plumbing, installing SharkBite fittings can seem intimidating. However, with the right tools and knowledge, it’s actually quite easy. Here’s a beginner’s guide to help get you started:
Types of SharkBite Fittings
SharkBite fittings come in a variety of sizes and styles. The most common type is the straight coupling, which is used to connect two pieces of pipe together. Other types include elbow fittings, tee fittings, and adapters.
Tools Needed for Installation
Depending on the type of fitting you’re installing, you may need additional tools. For instance, if you’re installing an elbow fitting, you’ll need a pipe cutter, a deburring tool, and a wrench. Make sure to have all the necessary tools on hand before you begin.
Safety Tips
As with any plumbing project, it’s important to take safety precautions. Make sure to wear protective gloves and glasses when working with pipes and fittings, and always remember to turn off the water supply before you start. Also, be sure to follow the manufacturer’s instructions for installation and testing.
How to Easily Install SharkBite Fittings in 5 Steps
Installing SharkBite fittings doesn’t have to be complicated. Here’s a five-step guide to help you get started:
Step 1: Select the Right Fitting
The first step is to select the right fitting for your needs. Make sure to measure the pipe carefully and select a fitting that’s the correct size and type for the job.
Step 2: Cut and Deburr the Pipe
Next, use a pipe cutter to cut the pipe to the desired length, then use a deburring tool to remove any sharp edges. This will help ensure a secure and watertight connection.
Step 3: Lubricate the Fitting and Pipe
To help the fitting slide on easily, apply a small amount of lubricant to the inside of the fitting and the end of the pipe. This will also help create a tighter seal.
Step 4: Push the Fitting onto the Pipe
Once you’ve applied the lubricant, you’re ready to attach the fitting. Simply push the fitting onto the end of the pipe until it clicks into place. This should create a secure and watertight connection.
Step 5: Test the Seal
Finally, it’s important to test the seal before using the fitting. Turn on the water and check for any leaks or drips. If there are any, make sure to tighten the fitting and test again. Once you’ve confirmed that the seal is tight and secure, you’re ready to go.
Installing SharkBite Fittings: What You Need to Know
When it comes to installing SharkBite fittings, there are a few key points to keep in mind. Here’s what you need to know:
Choosing the Right Size Fitting
One of the most important steps in installing SharkBite fittings is choosing the right size. Make sure to measure the pipe carefully and select a fitting that’s the correct size and type for the job. This will help ensure a secure and leak-proof connection.
Installing SharkBite Fittings with Other Plumbing Materials
SharkBite fittings are designed to be compatible with most plumbing materials, including copper, CPVC, and PEX. This means that you can create a reliable connection between different types of pipes without having to use multiple fittings.
Common Mistakes to Avoid
When installing SharkBite fittings, it’s important to avoid common mistakes. Make sure to read and follow the manufacturer’s instructions, and always wear protective gloves and glasses when working with pipes and fittings. Additionally, remember to turn off the water supply before you start and test the seal after installation.

The Complete Guide to Installing SharkBite Fittings
Installing SharkBite fittings doesn’t have to be a daunting task. With the right tools and knowledge, you can easily install SharkBite fittings in just a few simple steps. Here’s a complete guide to help you get started:
Sizing SharkBite Fittings
The first step is to select the right size fitting for your needs. Make sure to measure the pipe carefully and select a fitting that’s the correct size and type for the job. This will help ensure a secure and leak-proof connection.
Identifying the Right Fitting
SharkBite fittings come in a variety of sizes and styles. The most common type is the straight coupling, which is used to connect two pieces of pipe together. Other types include elbow fittings, tee fittings, and adapters.
Installing SharkBite Fittings
Once you’ve selected the right fitting, you’re ready to install it. Start by cutting the pipe to the desired length and deburring the edges to remove any sharp burrs. Next, apply a small amount of lubricant to the inside of the fitting and the end of the pipe. Finally, push the fitting onto the end of the pipe until it clicks into place. Once the connection is secure, turn on the water and check for any leaks or drips.

How to Quickly and Safely Install SharkBite Fittings
Installing SharkBite fittings can be done quickly and safely with the right tools and knowledge. Here’s a step-by-step guide to help you get started:
Preparing the Area
Before you begin, make sure to prepare the area by turning off the water supply and gathering the necessary tools. This will help ensure a safe and efficient installation.
Applying the Fitting
Once the area is prepared, you’re ready to apply the fitting. Make sure to cut the pipe to the correct size and deburr the edges. Then, apply a small amount of lubricant to the inside of the fitting and the end of the pipe. Finally, push the fitting onto the end of the pipe until it clicks into place.
Testing the Seal
It’s important to test the seal before using the fitting. Turn on the water and check for any leaks or drips. If there are any, make sure to tighten the fitting and test again. Once you’ve confirmed that the seal is tight and secure, you’re ready to go.

DIY Installation of SharkBite Fittings in 10 Minutes or Less
Installing SharkBite fittings doesn’t have to take a long time. With the right tools and knowledge, you can easily install SharkBite fittings in 10 minutes or less. Here’s what you need to do:
Gather Necessary Supplies
Before you begin, make sure to gather all the necessary supplies. This includes the fitting, pipe, lubricant, pipe cutter, and deburring tool. Having these items on hand will help ensure a quick and efficient installation.
Prepare the Pipe
Next, use a pipe cutter to cut the pipe to the desired length, then use a deburring tool to remove any sharp edges. This will help ensure a secure and watertight connection.
Attach the Fitting
Once the pipe is prepped, you’re ready to attach the fitting. Simply insert the fitting onto the end of the pipe, then press down firmly until it clicks into place. This should create a secure and watertight connection.
Test the Seal
Finally, it’s important to test the seal before using the fitting. Turn on the water and check for any leaks or drips. If there are any, make sure to tighten the fitting and test again. Once you’ve confirmed that the seal is tight and secure, you’re ready to go.
Conclusion
Installing SharkBite fittings can be a simple and straightforward process. With the right tools and knowledge, you can easily install SharkBite fittings in just a few steps. Make sure to measure the pipe carefully, apply lubricant to the fitting and pipe, and test the seal after installation. With these tips, you’ll be able to install SharkBite fittings quickly and safely.
For more information on installing SharkBite fittings, be sure to visit the SharkBite website or consult a professional plumber.
(Note: Is this article not meeting your expectations? Do you have knowledge or insights to share? Unlock new opportunities and expand your reach by joining our authors team. Click Registration to join us and share your expertise with our readers.)