Introduction
Installing compression fittings is a common task for plumbers and DIYers alike. It’s an important skill to have, as it can be used to replace leaky pipes or connect new plumbing fixtures. But before you start installing your own compression fittings, it’s important to understand what they are and why they’re beneficial.
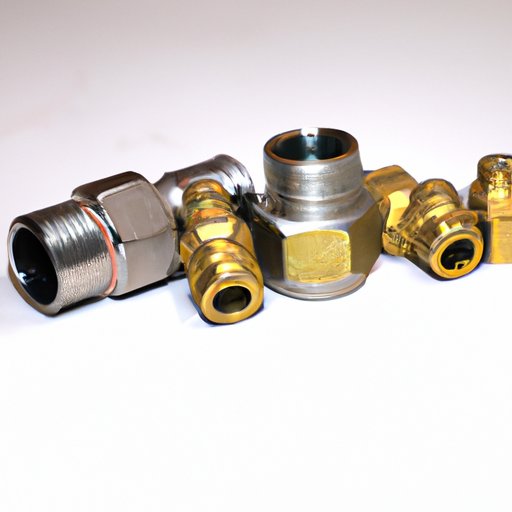
What is a Compression Fitting?
A compression fitting is a type of pipe fitting that uses rings of metal to create a tight seal between two pieces of pipe. This type of fitting is ideal for connecting pipes made from different materials, such as copper and plastic, as well as for repairing small leaks in existing plumbing lines.
Benefits of Installing a Compression Fitting
Installing a compression fitting has several benefits over other types of fittings. For one, it’s easy to install without special tools or expertise. Another benefit is that it’s very durable and can withstand high pressure. Finally, it’s very versatile and can be used in a wide variety of applications.
Step-by-Step Guide to Installing a Compression Fitting
Installing a compression fitting is a relatively simple process that requires few tools. Here’s a step-by-step guide to help you get started.
Gather the Materials Needed
Before you begin, make sure you have all the necessary supplies. These include the compression fitting, a wrench, thread sealant, and plumber’s tape.
Prepare the Pipe for Installation
The next step is to prepare the pipe for installation. Start by cleaning the pipe with a rag and then measuring to make sure the fitting will fit properly.
Apply Thread Sealant
Once the pipe is ready, it’s time to apply the thread sealant. This helps to ensure a tight seal and prevent leaks. Apply the sealant liberally to the threads of the fitting.
Connect the Compression Fitting
Now it’s time to connect the compression fitting to the pipe. Start by aligning the fitting with the pipe, then gently insert the fitting into the pipe.
Tighten the Fitting
Once the fitting is inserted, use a wrench to tighten the fitting securely. Be careful not to overtighten, as this could damage the pipe or the fitting.
Test for Leaks
Finally, it’s time to test for leaks. Turn on the water and check for any leaks around the fitting. If you do find any leaks, turn off the water and tighten the fitting again.
A Beginner’s Guide to Installing Compression Fittings
If you’re new to installing compression fittings, there are a few key points to keep in mind. Here’s a quick guide to help you get started.
Types of Compression Fittings
There are many different types of compression fittings available. The most common type is the slip-on fitting, which is easy to install and can be used with both plastic and metal pipes. There are also threaded compression fittings, which require more expertise but provide a stronger connection.
Common Mistakes to Avoid
When installing compression fittings, there are a few common mistakes to avoid. Make sure you measure the pipe correctly and don’t overtighten the fitting. It’s also important to apply thread sealant to the fitting to ensure a tight seal.
How to Measure for the Correct Size Fitting
It’s important to measure the pipe accurately so that the fitting fits properly. To do this, measure the outside diameter of the pipe and then compare it to the size of the fitting. Make sure to double-check your measurements before purchasing the fitting.

Installing Compression Fittings: What You Need To Know
Installing compression fittings is a relatively straightforward process, but there are a few essential tips to keep in mind. Here’s what you need to know.
Choosing the Right Tools
The right tools are essential for a successful installation. Make sure you have a wrench, thread sealant, and plumber’s tape on hand. It’s also important to select the correct size fitting for the pipe.
Understanding Compression Fitting Sizes
When selecting a fitting, it’s important to understand the sizing conventions. Most compression fittings are labeled with their inside diameter (ID) and outside diameter (OD). Make sure to measure the pipe correctly before purchasing the fitting.
Knowing When to Use Plumber’s Tape
Plumber’s tape can be used to help ensure a tight seal on the fitting. It’s especially important to use when connecting plastic pipes, as these can be prone to leaking. Make sure to wrap the tape tightly around the fitting before inserting it into the pipe.
How to Install a Compression Fitting: A Comprehensive Guide
Installing a compression fitting is a relatively simple process, but there are a few steps to follow to ensure a successful installation. Here’s a comprehensive guide to get you started.
Assembling the Fitting
Start by assembling the fitting according to the manufacturer’s instructions. This usually involves inserting the compression nut onto the fitting body and then securing it with the compression ring.
Cleaning and Preparing the Pipe
Next, clean the pipe with a rag to remove any dirt or debris. Make sure to measure the pipe to ensure the fitting will fit properly.
Applying Thread Sealant
Once the pipe is ready, it’s time to apply the thread sealant. This helps to ensure a tight seal and prevent leaks. Apply the sealant liberally to the threads of the fitting.
Inserting the Fitting into the Pipe
Now it’s time to insert the fitting into the pipe. Start by aligning the fitting with the pipe, then gently insert the fitting into the pipe.
Tightening the Fitting
Once the fitting is inserted, use a wrench to tighten the fitting securely. Be careful not to overtighten, as this could damage the pipe or the fitting.

The Basics of Installing a Compression Fitting
Installing a compression fitting is a relatively simple process, but there are a few basics to keep in mind. Here’s a quick guide to get you started.
Selecting the Right Fitting
Make sure to select the correct size fitting for the pipe. Most compression fittings are labeled with their inside diameter (ID) and outside diameter (OD).
Making Sure You Have the Right Tools
The right tools are essential for a successful installation. Make sure you have a wrench, thread sealant, and plumber’s tape on hand.
Cleaning and Preparing the Pipe
Start by cleaning the pipe with a rag and then measuring to make sure the fitting will fit properly.
Installing the Fitting
Once the pipe is ready, it’s time to apply the thread sealant and insert the fitting into the pipe. Then, use a wrench to tighten the fitting securely.

A Detailed Guide to Installing a Compression Fitting
Installing a compression fitting is a relatively straightforward process, but there are a few extra steps to take to ensure a successful installation. Here’s a detailed guide to help you out.
Safety Tips
Before you begin, make sure you’re wearing protective gear such as gloves, eye protection, and a dust mask. Also, make sure the area is well-ventilated to prevent fumes from building up.
Measuring for the Correct Size Fitting
It’s important to measure the pipe accurately so that the fitting fits properly. To do this, measure the outside diameter of the pipe and then compare it to the size of the fitting. Make sure to double-check your measurements before purchasing the fitting.
Applying Thread Sealant
Once the pipe is ready, it’s time to apply the thread sealant. This helps to ensure a tight seal and prevent leaks. Apply the sealant liberally to the threads of the fitting.
Connecting the Fitting
Now it’s time to connect the compression fitting to the pipe. Start by aligning the fitting with the pipe, then gently insert the fitting into the pipe.
Testing for Leaks
Finally, it’s time to test for leaks. Turn on the water and check for any leaks around the fitting. If you do find any leaks, turn off the water and tighten the fitting again.
Conclusion
Installing a compression fitting is a relatively simple process, but there are a few key steps to follow to ensure a successful installation. Make sure to gather the necessary supplies, prepare the pipe for installation, apply thread sealant, insert the fitting, and then test for leaks. With the right tools and knowledge, you can easily install a compression fitting on your own.
(Note: Is this article not meeting your expectations? Do you have knowledge or insights to share? Unlock new opportunities and expand your reach by joining our authors team. Click Registration to join us and share your expertise with our readers.)