Introduction
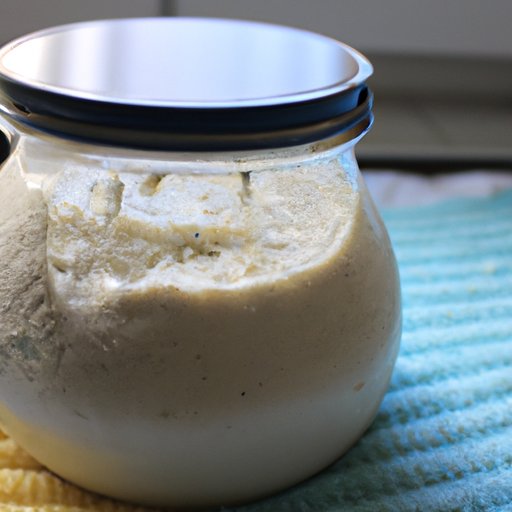
A sourdough starter is a living culture of wild yeast and bacteria that is used to make traditional sourdough bread. It takes patience and care to maintain a healthy starter, but it can be incredibly rewarding when done correctly. This article will provide an in-depth look at how to feed a sourdough starter and offer helpful tips and recipes for making delicious sourdough breads.

Preparing and Feeding a Sourdough Starter
In order to feed a sourdough starter, you’ll need to understand the ingredients needed and establish the right environment for feeding. Here’s a step-by-step guide to get you started:

The Basics of Feeding a Sourdough Starter
Before you start feeding your starter, there are a few key factors to consider. What type of flour and water will you use? Different flours have different levels of protein, which can affect the health of the starter. You’ll also need to consider the temperature and humidity levels in your kitchen. If the air is too dry, the starter may not thrive. Finally, you’ll need to decide how often you want to feed the starter. Generally speaking, it should be fed every 12-24 hours.
Step-by-Step Guide to Feeding a Sourdough Starter
Once you’ve chosen the right ingredients and established the right environment for feeding, you’re ready to begin. Here’s a step-by-step guide to help you get started:
Step 1: Measure out the ingredients. You’ll need equal parts of flour and water (e.g., 1 cup of flour and 1 cup of water). Make sure to use filtered or distilled water, as tap water can contain chlorine or other chemicals that can inhibit the growth of the starter.
Step 2: Mix the ingredients together. Using a wooden spoon or spatula, mix the flour and water together until they are completely combined. Try to avoid over-mixing, as this can cause the starter to become too dense.
Step 3: Cover the bowl with a lid or cloth. Once the ingredients are mixed, cover the bowl with a lid or cloth. This will help keep the starter from drying out.
Step 4: Let the starter sit for 12-24 hours. During this time, the starter will begin to ferment and activate. Keep an eye on it and make sure it doesn’t dry out or become overly active.
Step 5: Discard some of the starter. After 12-24 hours, you’ll need to discard some of the starter (about half). This will help keep the starter from becoming too acidic.
Step 6: Feed the remaining starter. Add equal parts of flour and water to the remaining starter and mix until combined. Then cover the bowl and let it sit for another 12-24 hours before using it.
How to Maintain a Healthy, Active Sourdough Starter
Maintaining a healthy, active starter is key to successful sourdough baking. Here are some tips for keeping your starter in tip-top shape:
Temperature and humidity levels. The ideal temperature for a sourdough starter is between 70-80 degrees Fahrenheit. Too cold and the starter won’t activate; too hot and it will become too active. Humidity levels should also be monitored, as too much humidity can cause mold to grow on the starter.
Keeping the starter in an airtight container. An airtight container is essential for keeping the starter fresh. This will help keep oxygen and moisture levels balanced, which is important for the health of the starter.
Feeding the starter regularly. To ensure a healthy starter, it’s important to feed it regularly. Generally speaking, it should be fed every 12-24 hours.

Tips for Troubleshooting Common Problems with Sourdough Starters
Sometimes, even with the best care, problems can arise with sourdough starters. Here are some tips for troubleshooting common issues:
Noticing a difference in smell or texture. If you notice a difference in smell or texture, it could be a sign that the starter is no longer active. To fix this, discard some of the starter and feed it with equal parts of flour and water.
Noticing a decrease in activity. This can happen if the starter isn’t fed regularly. To fix this, discard some of the starter and feed it with equal parts of flour and water.
Noticing mold on the starter. If you notice mold on the starter, discard it immediately and start over. Be sure to monitor humidity levels and keep the starter in an airtight container to prevent mold growth.
Recipes for Delicious Sourdough Breads Using Your Starter
Now that your starter is up and running, it’s time to put it to good use! Here are some delicious recipes for sourdough breads:
Classic Sourdough Bread. This classic recipe is perfect for beginner bakers. With just four ingredients and a few simple steps, you can make a delicious loaf of sourdough bread.
Sourdough Pizza Dough. This easy recipe yields a crisp, chewy crust that is perfect for pizza night. Just mix the ingredients together, let the dough rise, and bake for a delicious homemade pizza.
Sourdough Pancakes. These fluffy pancakes are made with sourdough starter and are sure to be a hit with the whole family. Top them with fresh fruit and a dollop of whipped cream for an extra special treat.
Conclusion
Feeding a sourdough starter correctly is essential for successful sourdough baking. By following this step-by-step guide and understanding the basics of feeding, you can easily maintain a healthy, active starter. Use your starter to make delicious sourdough breads like classic sourdough bread, sourdough pizza dough, and sourdough pancakes.
(Note: Is this article not meeting your expectations? Do you have knowledge or insights to share? Unlock new opportunities and expand your reach by joining our authors team. Click Registration to join us and share your expertise with our readers.)