Introduction
For many people, drawing a well may seem like an intimidating task. But with the right tools and techniques, it can be surprisingly easy. In this article, we’ll explore the basics of drawing a well, from basic shapes to adding details and depth. We’ll also look at tips and tricks for creating a realistic 3D drawing, using shading techniques and adding color and perspective.
Definition of “Well”
A well is an excavation in the ground made for the purpose of extracting water or other underground resources. Wells can range in size from small hand-dug wells to large industrial wells. They are usually circular in shape and can be found in rural and urban areas alike.
Overview of Different Types of Wells
There are several different types of wells, each with its own unique characteristics. Hand-dug wells are the simplest type of well and involve digging a shallow hole in the ground. Borehole wells are deeper wells that involve drilling into the ground with a machine. Artesian wells involve tapping into underground aquifers and can provide a steady supply of water. And finally, there are also mechanized wells, which use pumps and motors to draw water up from the ground.
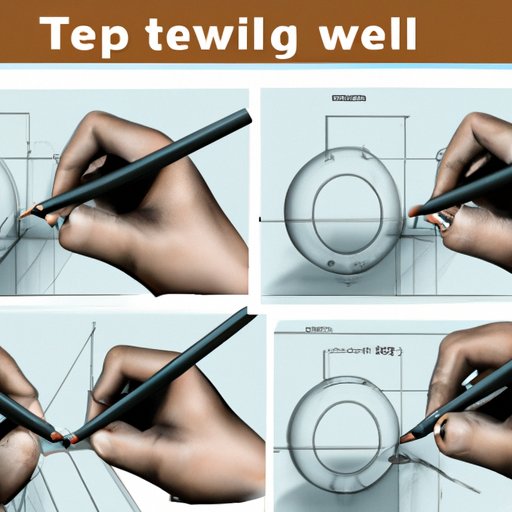
Step-by-Step Guide to Drawing a Well
Now that you have a better understanding of what a well is and the different types of wells, let’s take a look at how to draw one. Follow these steps to create your own realistic well drawing.
Basic Shapes
The first step to drawing a well is to sketch out the basic shapes. Start by drawing a circle for the well opening and then add a few vertical lines to represent the walls of the well. Finally, draw a horizontal line across the top of the well to represent the well cap. This will form the basic structure of your well.
Adding Details
Once you have the basic structure of the well in place, it’s time to start adding details. You can add bricks or stones to the walls of the well, as well as ropes or buckets to the inside of the well. You can also add a ladder or other objects to make the well more interesting.
Creating Depth and Realism
To make your well drawing look more realistic, you’ll need to add some depth and shadow. Start by adding a few curved lines to the bottom of the well to give it the illusion of being deeper. Then add some shadows around the edges of the well to give it a more 3D effect. Finally, you can add highlights to certain areas to create the illusion of light reflecting off the surface of the well.

Tips and Tricks for Drawing Realistic Wells
Now that you know the basics of drawing a well, here are a few tips and tricks to help you create a more realistic drawing.
Use Reference Photos
Using reference photos is a great way to get some inspiration and ideas for your drawing. Take a look at some photos of real wells and use them as a guide for your drawing. This will help you get a better sense of the details and proportions of a well.
Observe the Light Sources
When drawing a well, it’s important to pay attention to the light sources. Look at where the light is coming from and how it affects the shadows and highlights of the well. This will help you create a more realistic drawing.
Add Shadows and Highlights
Shadows and highlights are essential for creating a realistic drawing. Try experimenting with different shadow and highlight combinations to see what looks best. Remember, the shadows should be darker on the side of the well that is away from the light source and the highlights should be brighter on the side of the well that is closer to the light source.

How to Create a 3D Well Drawing
If you want to take your well drawing to the next level, you can try creating a 3D drawing. Here are some tips for achieving a more realistic 3D drawing.
Understanding Perspective
To create a 3D drawing, you’ll need to understand the basics of perspective. Start by familiarizing yourself with the concept of vanishing points and how they affect the size and placement of objects in a drawing. This will help you create a more realistic 3D drawing.
Rendering in Three Dimensions
Once you understand the basics of perspective, you can start rendering your drawing in three dimensions. You can do this by adding additional lines and curves to your drawing to give it a more 3D effect. Don’t be afraid to experiment with different line thicknesses and lengths to create a more realistic 3D effect.
Adding Layers of Detail
Finally, you can add additional layers of detail to your 3D drawing. This could include things like bricks, stones, ropes, ladders, and other objects. The more detailed your drawing is, the more realistic it will look.
Using Shading Techniques to Draw a Well
Shading is an important part of creating a realistic drawing. Here are some shading techniques that you can use to make your well drawing look more realistic.
Using Crosshatching
Crosshatching is a technique where you use two sets of parallel lines to create a shading effect. Start by drawing one set of lines and then draw a second set of lines perpendicular to the first. This will create an intricate pattern of lines that will give your drawing a more realistic look.
Blending Techniques
Blending techniques are another way to add shading to your drawing. Start by drawing two lines close together and then gradually blend them together with a series of curved lines. This will create a smooth transition between the two lines and give your drawing a more realistic look.
Contour Shading
Contour shading is a technique where you use curved lines to create a shading effect. Start by drawing curved lines around the edges of the object that you’re shading. Then gradually fill in the space between the curved lines to create a smooth, even shading effect.

Drawing a Well with Color and Perspective
Adding color and perspective to your drawing can help make it look even more realistic. Here are some tips for using color and perspective to draw a more realistic well.
Choosing Colors
When choosing colors for your drawing, consider the environment that the well is located in. If it’s in a rural area, you might want to use earthy tones such as browns and greens. If it’s in an urban area, you might want to use brighter colors such as blues and yellows. Experiment with different color combinations to find the one that looks best.
Applying Color
Once you’ve chosen the colors for your drawing, it’s time to apply them. Start by adding the base colors to the different elements of the well. Then add shadows and highlights to give the drawing more depth. Finally, you can add texture to certain areas to make the drawing look even more realistic.
Using Perspective
Using perspective can help make your drawing look more realistic. Start by familiarizing yourself with the basics of perspective and then draw your well from different angles to give it a more 3D look. You can also use vanishing points to create the illusion of depth in your drawing.
Conclusion
Drawing a well can seem like a daunting task, but with the right tools and techniques, it can be surprisingly easy. By following the steps outlined in this article, you can create a realistic well drawing that has depth, realism, and color. Don’t forget to use reference photos, observe the light sources, and use shading techniques to give your drawing an extra touch of realism.
(Note: Is this article not meeting your expectations? Do you have knowledge or insights to share? Unlock new opportunities and expand your reach by joining our authors team. Click Registration to join us and share your expertise with our readers.)