Introduction
A pumpkin art hub is an artistic representation of a pumpkin, usually in the form of a drawing or painting. It can be created using various mediums such as pencils, markers, canvas, watercolors, charcoal, and clay. Drawing a pumpkin art hub can be a fun and creative way to express yourself, and it can also help you practice your artistic skills. In this article, we will explore how to draw a pumpkin art hub step-by-step, so you can create your own unique masterpiece.
Step-By-Step Instructions to Drawing a Pumpkin Art Hub
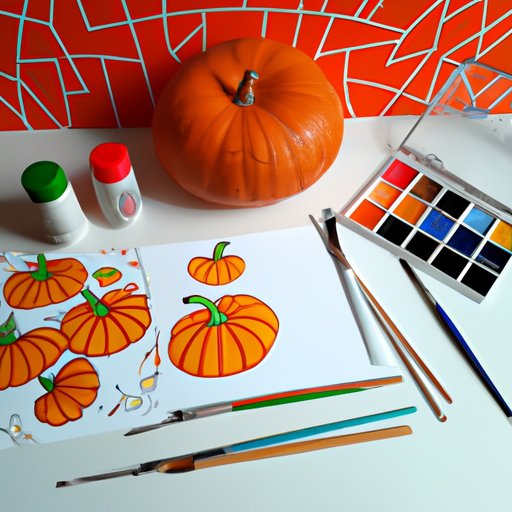
The first step in creating a pumpkin art hub is to gather the necessary materials. Depending on what medium you choose, you’ll need to make sure you have the appropriate supplies. For example, if you are using pencils, you’ll need a pencil sharpener, eraser, and paper. If you’re using markers, you’ll need different colors of markers and paper. If you are using canvas, you’ll need a canvas, paints, brushes, and other tools.
Once you have your materials gathered, it’s time to start drawing. Begin by outlining the shape of the pumpkin. Start by drawing two circles and then connecting them with curved lines. This will form the basic shape of the pumpkin. Once you have the outline completed, add details such as eyes, nose, mouth, and stem. You can also add shading to give the pumpkin more dimension and depth.
How to Create a Realistic Pumpkin Art Hub with Pencils and Markers
If you want to create a realistic pumpkin art hub with pencils and markers, you’ll need to choose the right colors. Start by selecting a light yellow color for the base of the pumpkin and then layer darker shades of yellow and orange on top. To create depth and dimension, use a darker color to shade the edges of the pumpkin. You can also blend colors together to create a more natural look.
To finish off the look, use a dark brown color to add details and shading. Focus on adding shadows and highlights to the pumpkin, and don’t forget to add the stem. Once you are done, you should have a realistic looking pumpkin art hub.
Tips for Drawing a Pumpkin Art Hub on Canvas
If you want to create a pumpkin art hub on canvas, there are a few things to keep in mind. First, make sure you prepare the canvas by priming it with a white gesso primer. This will ensure that the paint adheres better and will produce a better result. Next, sketch the outline of the pumpkin onto the canvas with a pencil or marker. Once you have the outline, you can start applying paint.
Choose colors that are similar to those used for a pencil or marker drawing. Start by applying a light yellow color as the base and then layer darker shades of yellow and orange on top. Use a dark brown color to add details and shading. To create depth and dimension, use a lighter color to highlight the edges of the pumpkin. Once you are finished, you should have a beautiful pumpkin art hub on canvas.

A Guide to Sketching a Pumpkin Art Hub with Colored Pencils
When sketching a pumpkin art hub with colored pencils, it’s important to select the right colors. Start by choosing a light yellow color for the base of the pumpkin and then layer darker shades of yellow and orange on top. To create depth and dimension, use a darker color to shade the edges of the pumpkin. You can also blend colors together to create a more natural look.
To add details and shading, use a dark brown color. Focus on adding shadows and highlights to the pumpkin, and don’t forget to add the stem. Once you are done, you should have a realistic looking pumpkin art hub.

Crafting a Pumpkin Art Hub with Watercolors
If you want to create a pumpkin art hub with watercolors, you’ll need to use the right brushes. Start by selecting a flat brush for the base of the pumpkin and then use a round brush for adding details and shading. When applying the paint, use a light yellow color for the base and then layer darker shades of yellow and orange on top. To create depth and dimension, use a lighter color to highlight the edges of the pumpkin.
Once you are satisfied with the base layer, you can start applying watercolor techniques such as wet-on-wet, dry-brush, and glazing. These techniques will help you create a more realistic looking pumpkin art hub. Finally, add the stem and any other finishing touches you’d like to complete your masterpiece.
Utilizing Charcoal to Create a Pumpkin Art Hub
Using charcoal to create a pumpkin art hub is a great way to add texture and depth to your artwork. Start by choosing the right type of charcoal for your project. Soft charcoal is best for sketching and outlining, while hard charcoal is better for adding details and shading. Once you have the right charcoal, sketch the outline of the pumpkin onto the paper.
Next, use a light yellow color to fill in the base of the pumpkin. Then, layer darker shades of yellow and orange on top. To create depth and dimension, use a darker color to shade the edges of the pumpkin. Finally, use a dark brown color to add details and shading. Focus on adding shadows and highlights to the pumpkin, and don’t forget to add the stem.

How to Create a 3D Pumpkin Art Hub from Clay
Creating a 3D pumpkin art hub from clay is a great way to bring your artwork to life. Start by choosing the right type of clay for your project. Polymer clay is a great option because it is easy to work with and comes in a variety of colors. Once you have the clay, form it into the shape of a pumpkin. You can use tools to add details and texture to the pumpkin.
Next, bake the clay in the oven according to the manufacturer’s instructions. Once it is finished baking, you can start adding color. Paint the pumpkin with acrylic paint or use colored markers to draw on the details. Finally, add the stem and any other finishing touches you’d like to complete your 3D pumpkin art hub.
Conclusion
Drawing a pumpkin art hub can be a fun and creative activity. With the right supplies and step-by-step instructions, you can create beautiful artwork using pencils, markers, canvas, watercolors, charcoal, and clay. Whether you want to create a realistic looking pumpkin art hub or a 3D one from clay, this guide has all the information you need to get started.
(Note: Is this article not meeting your expectations? Do you have knowledge or insights to share? Unlock new opportunities and expand your reach by joining our authors team. Click Registration to join us and share your expertise with our readers.)