Introduction
Power Automate is a powerful tool for automating repetitive tasks and streamlining your workflow. It is a cloud-based service that enables users to create automated workflows between their favorite apps and services to synchronize files, get notifications, collect data, and more. With Power Automate, businesses can save time, reduce manual errors, and enhance customer experience.
Step-by-Step Guide to Creating a Flow in Power Automate
In this section, we will provide a step-by-step guide to creating a flow in Power Automate. This guide will help you understand the process of setting up a trigger for the flow, adding conditions and actions, and testing the flow.
Overview of the Process
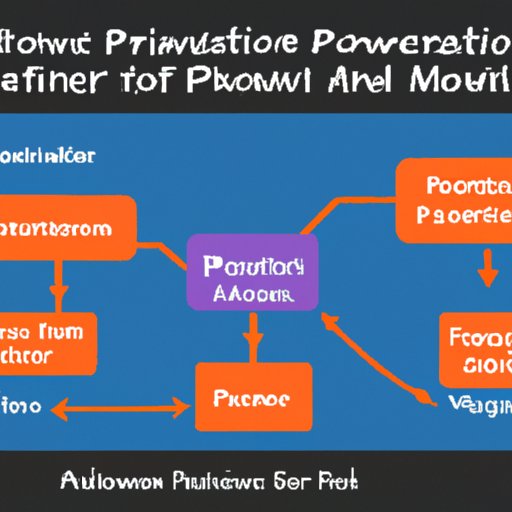
The first step in creating a flow in Power Automate is to set up a trigger for the flow. The trigger is an event that initiates the flow. Examples of triggers include a new item being added to a list, a document being uploaded to a library, or a user logging into a system. Once the trigger is established, you can add conditions and actions to the flow. Conditions are rules that must be met before the flow can be executed. For example, you can specify that the flow should only execute if the item being added to the list has a certain value. Actions are the steps that will be taken when the flow is triggered. Examples of actions include sending an email notification, creating a task in a task management system, or copying a file to a different location. Finally, it is important to test the flow to ensure that it works correctly.
Setting up a Trigger for the Flow
The first step in creating a flow in Power Automate is to set up a trigger. To do this, open the “Create a Flow” page and select the trigger type you want to use. You can choose from popular triggers such as “When an item is created” or “When a file is created”. You can also create custom triggers using HTTP requests or webhooks. Once you have selected the trigger type, you can configure the settings for the trigger. This includes specifying which list or library the trigger should monitor, as well as any additional conditions that must be met for the trigger to fire.
Adding Conditions and Actions
Once the trigger is set up, you can add conditions and actions to the flow. To add a condition, click on the “+ Add a Condition” button. This will open a window where you can specify the conditions that must be met for the flow to execute. For example, you can specify that the flow should only execute if the item being added to the list has a certain value. To add an action, click on the “+ Add an Action” button. This will open a window where you can select the action you want to take when the flow is triggered. Examples of actions include sending an email notification, creating a task in a task management system, or copying a file to a different location.
Testing the Flow
Once the trigger and conditions have been set up and the actions have been added, it is important to test the flow to make sure it works correctly. To do this, click on the “Test” button. This will open a window where you can enter the data that will be used to test the flow. Once you have entered the data, click on the “Run Test” button to execute the flow. If the flow executes successfully, you will see a green checkmark next to the “Run Test” button. If there is an error, you will see a red exclamation mark.

Harnessing the Power of Automation with Power Automate Flows
Once you have created a flow in Power Automate, you can harness the power of automation to streamline your business processes. There are several types of flows available in Power Automate, including automated workflows, scheduled flows, and instant flows. Automated workflows are triggered by events and can be used to automate repetitive tasks. Scheduled flows are triggered on a set schedule, such as every hour or every day. Instant flows are triggered manually and can be used to quickly execute a single action.
In order to leverage the power of automation, you need to understand how to use triggers, conditions, and actions. Triggers are the events that initiate the flow. Conditions are rules that must be met before the flow can be executed. Actions are the steps that will be taken when the flow is triggered. By combining these three elements, you can create powerful automated workflows that can save you time and effort.

Leveraging Power Automate to Streamline Your Business Processes
With Power Automate, you can automate repetitive tasks, reduce manual errors, and enhance customer experience. Automating repetitive tasks can save you time and effort, allowing you to focus on more important tasks. By automating data entry, you can reduce manual errors and ensure accuracy. You can also use Power Automate to automate communication processes, such as sending emails or SMS messages. Finally, you can use Power Automate to enhance customer experience by automatically responding to customer inquiries or providing personalized offers.
How to Build Automated Workflows with Power Automate
Building automated workflows with Power Automate is fairly straightforward. The first step is to visualize the workflow. This involves mapping out the steps that will be taken when the flow is triggered. Once you have a clear understanding of the workflow, you can start designing the flow. This includes setting up the trigger, adding conditions and actions, and connecting the various steps together. Finally, you can test the flow to make sure it is working correctly.
Simplifying Your Tasks with Automation and Power Automate
Power Automate can be used to simplify many of your daily tasks. You can automate communication processes, such as sending emails or SMS messages. You can also use Power Automate to automate data entry, such as entering customer information into a database. Automating approvals can also save you time and effort. Finally, you can use Power Automate to schedule tasks, such as sending out emails or generating reports at regular intervals.

Unlocking the Power of Automation with Power Automate Flows
Once you have created a flow in Power Automate, you can unlock the power of automation. You can integrate with other systems, such as Salesforce or SharePoint, to create powerful automated workflows. You can also use Power Automate to schedule tasks, such as sending out emails or generating reports at regular intervals. Finally, you can use Power Automate to monitor flows to ensure they are running smoothly.
Conclusion
In conclusion, Power Automate is a powerful tool for automating repetitive tasks and streamlining your workflow. This article provided an overview of Power Automate and its uses, as well as a step-by-step guide to creating a flow in Power Automate. We discussed how to leverage the power of automation to streamline your business processes and simplify your tasks with Power Automate. With Power Automate, you can automate repetitive tasks, reduce manual errors, and enhance customer experience.
By following the steps outlined in this article, you can easily create powerful automated workflows with Power Automate. You can use triggers, conditions, and actions to build powerful automated workflows that can save you time and effort. You can also use Power Automate to integrate with other systems, schedule tasks, and monitor flows. Unlock the power of automation with Power Automate and simplify your tasks today.
(Note: Is this article not meeting your expectations? Do you have knowledge or insights to share? Unlock new opportunities and expand your reach by joining our authors team. Click Registration to join us and share your expertise with our readers.)
