Introduction
A weed eater, also known as a string trimmer or weed whacker, is a gardening tool used to trim grass and weeds along hard-to-reach places, such as fences and walls. The weed eater uses a monofilament line that spins at high speeds to cut through vegetation. Over time, the line will wear down and need to be replaced. Replacing the weed eater string is an important maintenance task that should be done regularly in order to keep the weed eater running smoothly.
Step-by-Step Guide to Changing the String on a Stihl Weed Eater
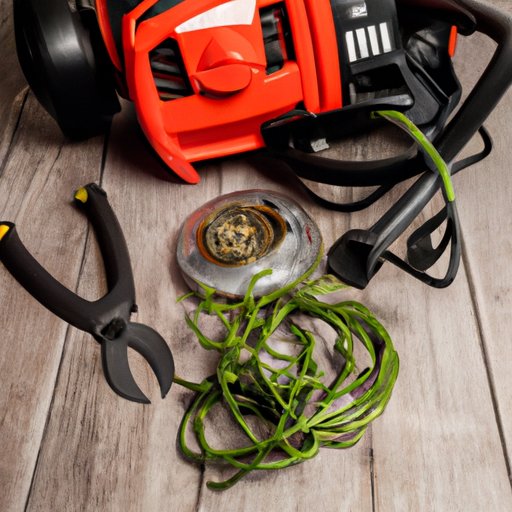
Changing the string on a Stihl weed eater is a relatively simple process that can be completed in a few easy steps. Before beginning, make sure you have all the necessary tools, such as needle-nose pliers, scissors, and an adjustable wrench.
1. Turn off the weed eater and disconnect it from the power source. Make sure the engine has cooled down before proceeding.
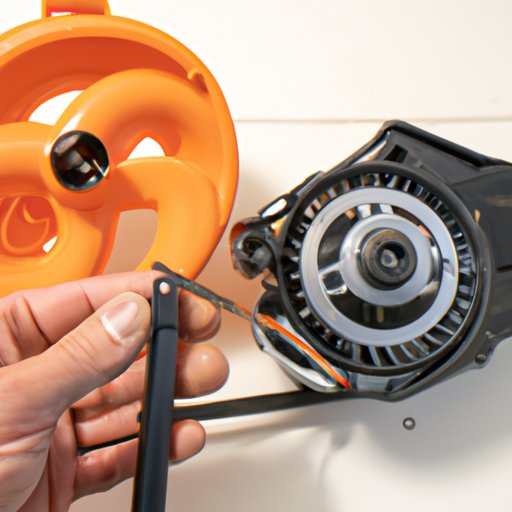
2. Locate the spool cover on the bottom of the weed eater and remove it. This will expose the spool, which holds the old string.
3. Use the needle-nose pliers to remove the old string from the spool. Cut the string into small pieces to make the removal process easier.
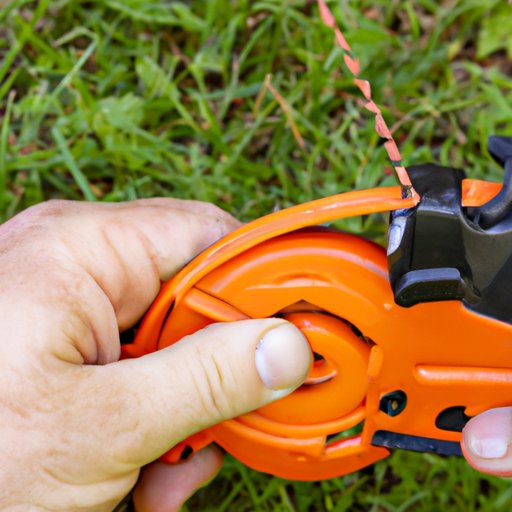
4. Install the new string onto the spool. Start by feeding one end of the string into the hole in the spool. Then, wrap the string around the spool in a clockwise direction until the entire length of string is wrapped around the spool. Make sure the string is tightly wound to ensure proper performance.
5. Reattach the spool cover and tighten it with the adjustable wrench. Make sure the cover is securely attached to prevent debris from entering the weed eater.
A Comprehensive Overview of How to Change the String on a Stihl Weed Eater
When it comes to changing the string on a Stihl weed eater, there are several factors to consider. First and foremost, it’s important to select the right type of string for your model. Different types of weed eater strings are available, including twisted, round, and serrated. Each type has its own unique benefits and drawbacks. For instance, twisted strings offer better cutting power, while round strings provide a smoother cut. Serrated strings are ideal for heavy-duty tasks, such as clearing thick brush.
It’s also important to select the correct size of string for your model. Different weed eaters require different sizes of strings, so make sure you check the manufacturer’s specifications before purchasing a new spool. Additionally, it’s a good idea to keep extra string on hand, just in case you run out during a project.
Finally, it’s essential to inspect the spool for signs of wear and tear before replacing the string. If the spool is cracked or damaged, it’s best to replace it with a new one before installing the new string.
Quick Tips for Changing the String on a Stihl Weed Eater
When changing the string on a Stihl weed eater, there are a few quick tips to keep in mind. First, always make sure you have extra string on hand. This way, if you run out, you won’t have to stop what you’re doing to purchase more. Second, inspect the spool for any signs of wear and tear before installing the new string. If the spool is cracked or damaged, it’s best to replace it with a new one. Finally, use the correct size of string for your model. Different weed eaters require different sizes of strings, so make sure you check the manufacturer’s specifications before purchasing a new spool.
An Illustrated Guide to Changing the String on a Stihl Weed Eater
If you’re still unsure about how to change the string on a Stihl weed eater, don’t worry! There are plenty of helpful resources available online. Many websites offer step-by-step visuals that walk you through the process. Additionally, many websites offer troubleshooting tips in case you encounter any problems while changing the string. With these resources, you’ll be able to quickly and easily change the string on your Stihl weed eater.
DIY: Learn How to Change the String on a Stihl Weed Eater
If you’re a DIY enthusiast, learning how to change the string on a Stihl weed eater is a great way to save money and time. All you need is a few basic tools, such as needle-nose pliers, scissors, and an adjustable wrench. Once you have all the necessary supplies, you can follow the step-by-step instructions below to complete the job.
1. Turn off the weed eater and disconnect it from the power source. Make sure the engine has cooled down before proceeding.
2. Locate the spool cover on the bottom of the weed eater and remove it. This will expose the spool, which holds the old string.
3. Use the needle-nose pliers to remove the old string from the spool. Cut the string into small pieces to make the removal process easier.
4. Install the new string onto the spool. Start by feeding one end of the string into the hole in the spool. Then, wrap the string around the spool in a clockwise direction until the entire length of string is wrapped around the spool. Make sure the string is tightly wound to ensure proper performance.
5. Reattach the spool cover and tighten it with the adjustable wrench. Make sure the cover is securely attached to prevent debris from entering the weed eater.
Troubleshooting: When Your Weed Eater Won’t Take the New String
Sometimes, when you try to install a new string on your weed eater, it won’t take the new string. This could be due to a variety of issues, such as an improperly wound spool, a worn out spool, or a defective string. To resolve this issue, first check the spool to make sure it’s not worn out or improperly wound. If the spool looks fine, try using a different type of string. If that doesn’t work, try using a different brand of string. If none of these solutions work, it’s best to take your weed eater to a professional for repair.
Conclusion
Replacing the weed eater string on a Stihl weed eater is an important maintenance task that should be done regularly in order to keep the weed eater running smoothly. In this article, we discussed the importance of replacing the string, a step-by-step guide to changing the string, a comprehensive overview of how to change the string, quick tips for changing the string, an illustrated guide, and troubleshooting tips. By following these tips, you’ll be able to easily and quickly change the string on your Stihl weed eater.
(Note: Is this article not meeting your expectations? Do you have knowledge or insights to share? Unlock new opportunities and expand your reach by joining our authors team. Click Registration to join us and share your expertise with our readers.)