Introduction
The Stihl Weed Eater is an essential tool for any homeowner or gardener looking to keep their yard looking tidy. It’s a versatile tool that can be used to trim grass, weeds, and other vegetation. However, after extended use, the string may become worn out or frayed and will need to be replaced in order to ensure the Weed Eater continues to perform at its best.
Replacing the string on a Stihl Weed Eater is not as difficult as it may seem. With the right tools and a few simple steps, you can easily change the string and get back to trimming your lawn or garden. In this article, we’ll cover everything you need to know about changing the string on a Stihl Weed Eater, from the benefits of replacing the string to a detailed tutorial on how to do it.
Step-by-Step Instructions for Replacing the String on a Stihl Weed Eater
Before you begin, make sure you have all the necessary tools and supplies, including a new spool of string and a screwdriver. Once you have everything you need, follow these steps to replace the string on your Stihl Weed Eater:
Preparing your Stihl Weed Eater
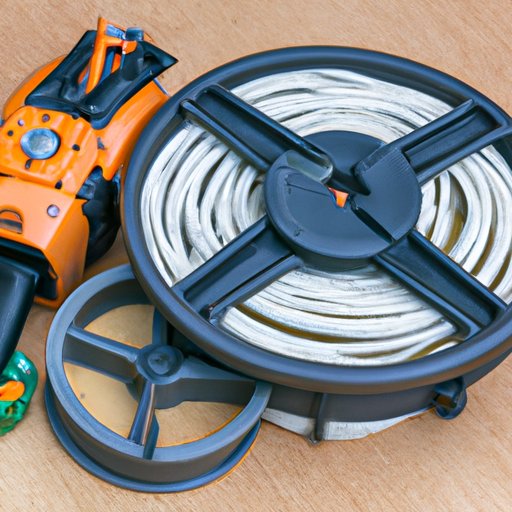
Start by disconnecting the spark plug wire from the spark plug. This will prevent the Weed Eater from accidentally starting while you’re working on it. Then, remove the spool cover and locate the spool. You may need to use a screwdriver to remove the screws holding the spool in place.
Removing the old string
Next, remove the old string from the spool. Be careful not to damage the spool as you do this, as it can affect the performance of the Weed Eater. Once the old string is removed, clean the spool and inspect it for any damage.
Installing the new string
Now it’s time to install the new string. Start by placing the new string onto the spool, making sure the line is wound tightly and evenly. If necessary, refer to the manufacturer’s instructions for more information on winding the string correctly. Once the string is in place, secure the spool back into the Weed Eater and replace the spool cover.

A Guide to Easily Change the String on Your Stihl Weed Eater
Once you’ve followed the instructions above, your Stihl Weed Eater should be ready to go. Here are a few tips to help make the process of changing the string easier:
Tips for winding the string
Make sure the string is wound tightly and evenly around the spool. This will help ensure the Weed Eater performs at its best. Refer to the manufacturer’s instructions if you’re unsure of how to wind the string.
Troubleshooting common issues
If you’re having difficulty removing the old string or installing the new one, check the spool for any debris or damage. If necessary, use a screwdriver to remove the spool and clean it before reinstalling it. Also, make sure the string is wound correctly and evenly around the spool.
How to Change the String on Your Stihl Weed Eater in 5 Easy Steps
Changing the string on your Stihl Weed Eater doesn’t have to be a complicated process. With the right tools and a few simple steps, you can quickly and easily replace the string on your Weed Eater. Here’s how to do it in five easy steps:
Step 1: Prepare your Stihl Weed Eater
Start by disconnecting the spark plug wire from the spark plug. This will prevent the Weed Eater from accidentally starting while you’re working on it. Then, remove the spool cover and locate the spool.
Step 2: Remove the Old String
Carefully remove the old string from the spool. Be careful not to damage the spool as you do this, as it can affect the performance of the Weed Eater. Once the old string is removed, clean the spool and inspect it for any damage.
Step 3: Install the New String
Place the new string onto the spool, making sure the line is wound tightly and evenly. If necessary, refer to the manufacturer’s instructions for more information on winding the string correctly. Once the string is in place, secure the spool back into the Weed Eater and replace the spool cover.
Step 4: Wind the String
Wind the string around the spool, making sure it’s wound tightly and evenly. Again, refer to the manufacturer’s instructions if you’re unsure of how to do this correctly.
Step 5: Test and Cut the New Line
Once the string is in place, test the Weed Eater to make sure it’s working properly. If it is, cut the line to the desired length and you’re done!
The Quick and Easy Way to Replace the String on a Stihl Weed Eater
Replacing the string on a Stihl Weed Eater doesn’t have to be a difficult process. With the right tools and a few simple steps, you can quickly and easily change the string and get back to trimming your lawn or garden. Here’s what you need to do:
Gather the necessary tools
Before you start, make sure you have all the necessary tools and supplies, including a new spool of string and a screwdriver.
Follow the instructions carefully
Follow the step-by-step instructions outlined above and make sure the string is wound correctly and evenly around the spool. Refer to the manufacturer’s instructions if you’re unsure of how to do this correctly.
A Tutorial on Replacing the String on a Stihl Weed Eater
Replacing the string on a Stihl Weed Eater is not a difficult task. All you need is the right tools and a few simple steps and you’ll be ready to go. Here’s a quick tutorial on how to do it:
Identify the type of string
Before you begin, make sure you know what type of string you’re going to use. Different Weed Eaters require different types of strings, so make sure you have the correct one for your model.
Install the new string
Once you have the correct string, place it onto the spool and make sure it’s wound tightly and evenly. Refer to the manufacturer’s instructions if you’re unsure of how to do this correctly. Once the string is in place, secure the spool back into the Weed Eater and replace the spool cover.

Tips and Tricks for Changing the String on a Stihl Weed Eater
Changing the string on a Stihl Weed Eater doesn’t have to be a difficult process. Here are a few tips and tricks to help make the process easier:
Wind the string correctly
Make sure the string is wound tightly and evenly around the spool. This will help ensure the Weed Eater performs at its best. Refer to the manufacturer’s instructions if you’re unsure of how to wind the string.
Test the new line before cutting it
Before you cut the new line, make sure the Weed Eater is working properly. Test the Weed Eater and make sure it’s performing as expected. If it is, then you can safely cut the line to the desired length.

Everything You Need to Know About Replacing the String on a Stihl Weed Eater
Replacing the string on a Stihl Weed Eater is not a difficult task. However, there are a few things you should know before you start. Here’s a quick overview of everything you need to know about replacing the string on a Stihl Weed Eater:
Types of strings available
Different Weed Eaters require different types of strings, so make sure you have the correct one for your model. Refer to the manufacturer’s instructions for more information on the types of strings available for your machine.
Maintenance tips for your Stihl Weed Eater
Regular maintenance is important for keeping your Stihl Weed Eater in good condition. Make sure to regularly clean the spool and inspect it for any damage. Additionally, make sure the string is wound correctly and evenly around the spool.
Conclusion
Changing the string on a Stihl Weed Eater is a relatively simple process. With the right tools and a few simple steps, you can easily replace the string and get back to trimming your lawn or garden. Just remember to follow the instructions carefully, use the right type of string, and make sure the string is wound correctly and evenly around the spool. With these tips in mind, you’ll be sure to have a successful string replacement on your Stihl Weed Eater.
(Note: Is this article not meeting your expectations? Do you have knowledge or insights to share? Unlock new opportunities and expand your reach by joining our authors team. Click Registration to join us and share your expertise with our readers.)