Introduction
Dancing is a great way to exercise, socialize, and have fun. Before you can enjoy your favorite moves, however, you need to build a safe and sturdy dance floor. Whether you’re looking to build a portable or permanent dance floor, this step-by-step guide will help you get the job done quickly and easily.
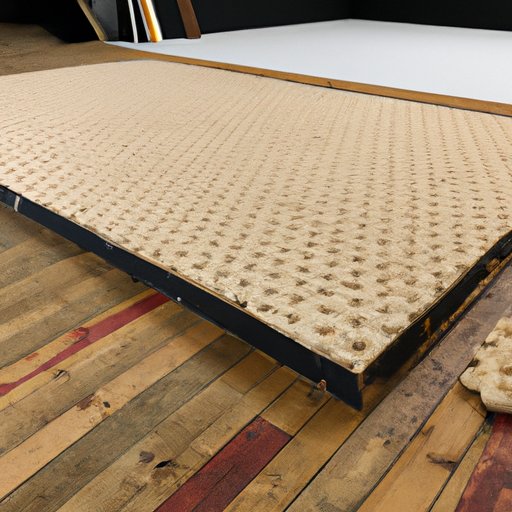
Step-by-Step Guide to Building a Portable Dance Floor
If you’re planning to move your dance floor from place to place, building a portable one is your best bet. It’s relatively easy to construct and can be customized to fit any space. Here’s what you need to know about building a portable dance floor.
Materials Needed
The materials needed to build a portable dance floor are fairly simple and include plywood, 2x4s, screws, and masonite. You’ll also need a saw, drill, and screwdriver.
Instructions for Building
Once you’ve gathered all of the necessary materials, you’re ready to start building. Here are the steps you should follow:
- Cut the plywood into four pieces that measure 3 feet by 4 feet each.
- Attach the 2x4s to the edges of the plywood pieces using wood screws.
- Lay the plywood pieces on top of the masonite and screw them together.
- Turn the assembly over and attach caster wheels to the bottom.
- Your portable dance floor is now ready to use!

Tips for Building a Wooden Dance Floor at Home
Building a wooden dance floor at home is a great way to save money while still getting a quality surface for dancing. However, it does require a bit more effort than building a portable dance floor. Here’s what you need to know.
Tools Needed
In addition to the materials listed above, you’ll also need tools such as a circular saw, jigsaw, power drill, and level.
Steps for Construction
Once you’ve gathered all the necessary tools, here’s how to build a wooden dance floor:
- Measure the area where the dance floor will be located and mark out the dimensions.
- Cut the plywood into four pieces that match the measurements.
- Secure the 2x4s to the edges of the plywood with screws.
- Lay the plywood pieces down and screw them together.
- Finish by sanding and staining the surface.
DIY Dance Floor: How to Build Your Own Affordable Dance Floor
If you’re looking for a cost-effective solution for building a dance floor, consider a DIY project. With the right materials and a little bit of elbow grease, you can create a beautiful and functional dance floor in no time.
Budget-Friendly Materials
When it comes to materials, you don’t have to break the bank. Plywood, 2x4s, and masonite are all affordable options for building a dance floor. You can also consider reusing and recycling materials like pallets and old flooring.
Guidelines for Building
The process for building a DIY dance floor is similar to that of building a wooden one. The main difference is that you’ll need to make sure the materials you use are strong and durable enough to withstand the wear and tear of dancing. Here’s what you should do:
- Gather the materials you need.
- Measure the area where the dance floor will be located and mark out the dimensions.
- Cut the plywood into four pieces that match the measurements.
- Secure the 2x4s to the edges of the plywood with screws.
- Lay the plywood pieces down and screw them together.
- Finish by sanding and staining the surface.

How to Assemble an Interlocking Foam Dance Floor
Interlocking foam tiles are a popular option for creating a dance floor, as they are lightweight and easy to install. Here’s what you need to know about assembling an interlocking foam dance floor.
Supplies Needed
You’ll need interlocking foam tiles, a measuring tape, a utility knife, and a flat surface for assembly.
Directions for Assembly
Assembling an interlocking foam dance floor is simple and straightforward. Here’s what you should do:
- Start by laying out the foam tiles in the desired pattern.
- Use a measuring tape to ensure that the tiles are evenly spaced.
- Cut off any excess tile material with a utility knife.
- Snap the tiles together to form a solid surface.
- Your interlocking foam dance floor is now ready to use!

Creative Ways to Construct a Dance Floor on a Budget
If you’re looking to build a dance floor but don’t have a lot of money to spend, there are plenty of creative solutions. Reusing and recycling materials is a great way to save money while still getting a quality surface for dancing.
Reusing and Recycling Materials
Old pallets, carpet remnants, and vinyl flooring can all be repurposed for a dance floor. These materials are often available for free or at a discounted price, making them great options for those on a budget.
Cost-Effective Solutions
If you’re looking for a more professional look, consider renting a dance floor instead of buying one. This is a great option if you’ll only be using the floor for a short period of time. You can also buy pre-made dance floors online, which can be a cost-effective solution if you’re willing to put in the time and effort to assemble it yourself.
Designing and Installing a Home Dance Floor for the Perfect Performance
Whether you’re a beginner or an experienced dancer, having a quality dance floor can make a big difference in your performance. Here’s how to design and install a home dance floor that’s perfect for your needs.
Choosing the Right Flooring
The type of flooring you choose will depend on your budget, the size of your space, and the level of your dancing skills. Hardwood and laminate floors are good options for beginners, while professional dancers may prefer sprung flooring.
Installation Tips
Once you’ve chosen the right flooring, it’s time to install it. If you’re installing a hardwood or laminate floor, make sure to use a level to ensure that the surface is even. For sprung flooring, you’ll need to hire a professional to properly install it.
Conclusion
Building a dance floor is a relatively simple process when you have the right materials and instructions. Whether you’re looking to build a portable, wooden, foam, or DIY dance floor, this guide has all the information you need to get started. With a little bit of creativity and some careful planning, you can create a beautiful and functional dance floor that’s perfect for your needs.
(Note: Is this article not meeting your expectations? Do you have knowledge or insights to share? Unlock new opportunities and expand your reach by joining our authors team. Click Registration to join us and share your expertise with our readers.)