Introduction
Installing vinyl plank flooring is a great way to update the look of any room in the home. However, it’s important to make sure that the subfloor is properly prepared before beginning the installation process. The flatness of the subfloor has a direct impact on the quality and longevity of the vinyl plank flooring, so it’s essential to ensure that the subfloor is as level and even as possible. This article will explore how flat does subfloor need to be for vinyl plank flooring and provide helpful tips for achieving an acceptable level of flatness.

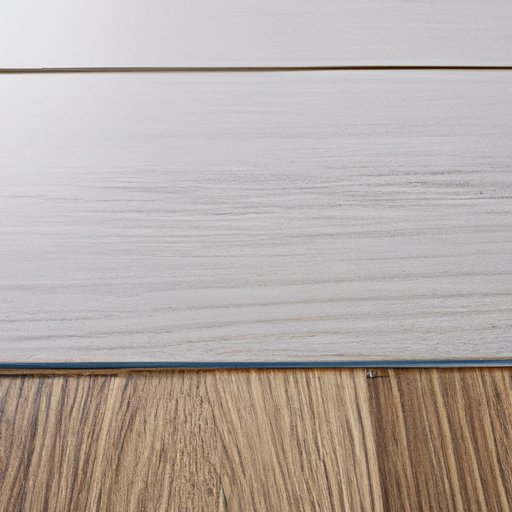
Examining the Impact of Subfloor Irregularities on Vinyl Plank Installation
When installing vinyl plank flooring, it’s important to take into account potential issues with subfloor flatness. If the subfloor is not level or even, the vinyl planks may not lay properly and could lead to unevenness or gaps between the planks. This can cause the planks to shift and buckle, leading to problems such as warping or water damage. In addition, uneven planks can create a tripping hazard and reduce the lifespan of the vinyl plank flooring.
Common causes of subfloor irregularities include poor construction, shifting of the foundation, and moisture damage. When preparing the subfloor for vinyl plank installation, it’s important to inspect it thoroughly to identify any areas of concern. If necessary, repairs should be made before proceeding with the installation.

What Homeowners Need to Know About Preparing Their Subfloor for Vinyl Plank Flooring
Before installing vinyl plank flooring, homeowners should take the necessary steps to prepare the subfloor for installation. This includes ensuring that the subfloor is clean and free of dust and debris, as well as inspecting it for any potential issues. If necessary, repairs should be made to address any irregularities in the subfloor. Finally, it’s important to make sure that the subfloor is level and even before beginning the installation process.
It’s also important to avoid common mistakes when preparing the subfloor for vinyl plank installation. For example, some homeowners may try to use self-leveling compounds to correct any irregularities in the subfloor. However, these products are not designed for use on wood subfloors and can actually cause more damage. Additionally, some homeowners may attempt to install vinyl plank flooring over existing flooring. While this may seem like a quick and easy solution, it is not recommended as it can lead to uneven planks and other issues.

The Ideal Flatness for Subfloors Before Installing Vinyl Plank Flooring
In order to ensure that the vinyl plank flooring is installed correctly, it’s important to understand the ideal flatness for subfloors before installation. According to industry standards, the maximum allowable tolerance for subfloor flatness is 1/8 inch over a 10 foot span. Additionally, the subfloor should have no more than 1/16 inch variation in height from one side of the room to the other. Any greater degree of variation or irregularity can lead to problems with the installation.
For best results, it’s recommended that homeowners aim for a flatness tolerance of 1/16 inch or less over a 10 foot span. This will ensure that the vinyl plank flooring is installed correctly and will minimize the risk of warping or other issues.

How to Ensure Your Subfloor is Level Enough for Vinyl Plank Flooring
Once the subfloor has been inspected and any necessary repairs have been made, it’s time to check the flatness of the subfloor. This can be done by using a straight edge, such as a level or ruler. First, place the straight edge across the middle of the room and measure the difference in height from one side of the room to the other. If the difference is greater than 1/16 inch, then additional work may be needed to achieve the desired level of flatness.
Next, measure the difference in height from one corner of the room to the opposite corner. If the difference is greater than 1/8 inch, then the subfloor may need to be leveled or shimmed in order to achieve the desired level of flatness. If the difference is less than 1/8 inch, then the subfloor is likely ready for vinyl plank installation.
Understanding Tolerances for Subfloor Flatness Before Installing Vinyl Plank Flooring
When preparing a subfloor for vinyl plank installation, it’s important to understand the different types of tolerances and their implications. Generally speaking, there are two types of tolerances: absolute and relative. Absolute tolerances refer to the maximum allowable variation in height from one side of the room to the other. Relative tolerances refer to the maximum allowable variation in height from one corner of the room to the opposite corner.
The type of tolerance needed for a particular subfloor will depend on a number of factors, including the size of the room and the type of vinyl plank being installed. It’s important to consult with a professional installer or manufacturer to determine the appropriate tolerance for your particular situation.
Tips and Tricks for Achieving an Acceptable Subfloor Levelness for Vinyl Plank Flooring
Once you’ve determined the necessary flatness for your subfloor, it’s time to start preparing it for vinyl plank installation. To do this, you’ll need a few tools and materials, such as a level, shims, and a hammer. You may also want to use a wet saw or jigsaw to cut the shims to size if necessary.
When preparing the subfloor, it’s important to use a systematic approach. Start by measuring the differences in height from one corner of the room to the opposite corner. Then, place shims at the low spots to bring the subfloor up to the desired level. Finally, use a hammer to tap the shims into place until the subfloor is level and even.
What to Do When Your Subfloor is Not Flat Enough for Vinyl Plank Flooring
If the subfloor is not level enough for vinyl plank flooring, there are a few options available. The first option is to use a self-leveling compound to fill in any low spots. This can be a good solution for smaller areas, but it is not recommended for larger areas as it can cause more damage. Another option is to use a leveling system, such as a plywood underlayment. This can help to even out the subfloor and provide a stable base for the vinyl plank flooring.
If the subfloor is severely uneven or damaged, it may be necessary to seek professional help. An experienced contractor can assess the situation and recommend the best course of action. In some cases, it may be necessary to replace the subfloor altogether in order to ensure a successful vinyl plank installation.
Conclusion
Installing vinyl plank flooring is a great way to update the look of any room in the home. However, it’s important to make sure that the subfloor is properly prepared before beginning the installation process. Understanding how flat does subfloor need to be for vinyl plank flooring and taking the necessary steps to prepare the subfloor can help to ensure that the installation is successful and that the vinyl plank flooring lasts for years to come.
(Note: Is this article not meeting your expectations? Do you have knowledge or insights to share? Unlock new opportunities and expand your reach by joining our authors team. Click Registration to join us and share your expertise with our readers.)