Introduction
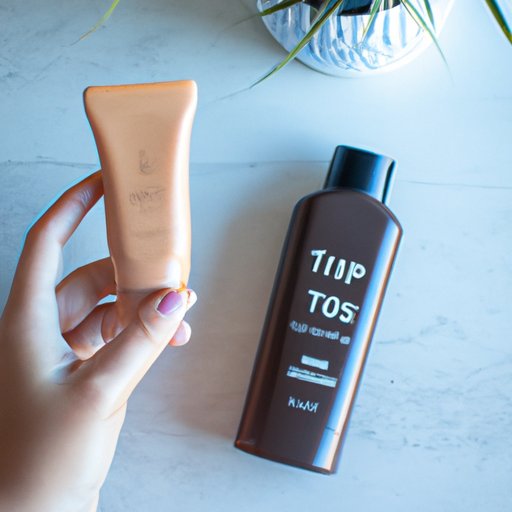
Self tanner has become a popular way to get that sun-kissed look without having to worry about UV rays and skin damage. But how does self tanner work? In this article, we’ll explore the basics of self tanner, provide a step-by-step guide for applying it correctly, discuss different types of self tanning products, offer tips for achieving the best results, and cover common mistakes to avoid.

Overview of the Basics of Self Tanner: How it Works and What to Expect
Self tanner is a product that helps you achieve a tanned look without having to spend time in the sun or use a tanning bed. It works by introducing dihydroxyacetone (DHA) into your skin. DHA is a colorless sugar that interacts with amino acids in the top layer of your skin to create a golden-brown color. This reaction takes anywhere from 2-4 hours, depending on the product used, and can last up to 7 days.
It’s important to note that self tanner won’t provide an immediate tan. You’ll need to wait at least 2-4 hours before you see the results, and they may not be as dark as you were expecting. Don’t worry – it will continue to darken over the next few hours. The color will also fade gradually over time, so you won’t have to worry about streaky patches or orange tones.
Step-by-Step Guide to Applying Self Tanner
Applying self tanner isn’t hard, but there are a few steps you should follow to ensure you get the best results. Here’s a step-by-step guide you can follow for flawless application:
Prepping the Skin
Before you apply self tanner, you should exfoliate your skin to remove any dead cells that might interfere with the product’s absorption. This will also help ensure an even and natural-looking tan. After exfoliating, make sure to moisturize your skin to give it a smooth base for the self tanner.
Choosing the Right Shade
When selecting a self tanner, it’s important to choose the right shade for your skin tone. If you’re new to self tanning, start with a lighter shade and work your way up. You can always add another layer to darken the tan if needed.
Applying the Self Tanner
Now comes the fun part – applying the self tanner. Start by squeezing some of the product into your hands and spread it evenly over your body. Make sure to pay special attention to areas like the ankles, wrists, elbows, and knees, which can be prone to streaking. Also, don’t forget to apply the product to your face, neck, and chest.
Blending and Smoothing the Tan
Once you’ve applied the self tanner, you’ll want to blend it in for the most natural-looking result. Use a damp cloth or a tanning mitt to blend the product into your skin and smooth out any streaks or patches. This will help ensure an even and natural-looking tan.

Exploring Different Types of Self Tanner Products
There are a variety of self tanning products on the market today. Here’s a brief overview of the different types and what you can expect from each one:
Traditional Lotions and Creams
Lotions and creams are the most traditional type of self tanner. They typically come in a pump bottle and are easy to apply. However, they can be a bit messy and may require more blending than other types of self tanners.
Foams and Sprays
Foams and sprays are a great option if you’re looking for a quick and mess-free application. They’re lightweight, easy to apply, and dry quickly. However, it’s important to note that foams and sprays can be harder to control, so you may need to do more blending to achieve an even tan.
Mousse
Mousse is a great option for those who are looking for an easy and mess-free application. It’s lightweight, fast-drying, and easy to control. Plus, it usually provides a natural-looking tan with minimal effort.
Gels
Gels are another popular option and often provide a natural-looking tan. They’re lightweight, fast-drying, and easy to apply. Plus, they’re generally mess-free and require minimal blending.
Towelettes
Towelette self tanners are perfect for those who want a quick and mess-free application. They’re pre-soaked, so all you have to do is wipe them over your skin. However, they’re typically only suitable for small areas, such as the face and neck.

Tips for Achieving the Best Results with Self Tanner
To get the best results with self tanner, here are a few tips you can follow:
Exfoliate Beforehand
As mentioned earlier, it’s important to exfoliate your skin before applying self tanner. This will help ensure an even and natural-looking tan.
Use a Tanning Mitt
Using a tanning mitt can help you achieve a streak-free tan. It will also help protect your hands from staining.
Start with a Small Area
If you’re new to self tanning, it’s best to start with a small area, such as your lower legs or arms, and then move onto larger areas once you’re comfortable with the process.
Apply Evenly
When applying self tanner, it’s important to apply it evenly across your body. To do this, use long, sweeping motions and make sure to blend it into the edges of your skin.
Don’t Overdo It
It’s easy to go overboard with self tanner, so it’s important to take it slow. Start with a light application and build up the color gradually. This will help you achieve the most natural-looking tan.
Common Mistakes to Avoid with Self Tanner and How to Correct Them
Even experienced self tanners can make mistakes. Here are a few common mistakes to watch out for and how to correct them:
Applying Too Much
One of the most common mistakes is applying too much self tanner. If you’ve gone overboard, you can use a damp cloth to lightly buff away the excess product. You can also apply a light layer of moisturizer to help blend the tan.
Not Washing Hands After Application
It’s important to wash your hands immediately after applying self tanner. Otherwise, the product can stain your palms and nails. If you do forget to wash your hands, use a damp cloth to gently rub away any excess product.
Not Blending Properly
Another mistake is not blending the product properly. Make sure to use a tanning mitt or damp cloth to blend the product into your skin and smooth out any streaks. This will help ensure an even and natural-looking tan.
Not Paying Attention to Feet and Hands
It’s easy to overlook the feet and hands when applying self tanner, but it’s important to pay special attention to these areas. Make sure to apply the product evenly and blend it into the edges for the most natural-looking result.
Not Letting the Tanner Dry Fully Before Dressing
Finally, make sure to let the self tanner dry fully before getting dressed. Otherwise, the product can transfer to your clothes, leaving behind unsightly stains.
Conclusion
Self tanner is a great way to get a sun-kissed look without having to worry about UV rays and skin damage. All you need to do is exfoliate beforehand, choose the right shade, apply the product evenly, and blend it into your skin. There are a variety of self tanning products available, so you’re sure to find one that suits your needs. Just remember to avoid common mistakes, such as applying too much and not letting the product dry fully before dressing.
By following the tips and guidelines outlined in this article, you can achieve a beautiful and natural-looking tan with minimal effort.
(Note: Is this article not meeting your expectations? Do you have knowledge or insights to share? Unlock new opportunities and expand your reach by joining our authors team. Click Registration to join us and share your expertise with our readers.)
