Introduction
Hydro dipping (also known as water transfer printing) is a popular technique used to create unique and intricate artwork on objects. It involves transferring a paint design onto an object by submerging it in a water bath with special paints and chemicals. The process is relatively simple and can be done at home. In this article, we will explore how does hydro dipping work and provide a step-by-step guide for beginners.
Step-by-Step Guide to Hydro Dipping
Hydro dipping is a fairly straightforward process that requires little skill or experience. Here is a step-by-step guide to help you get started:
Prepping the Object for Dipping
The first step in hydro dipping is to prepare the object for dipping. This involves cleaning the object with soap and water to remove any dirt or debris. Once the object is clean, it should be sanded to create a smooth surface. This will help the paint adhere better to the object.
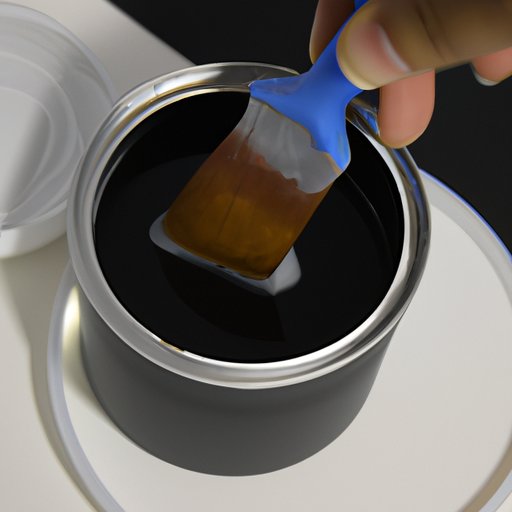
Applying the Paint
Once the object has been prepped, the next step is to apply the paint. This can be done using a spray gun, brush, or roller. If using a spray gun, make sure to use multiple light coats to avoid runs and drips. Allow the paint to dry completely before moving on to the next step.
Placing the Object in the Water
Once the paint is dry, the next step is to place the object in the water. This can be done in a bathtub, sink, or other large container. Make sure the container is filled with enough water to completely submerge the object. Add the special paints and activator chemicals to the water and stir gently until they are evenly distributed.
Removing and Finishing the Object
Once the object has been submerged in the water for the desired amount of time, it’s time to remove it. Carefully lift the object out of the water and allow it to air dry. Once dry, inspect the object to make sure the design has transferred correctly. If necessary, touch up any areas with additional paint. Finally, seal the design with a clear coat to protect it from wear and tear.

Exploring the Science Behind Hydro Dipping
Now that we’ve gone over the step-by-step process of hydro dipping, let’s take a closer look at the science behind it. Hydro dipping relies heavily on chemistry, specifically the reactivity of certain chemicals when exposed to heat and water.
The Chemistry of Hydro Dipping
At the core of hydro dipping is a chemical reaction between the paint and the water. During the dipping process, the paint molecules break apart and spread throughout the water. When the object is submerged, the molecules attach to the surface of the object and form a bond. As the object is removed from the water, the paint molecules remain attached and create a unique design.
How Does It Work?
The process of hydro dipping relies on two key components: heat and water. When heat is applied to the water, the molecules of the paint become more active and begin to break apart. At the same time, the water molecules become more reactive and attach to the surface of the object. As the object is removed from the water, the paint molecules remain attached and form a unique design.
The Materials and Equipment Used in Hydro Dipping
In order to successfully complete a hydro dipping project, certain materials and equipment are needed. Here is a list of the most common items used in hydro dipping:
Needed Materials
- Specialty paints
- Activator chemicals
- Clear coat
Required Equipment
- Spray gun
- Brush or roller
- Bathtub, sink, or other large container
DIY Hydro Dipping: A Beginner’s Guide
Hydro dipping is a great way to add unique designs to objects. With the right materials and equipment, anyone can do it. Here is a beginner’s guide to DIY hydro dipping:
Preparing the Tank
The first step in DIY hydro dipping is to prepare the tank. Fill the container with enough water to completely submerge the object. Add the specialty paints and activator chemicals to the water and stir gently until they are evenly distributed.
Painting the Object
Once the tank is prepared, the next step is to paint the object. This can be done using a spray gun, brush, or roller. Make sure to use multiple light coats to avoid runs and drips. Allow the paint to dry completely before moving on to the next step.
Submerging the Object
Once the paint is dry, the next step is to submerge the object into the water. Gently lower the object into the water and allow it to sit for the desired amount of time. Once the object has been submerged, carefully remove it from the water.
Finishing the Object
Once the object is removed from the water, allow it to air dry. Once dry, inspect the object to make sure the design has transferred correctly. If necessary, touch up any areas with additional paint. Finally, seal the design with a clear coat to protect it from wear and tear.
What Are the Benefits of Hydro Dipping?
Hydro dipping is a great way to add unique designs to objects. But what are the benefits of this process? Here are a few advantages of hydro dipping:
Durability and Versatility
One of the main benefits of hydro dipping is its durability. The paint bonds directly to the object, so it won’t chip or peel off like other painting methods. Plus, hydro dipping can be used on a variety of materials, including wood, plastic, and metal.
Unique Visual Effects
Another benefit of hydro dipping is the ability to create unique visual effects. By using different paints, activator chemicals, and submerging times, you can create intricate designs and patterns that are impossible to achieve with other painting methods.
Cost Savings
Finally, hydro dipping is a cost-effective way to add unique designs to objects. The materials and equipment needed are relatively inexpensive, and the process can be done at home with minimal effort.
Conclusion
Hydro dipping is a popular technique used to create unique and intricate artwork on objects. It involves transferring a paint design onto an object by submerging it in a water bath with special paints and chemicals. The process is relatively simple and can be done at home. In this article, we explored the step-by-step process of hydro dipping, the science behind it, the materials and equipment needed, and the benefits of this method.
(Note: Is this article not meeting your expectations? Do you have knowledge or insights to share? Unlock new opportunities and expand your reach by joining our authors team. Click Registration to join us and share your expertise with our readers.)