Introduction
Robots have become an integral part of our lives. From automated manufacturing processes to robotic vacuum cleaners, robots are everywhere. But did you ever wonder how to draw one? Drawing a robot can be a daunting prospect, since it requires a certain level of technical skill. However, with the right guidance and some practice, anyone can learn to draw a robot.
What is a Robot?
A robot is a machine that is designed to carry out a specific set of tasks. It is usually programmed to perform those tasks autonomously, meaning without human intervention. Robots are widely used in the manufacturing industry, where they are programmed to work around the clock with very little downtime. They are also used in many other applications such as medical surgery, search and rescue operations, and space exploration.
Why Draw One?
Drawing a robot can be a great way to explore your creativity and hone your artistic skills. Robots are complex machines, so drawing them requires a good understanding of anatomy, perspective, and proportion. By learning to draw a robot, you’ll gain a better understanding of how robots are made and how they move. You’ll also get to explore different styles of art and develop your own unique style.
Step-by-Step Guide to Drawing a Robot
If you’re a beginner, the best way to learn how to draw a robot is to start with a step-by-step tutorial. This will give you a basic understanding of the process and help you build up your confidence before tackling more advanced techniques.
Outlining the Robot’s Body
The first step in drawing a robot is to outline its body. Start by sketching a basic shape, such as a circle or square. Then add details such as arms, legs, and head. Be sure to keep the proportions of the robot in mind when drawing its parts. If you’re having trouble getting the proportions right, use a ruler or a grid to help you out.
Adding Details and Shading
Once you have the basic outline of the robot drawn, it’s time to add details and shading. Start by adding details such as eyes, antennae, and buttons. Then use shading to add depth to the robot. To make the robot look more realistic, try using different shades of gray to indicate shadows and highlights.
Final Touches
When you’re done shading the robot, you can add final touches such as a background or accessories. You can also use color to make the robot stand out even more. Experiment with different colors and textures to find the perfect combination for your robot.

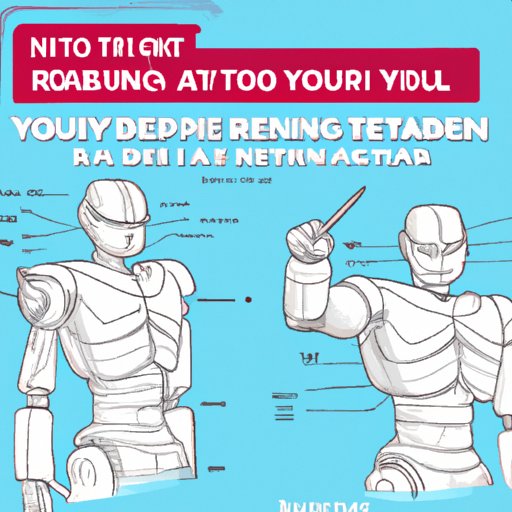
A Visual Tutorial on Drawing a Realistic Robot
A realistic robot drawing requires a deeper understanding of anatomy, proportion, and perspective. Here’s a visual tutorial that will teach you how to draw a realistic robot from scratch.
Proportion and Perspective
Start by sketching the robot’s body in correct proportion and perspective. Pay attention to the length and width of the robot’s body and limbs. Use a ruler or a grid to ensure that all the parts are in the right proportions.
Refining the Robot’s Features
Once you have the basic proportions down, it’s time to refine the robot’s features. Add details such as eyes, antennae, and buttons. Don’t forget to add shading to make the robot look more realistic. Use different shades of gray to indicate shadows and highlights.
Adding Color and Texture
Finally, it’s time to add color and texture to the robot. Experiment with different colors and textures to find the perfect combination for your robot. You can also add a background and accessories to make the robot look even more realistic.

Learn to Draw a Cute Cartoon Robot
Drawing a cute cartoon robot is a great way to explore your creativity and improve your drawing skills. Here’s a step-by-step tutorial on how to draw a cute cartoon robot.
Start with Simple Shapes
Start by sketching simple shapes such as circles, squares, and rectangles. These shapes will form the basis of your robot’s body. Try to keep the proportions in mind while sketching the shapes.
Make the Robot Adorable
Once you have the basic shapes sketched, it’s time to add details to make the robot look cute. Add eyes, antennae, and other features to give the robot a personality of its own. Don’t be afraid to experiment with different shapes and sizes to find the perfect combination.
Add Finishing Touches
Finally, add color and texture to the robot. Use bright colors to make the robot look cheerful and friendly. You can also add a background and accessories to make the robot even cuter.
Tips and Tricks for Creating a Realistic Robot Drawing
Creating a realistic robot drawing requires a lot of patience and practice. Here are some tips and tricks to help you get started.
Reference Photos
It’s always helpful to have a reference photo when drawing a robot. Look for photos of robots online and study their features carefully. This will give you a better understanding of how robots are constructed and how they move.
Use Blending Techniques
Blending techniques such as smudging and blending can help you create a smooth and realistic look. Use a blending stump or tortillon to blend different shades of gray and create subtle shadows and highlights.
Incorporate Different Materials
Robots are often made of different materials such as metal, plastic, and rubber. To make your robot look more realistic, try to incorporate different materials into your drawing. Use different shades of gray to indicate different materials, and add texture to make the robot look more lifelike.

How to Create a Simple Line Drawing of a Robot
If you’re looking for a quick and easy way to draw a robot, a simple line drawing might be the way to go. Here’s a step-by-step guide on how to create a simple line drawing of a robot.
Define the Outlines
Start by defining the outlines of the robot. Use a thin black marker to draw the basic shapes of the robot’s body. Keep the proportions in mind while sketching the outlines.
Add Details and Shadow
Once you have the basic outlines down, it’s time to add details and shadow. Start by adding eyes, antennae, and other features. Then use thicker black lines to add shadows and highlights. This will give the robot a more three-dimensional look.
Finalize the Drawing
Finally, add finishing touches such as a background and accessories. You can also use color to make the robot stand out even more. Experiment with different colors and textures to find the perfect combination for your robot.
Conclusion
Drawing a robot can be a fun and rewarding experience. With the right guidance and some practice, anyone can learn to draw a robot. This article has provided a step-by-step guide on how to draw a robot, as well as tips and tricks for creating a realistic robot drawing. Whether you’re a beginner or an experienced artist, drawing a robot can be a great way to explore your creativity and hone your artistic skills.
Review of Steps to Drawing a Robot
To summarize, here are the steps to drawing a robot:
- Outline the robot’s body
- Add details and shading
- Finalize the drawing with color and texture
Resources for Further Practice
If you’d like to learn more about drawing robots, check out the following resources:
- How to Draw a Robot – YouTube Video
- How to Draw Robots – Skillshare Class
-
(Note: Is this article not meeting your expectations? Do you have knowledge or insights to share? Unlock new opportunities and expand your reach by joining our authors team. Click Registration to join us and share your expertise with our readers.)