Introduction
Robots have become an integral part of our lives. From industrial robots used in factories to robotic vacuum cleaners and self-driving cars, robots are everywhere. Building a robot can be a fun and educational experience, providing you with insight into the world of robotics and artificial intelligence. In this article, we will provide a step-by-step guide to building a robot.
Why Build a Robot?
Building a robot has many benefits. It allows you to explore new concepts and technologies, develop problem-solving skills, and gain an understanding of how robots work. It can also help you learn about programming and electrical engineering, as well as provide you with a sense of accomplishment and pride in your work.

Overview of the Steps Needed to Build a Robot
Building a robot involves five main steps: identifying the appropriate components for building a robot, assembling the necessary parts and materials, programming the robot’s operating system, creating an external control system for the robot, and integrating sensors and electronics into the robot.
Step 1: Identifying the Appropriate Components for Building a Robot
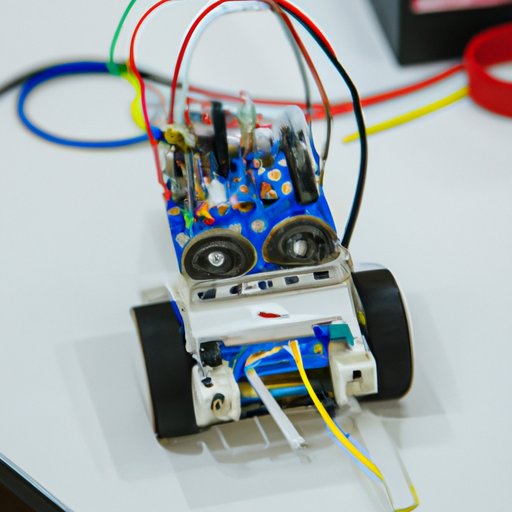
The first step in building a robot is to identify the components needed to build it. These components might include motors, microcontrollers, batteries, actuators, and other electronic components. Depending on the type of robot you are building, some components may be optional while others may be essential.
Once you have identified the components, you need to find the right ones for your application. You will want to consider factors such as size, power requirements, cost, and availability. You should also research the components to make sure they are compatible with each other and your robot’s design. Additionally, you will need to purchase tools and materials such as soldering irons, wires, and screws.

Step 2: Assembling the Necessary Parts and Materials
The next step is to assemble all the components and materials needed for the robot. This involves connecting the components together, securing the connections, and testing the assembly. Depending on the complexity of the robot, this process can take anywhere from a few hours to several days.
It is important to remember that even small mistakes can lead to major problems down the line. Therefore, it is important to take your time and double-check your work. If possible, enlist the help of someone who is experienced in robotics to ensure your robot is built correctly.
Step 3: Programming the Robot’s Operating System
Once the components and materials have been assembled, it is time to program the robot’s operating system. This involves writing code to control the robot’s movements, sensors, and other functions. Depending on the complexity of the robot, this process can take anywhere from a few hours to several days.
When programming the robot, you will need to consider factors such as speed, accuracy, and reliability. Additionally, you will need to debug the code to ensure that it is working correctly. To do this, you will need to test the code and make adjustments as necessary.
Step 4: Creating an External Control System for the Robot
Once the robot’s operating system has been programmed, it is time to create an external control system for the robot. This involves interfacing with the robot and setting up the control system. The control system should allow you to remotely control the robot and monitor its performance.
In order to create the control system, you will need to purchase or build a controller and set up the necessary software. Additionally, you will need to test the control system to make sure it works correctly. Once the control system is set up, you can begin to operate the robot.

Step 5: Integrating Sensors and Electronics into the Robot
The final step in building a robot is to integrate sensors and electronics into the robot. This involves connecting the sensors to the robot and programming them so that they can detect and respond to their environment. Depending on the complexity of the robot, this process can take anywhere from a few hours to several days.
When integrating sensors and electronics into the robot, it is important to consider factors such as accuracy, sensitivity, and power consumption. Additionally, you will need to debug the sensors and electronics to make sure they are working correctly. Once the sensors and electronics are integrated, your robot is ready to go.
Conclusion
Building a robot is a challenging but rewarding project. By following the steps outlined in this article, you can build a robot that is capable of performing a variety of tasks. From identifying the components to integrating sensors and electronics, building a robot requires patience and attention to detail. With the right tools and materials, anyone can build a robot.
To summarize, building a robot involves five main steps: identifying the appropriate components for building a robot, assembling the necessary parts and materials, programming the robot’s operating system, creating an external control system for the robot, and integrating sensors and electronics into the robot. With dedication and perseverance, you can build a robot that is capable of performing a variety of tasks.
(Note: Is this article not meeting your expectations? Do you have knowledge or insights to share? Unlock new opportunities and expand your reach by joining our authors team. Click Registration to join us and share your expertise with our readers.)